Version 1.0
Created: 24 May 2024
Updated: 24 May 2024
How Do I Delete/Deactivate a Resigned User or Change to a New User?
Differences between delete, deactivate and change user
| Delete | Deactivate | Change | |
|---|---|---|---|
| User can access the system. | No | No | Yes |
| Data will remain in the system. | No | Yes | Yes |
| The users’ jobs can be traced in the schedule and metrics overview pages. | No | Yes | Yes |
Navigate to the section by clicking it.
Deactivate a Resigned User
What happens when a user is deactivated?
- The user can’t login to the system.
- The user’s data will still stay in the system (e.g. Assigned to/ Creator column, job schedule, metrics, etc.)
- A deactivated user account is not counted as one.
How to deactivate a user?
-
Go to desktop site navigation bar > HR Suite > User List.
Open User List Page Here: https://system.caction.com/usermanage/userlist
*Note: Only certain admins can deactivate users.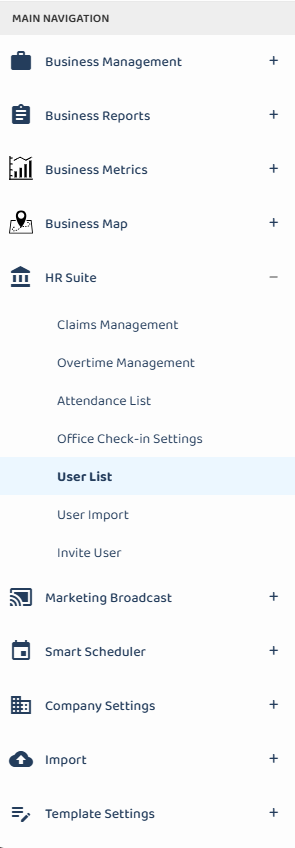
-
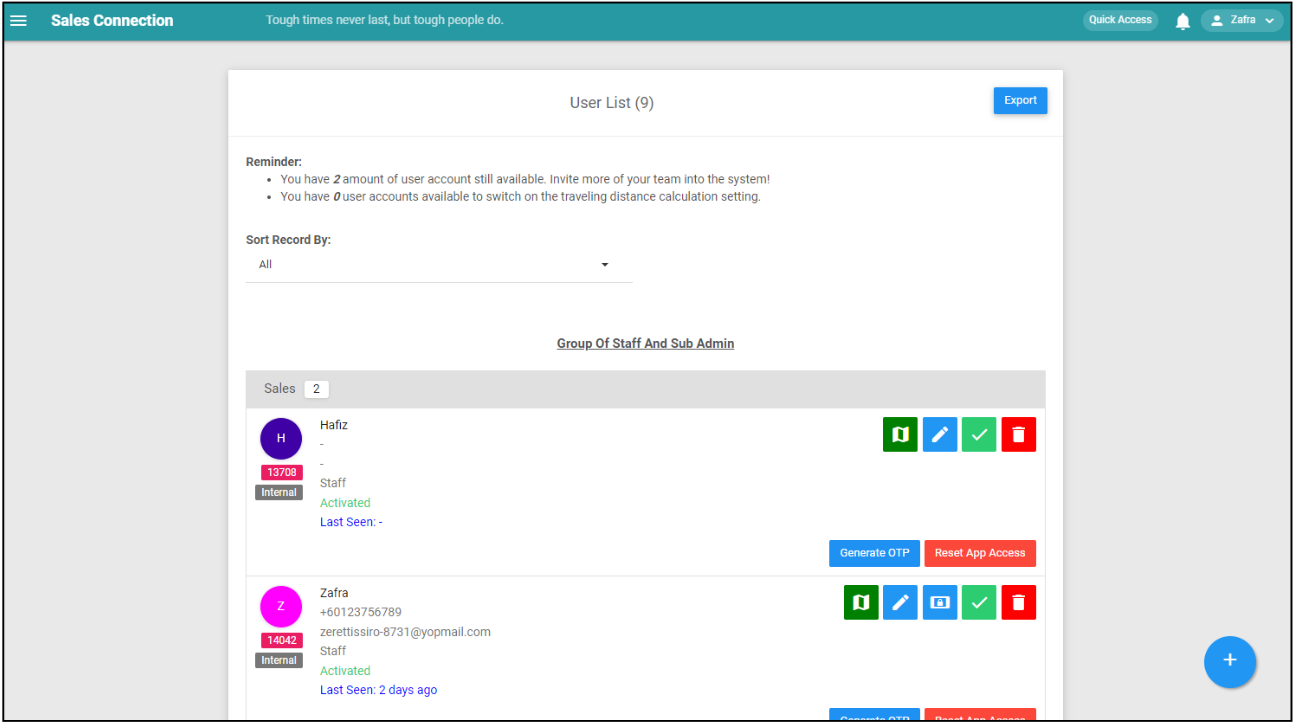
Navigate to the user you want to deactivate.
-
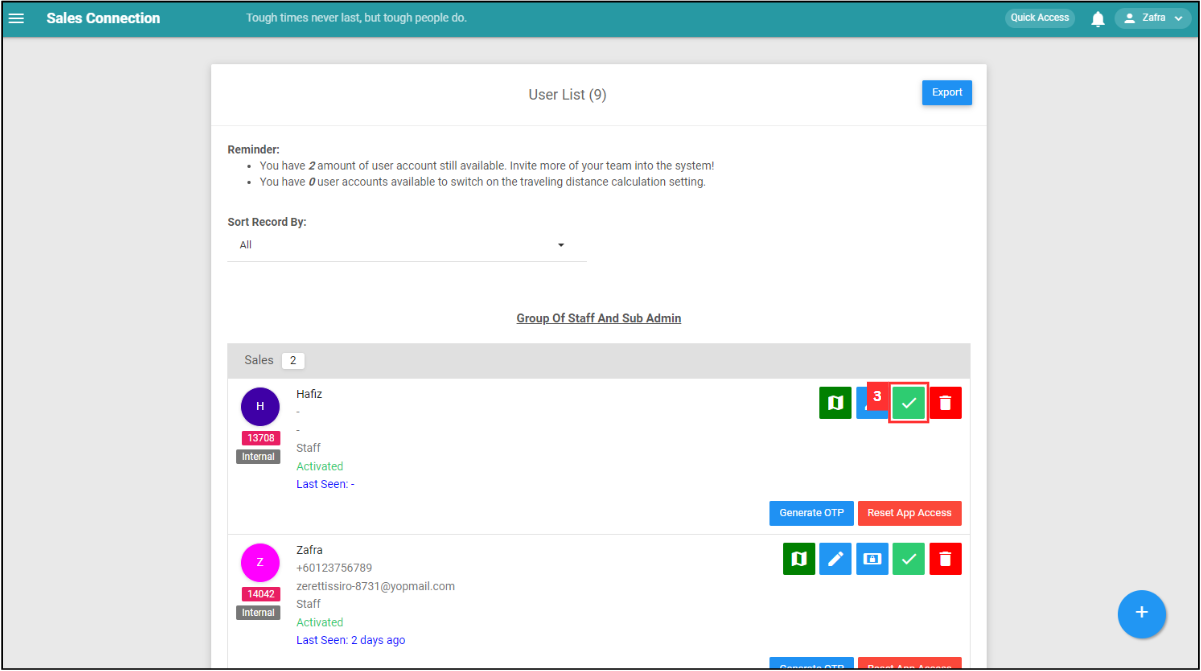
Click on the “Green Tick” icon to deactivate the user.
-
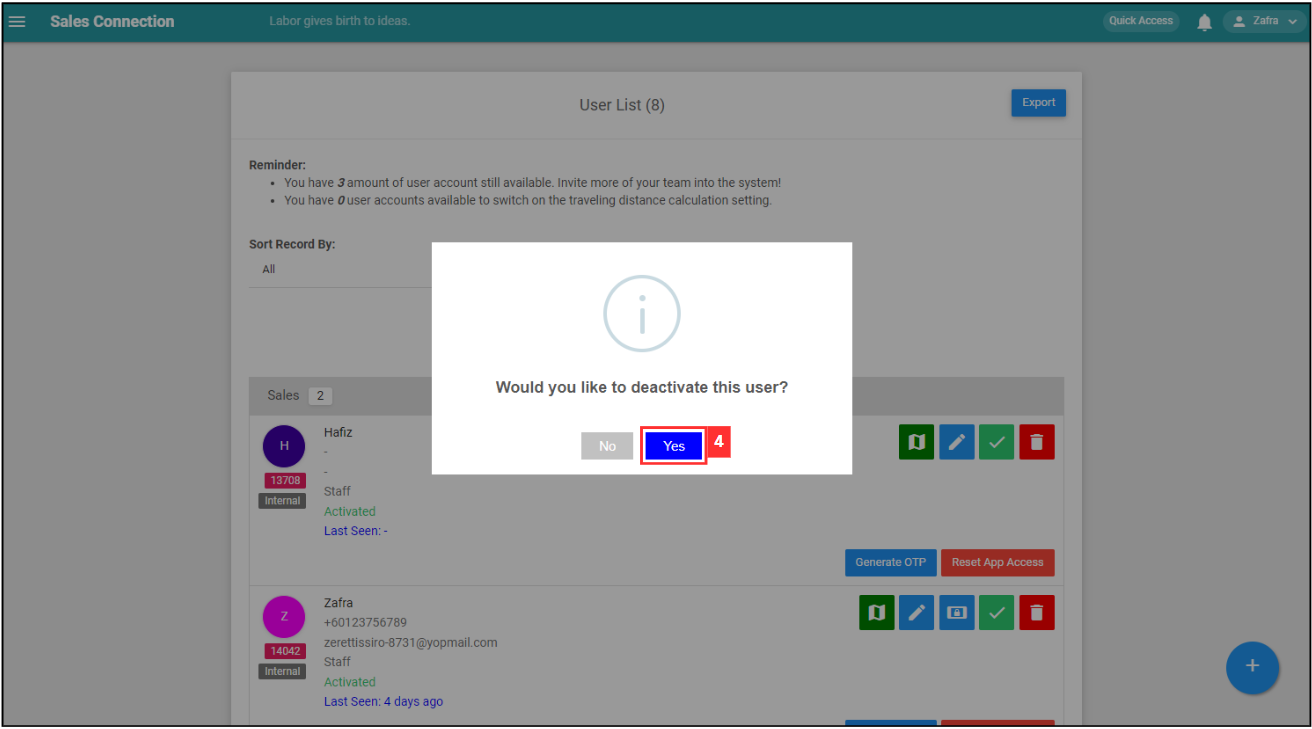
Click “Yes” to confirm your deactivation.
-
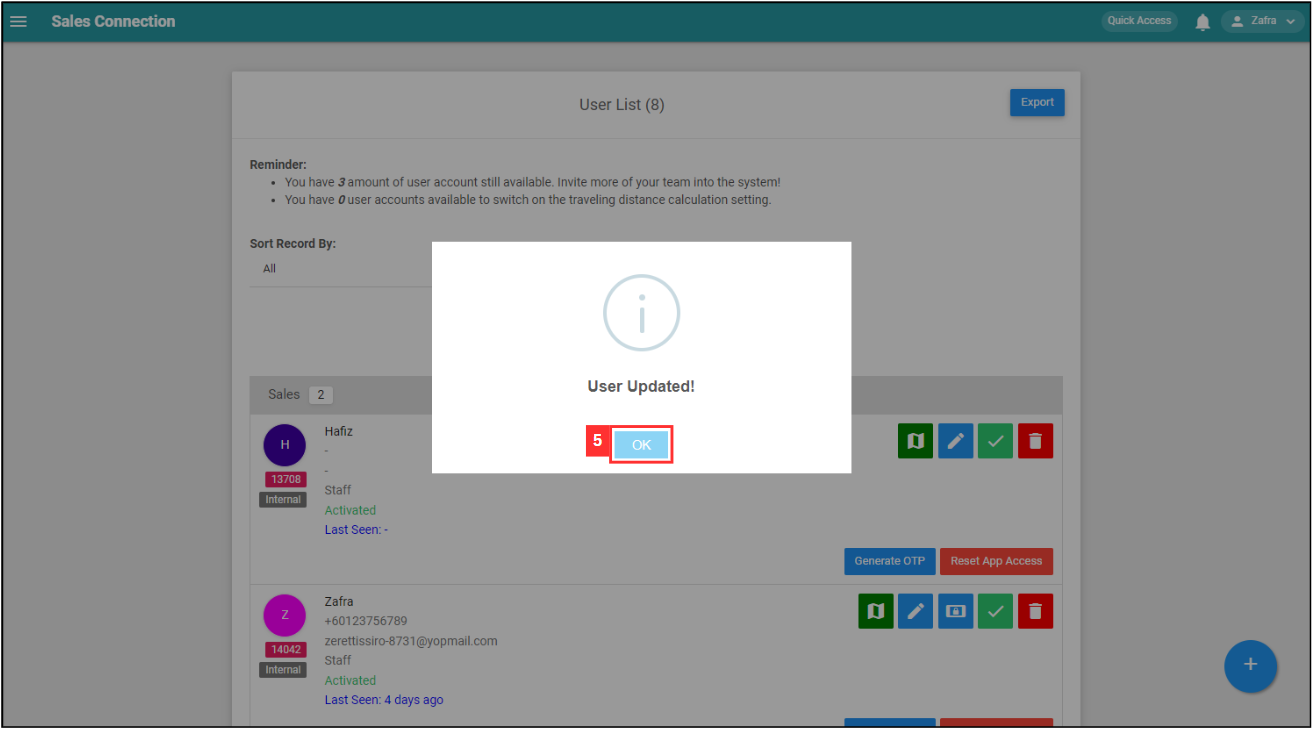
Click “OK” and the user has been deactivated successfully.
⚠ Delete a Resigned User
What happens when a user is deleted from the system?
- The user can’t login to the system.
- The user is removed from all the tasks they were assigned to or created.
- The users’ jobs won’t appear in the schedule and metrics overview pages.
*Note: All updates, comments, and check-ins/outs by the deleted user will stay in the system.
How to delete a user?
-
Go to desktop site navigation bar > HR Suite > User List.
Open User List Page Here: https://system.caction.com/usermanage/userlist
*Note: Only certain admins can delete users.
-
Navigate to the user you want to delete.

-
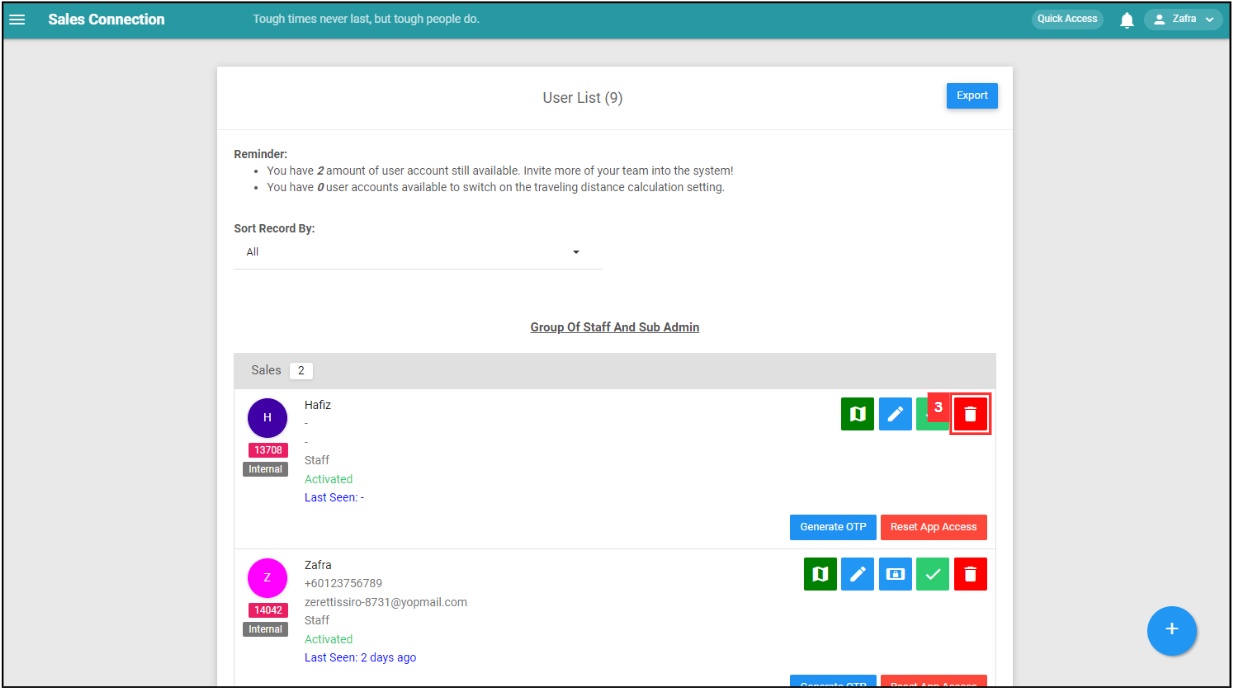
Click on the “Red Bin” icon to delete the user.
-
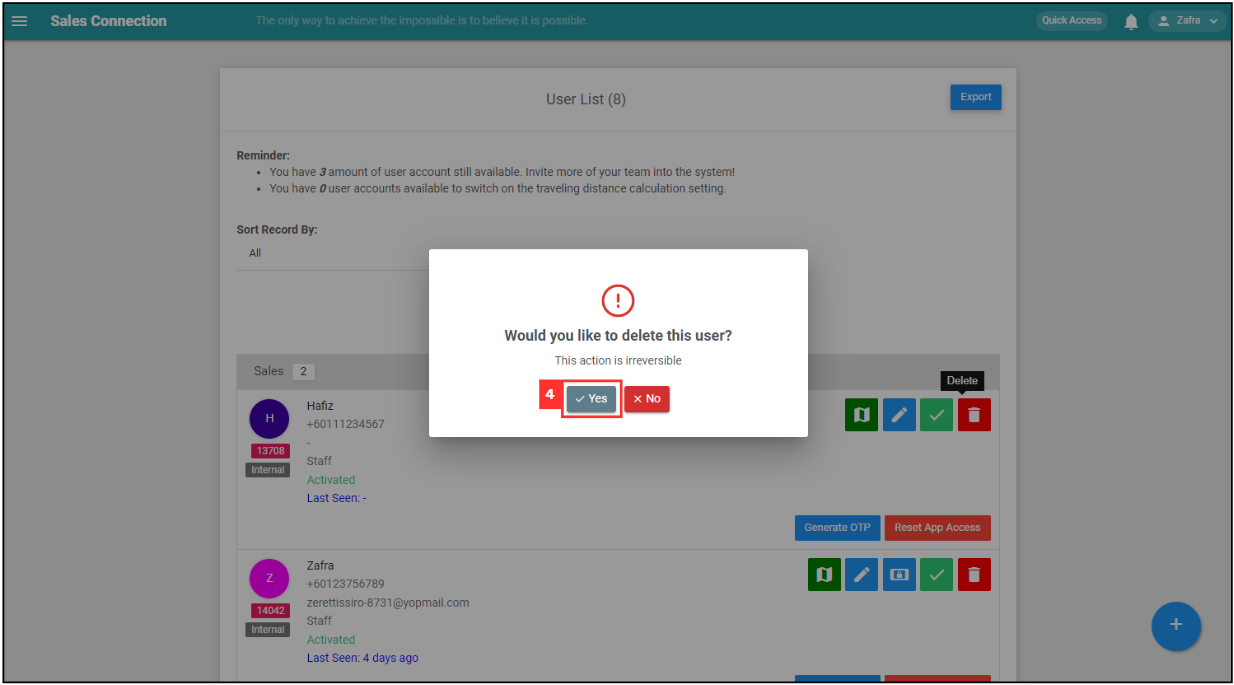
Click “Yes” to confirm your deletion.
-
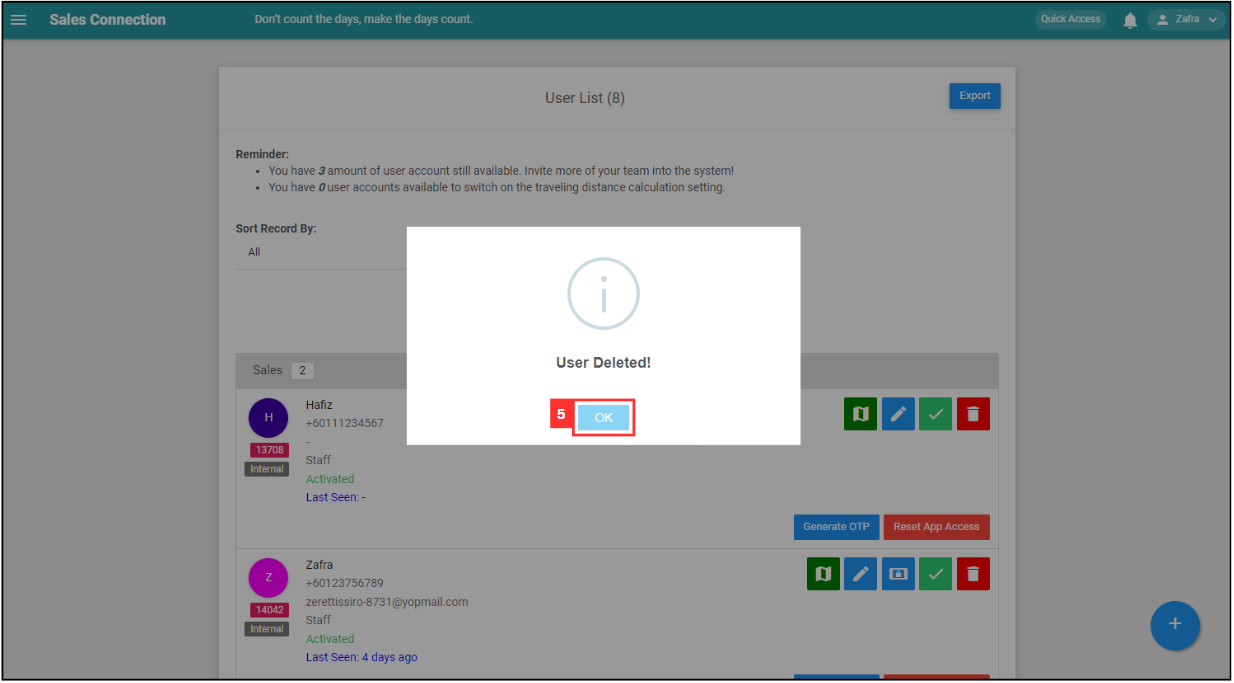
Click “OK” and the user has been deleted successfully.
⚠ Change to a New User
What happens if I replace a resigned user with a new user in the system?
- The resigned user will no longer have the system access.
- The new user will have all items previously assigned to or created by the resigned user.
- All historical data of the resigned user will be overwritten by the new user (e.g. Assigned to/ Creator columns, job schedule, metrics, etc.)
How to change to a new user?
-
Go to desktop site navigation bar > HR Suite > User List.
Open User List Page Here: https://system.caction.com/usermanage/userlist
*Note: Only certain admins can deactivate users.
-
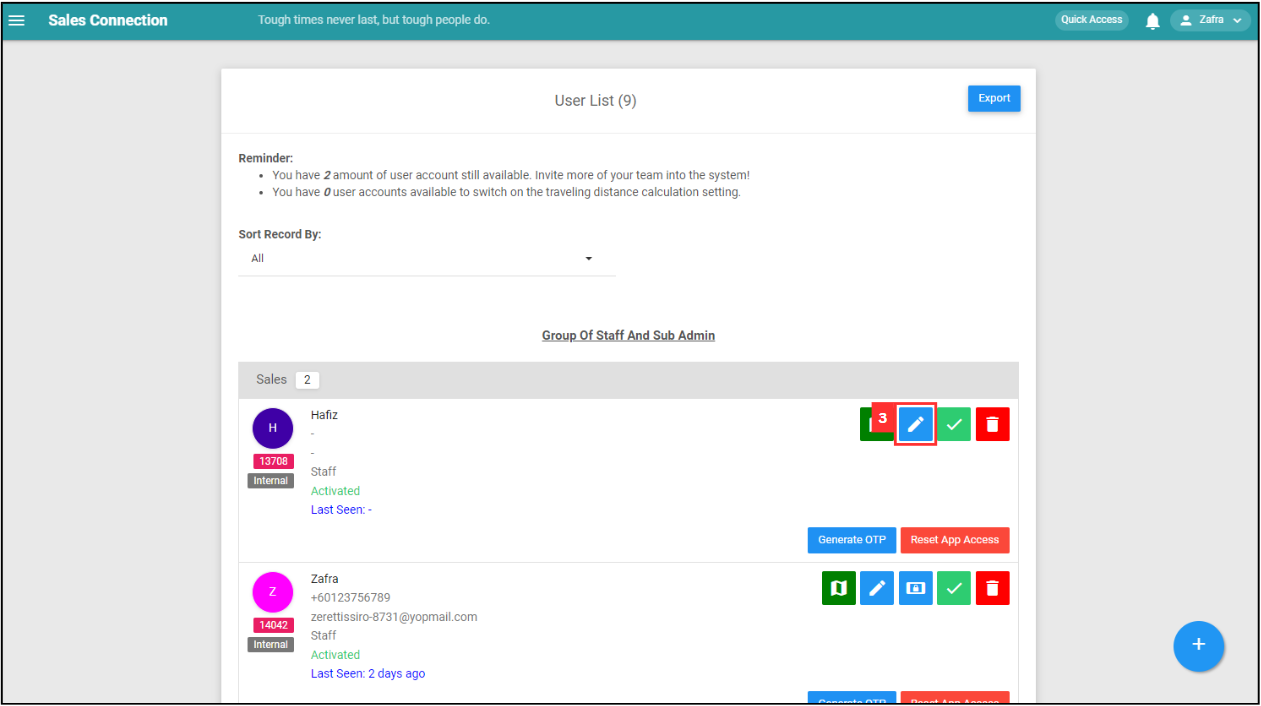
Navigate to the user you want to change the details to the new user.

-
Click on the “Blue Pencil” icon to change the user details.
-
Replace the original details with the new user’s information.
a. The details include:
- Name
- Telephone
- Email (optional if the user only uses a mobile device)
- User Group
- Account Type
- Staff Category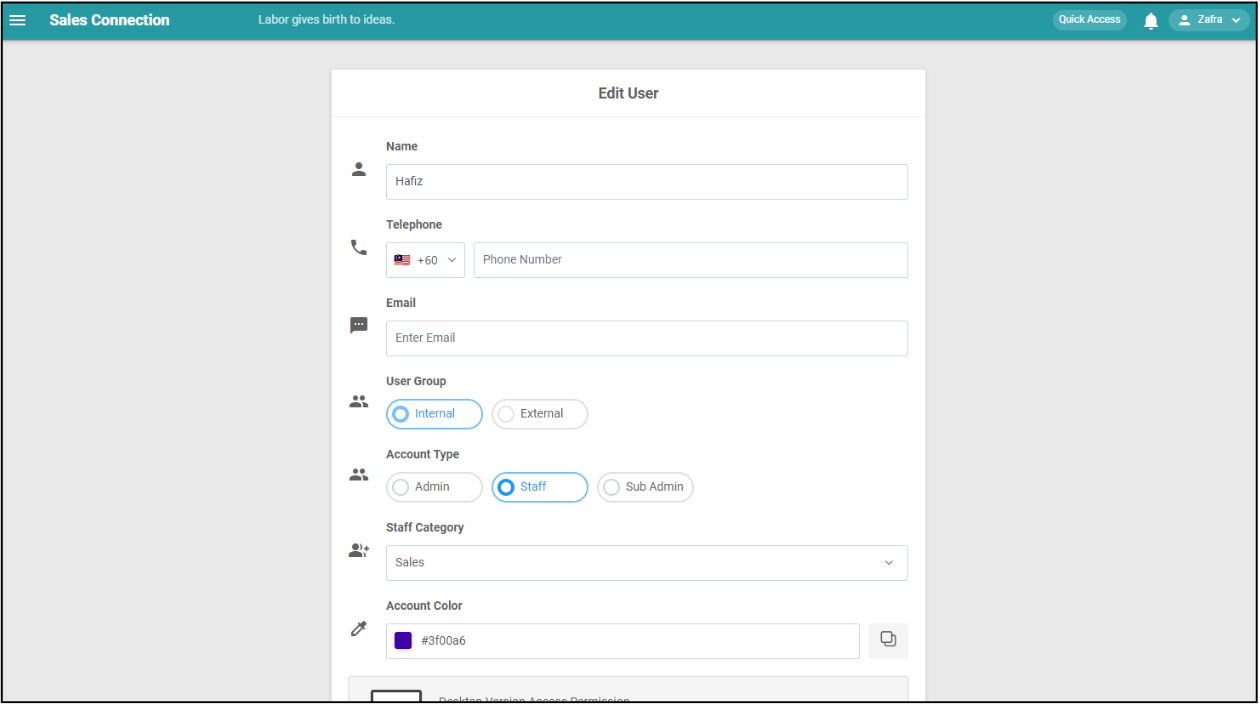
-
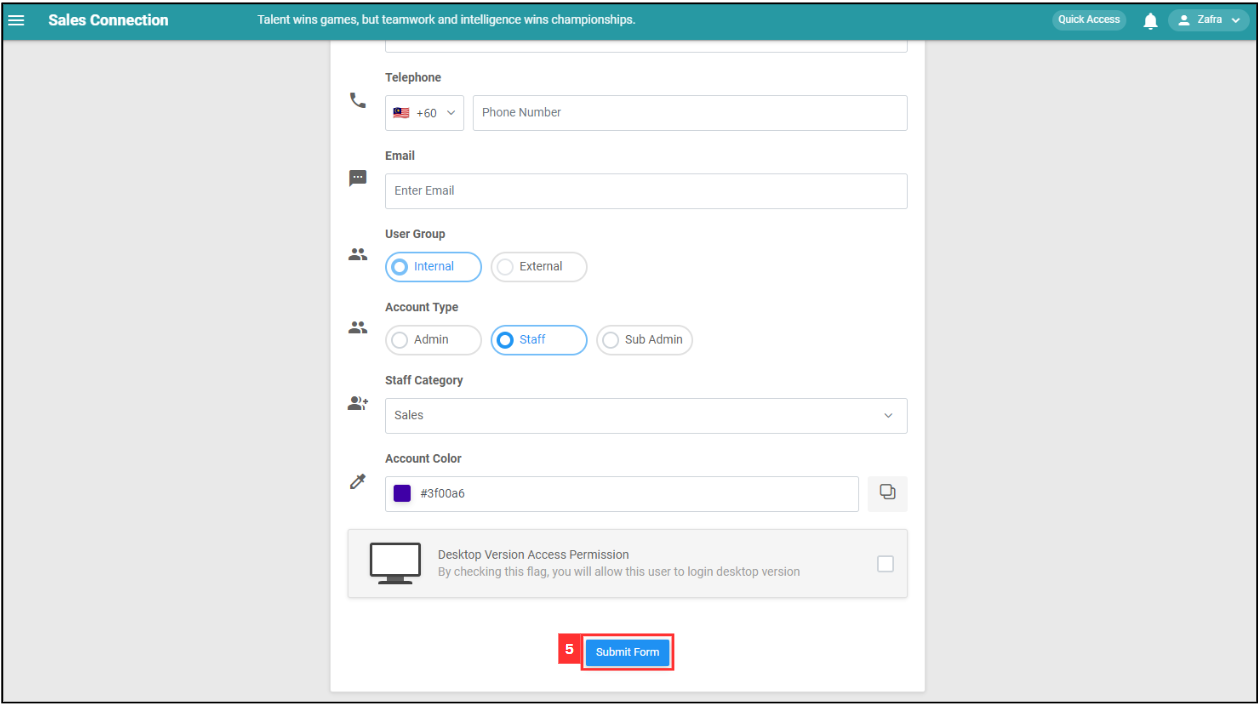
Click “Submit Form” and the user details has been changed successfully.
Related Articles