Version 1.0
Created: 16 July 2024
Updated: 16 July 2024
How to Create a Digital Form?
You and your team can start creating the digitalised form(s) in the system through many simple ways that cuts down on their time spent on manual hardcopies.
Navigate to the section by clicking it.
From Job
-
At the desktop site’s navigation bar, go to Business Management > Schedule > Job Schedule.
Create Digital Form Here: https://system.caction.com/activity/scheduler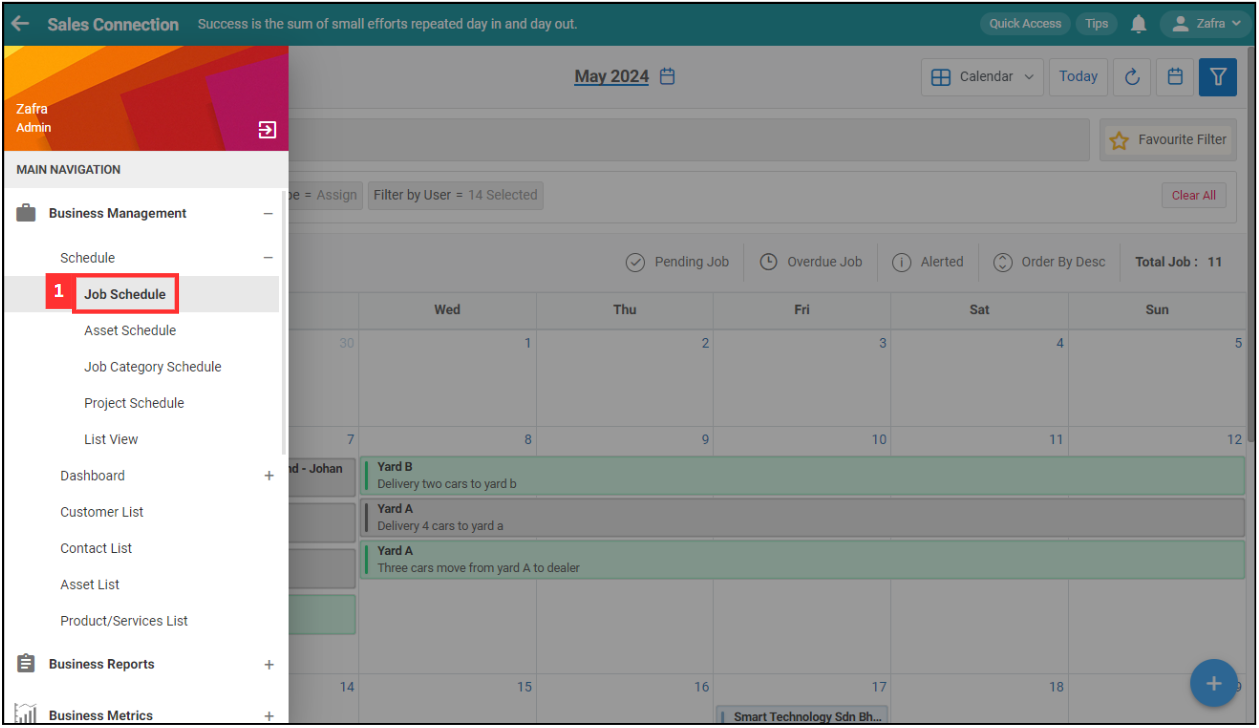
-
Click on the Job that you would like to create the Digital Form in.
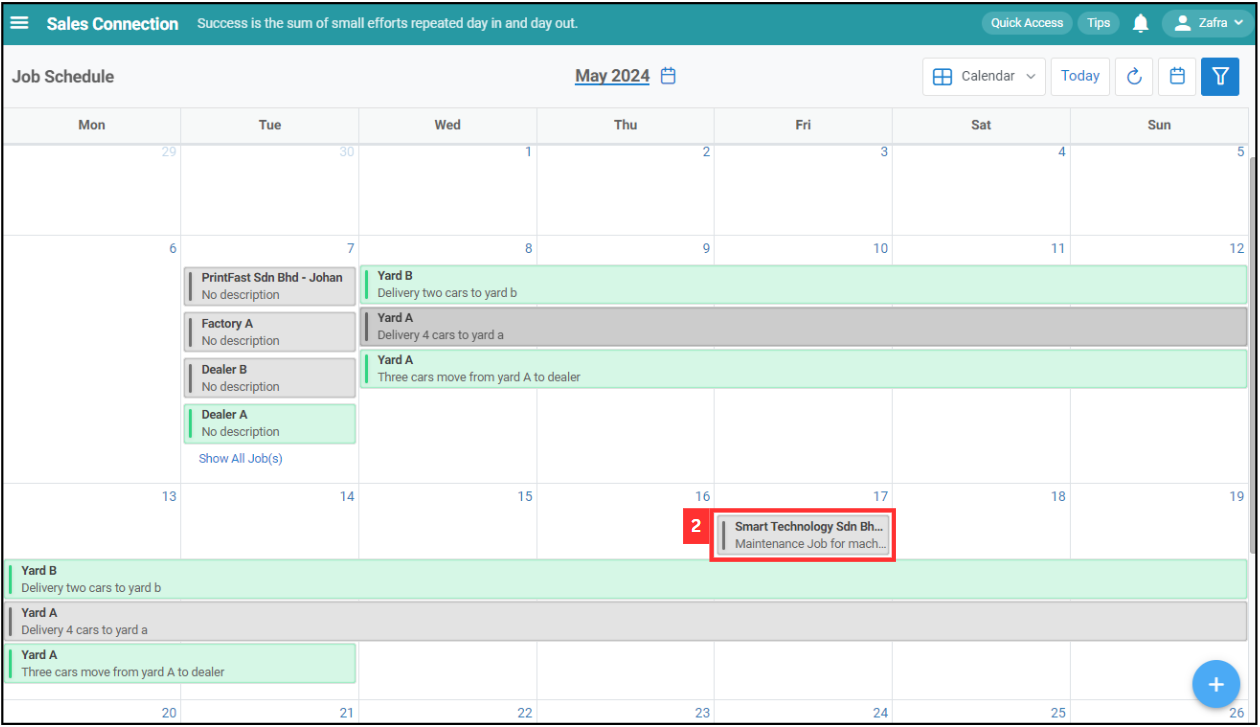
-
Click on the “Create Digital Form” icon.
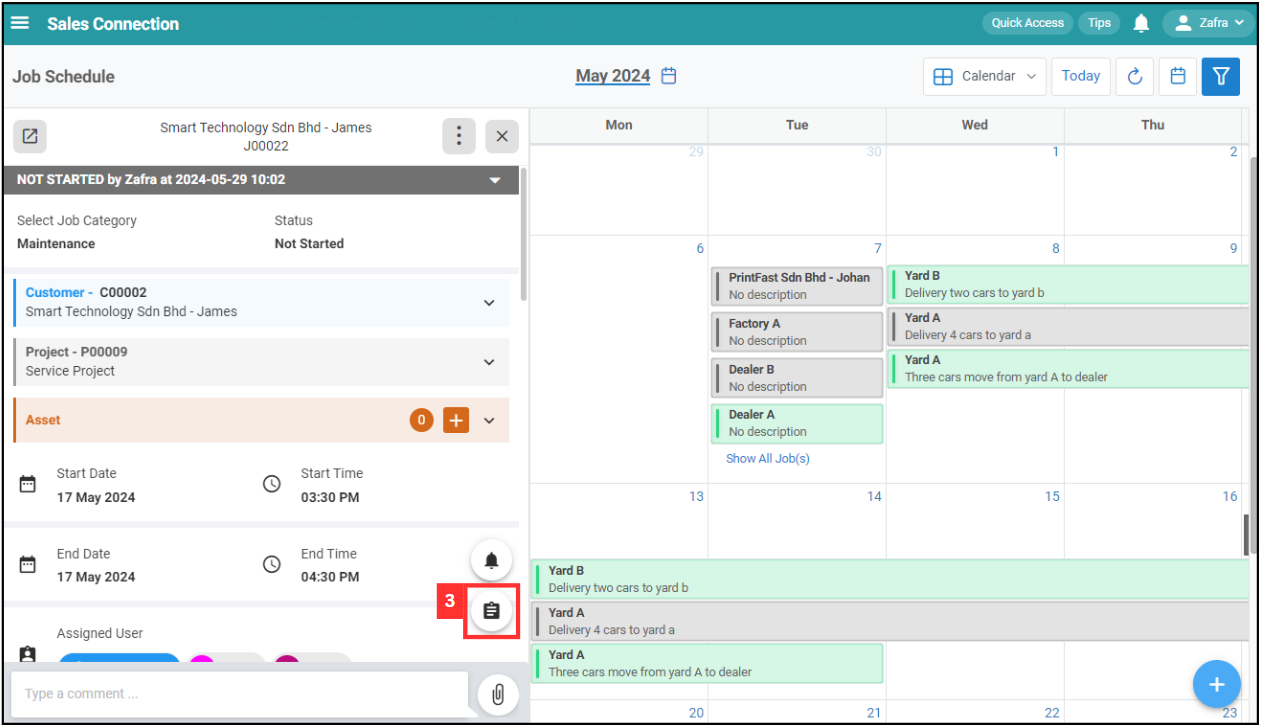
*Note: Digital Form Templates available are based on the access given by your admin. If you do not find your template, please request permission or help from your admin.
-
Select the type of digital form that you would like to create. For this example, we will select “Quotation”.
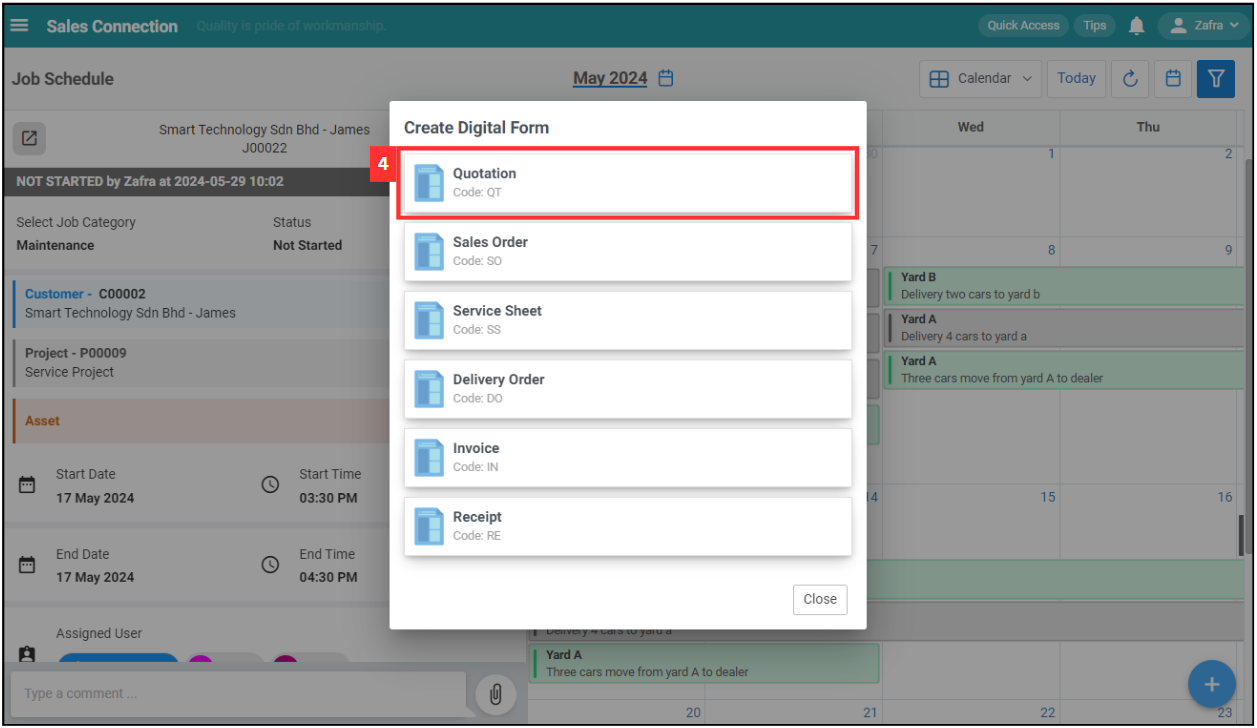
-
Fill out the details of the new quotation. Available fields may differ depending on your company’s system setup.
Field Name Description Category Classifies the type of quotation. Status Indicates the current status of the quotation. Customer Select the address of the customer or attach the customer. Project The project associated with this quotation. Start Date The date when the quotation is created. Assigned User The user responsible for this quotation. Reminder Set a reminder for follow-ups or important dates. Product/Services List The list of products or services included in the quotation. Description Additional details or description of the quotation. 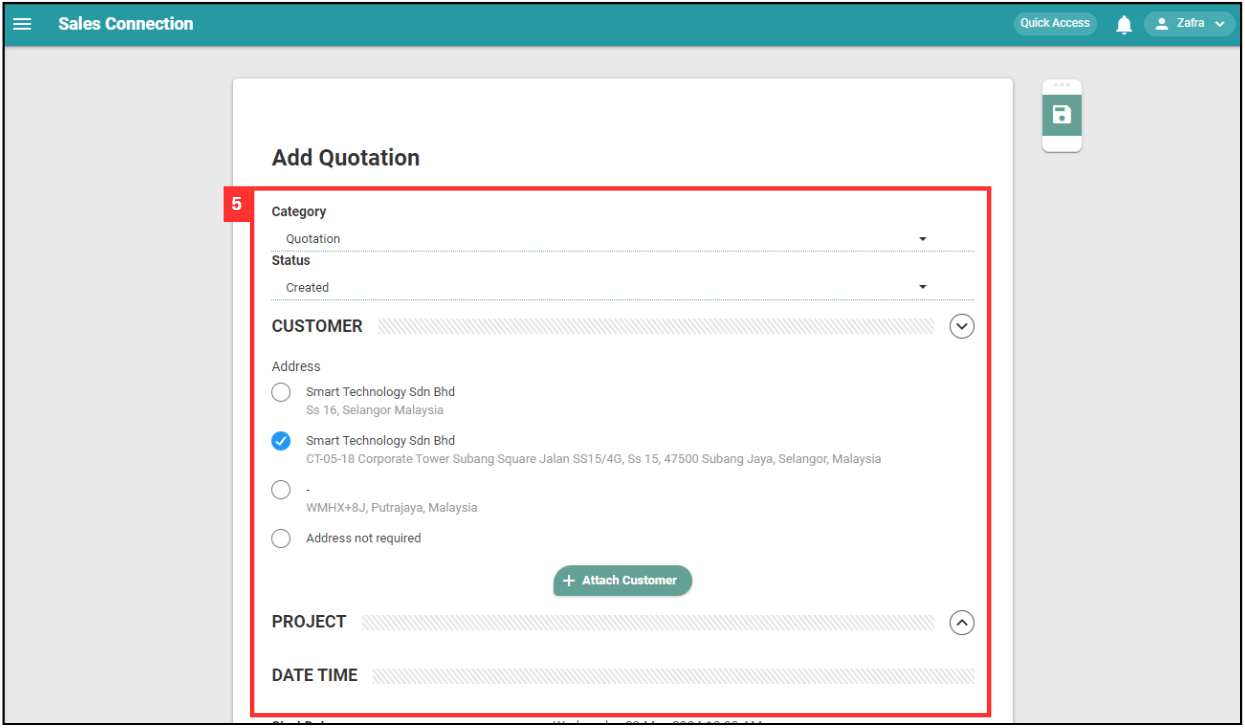
-
Click “+ Product/Service” if needed.
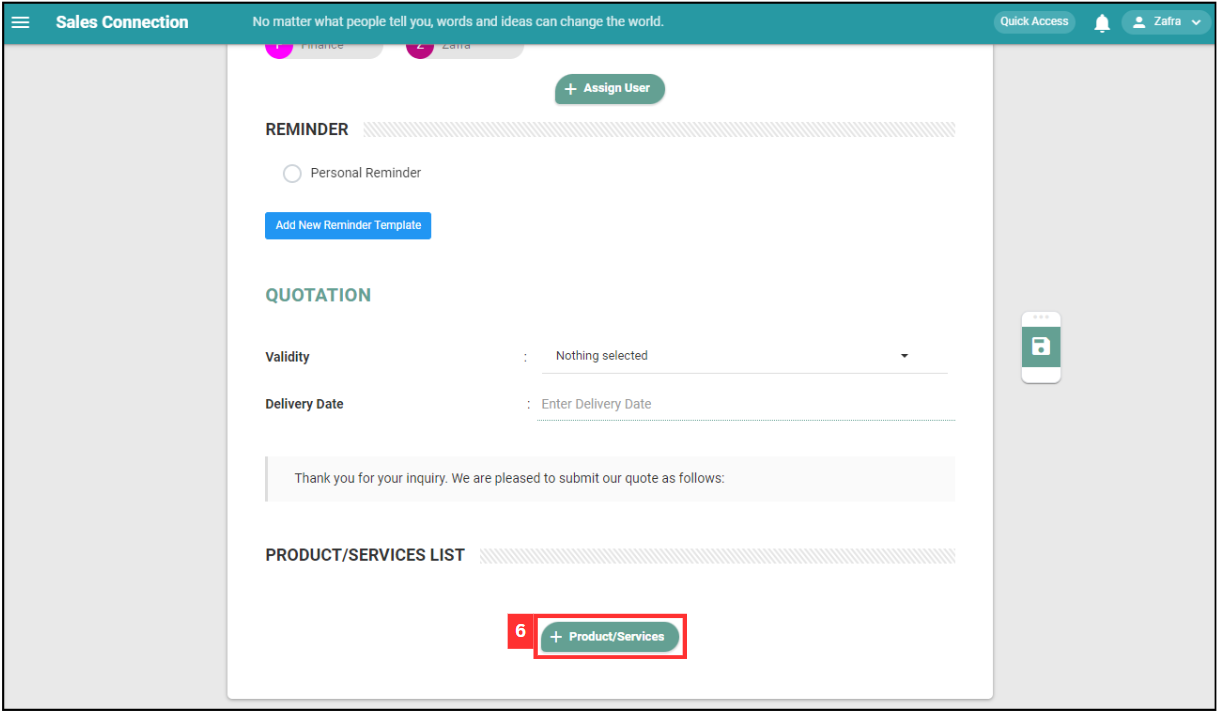
*Note: Product/Service section may not be available in your selected digital form.
-
Select the Product/Services that needed in this form.
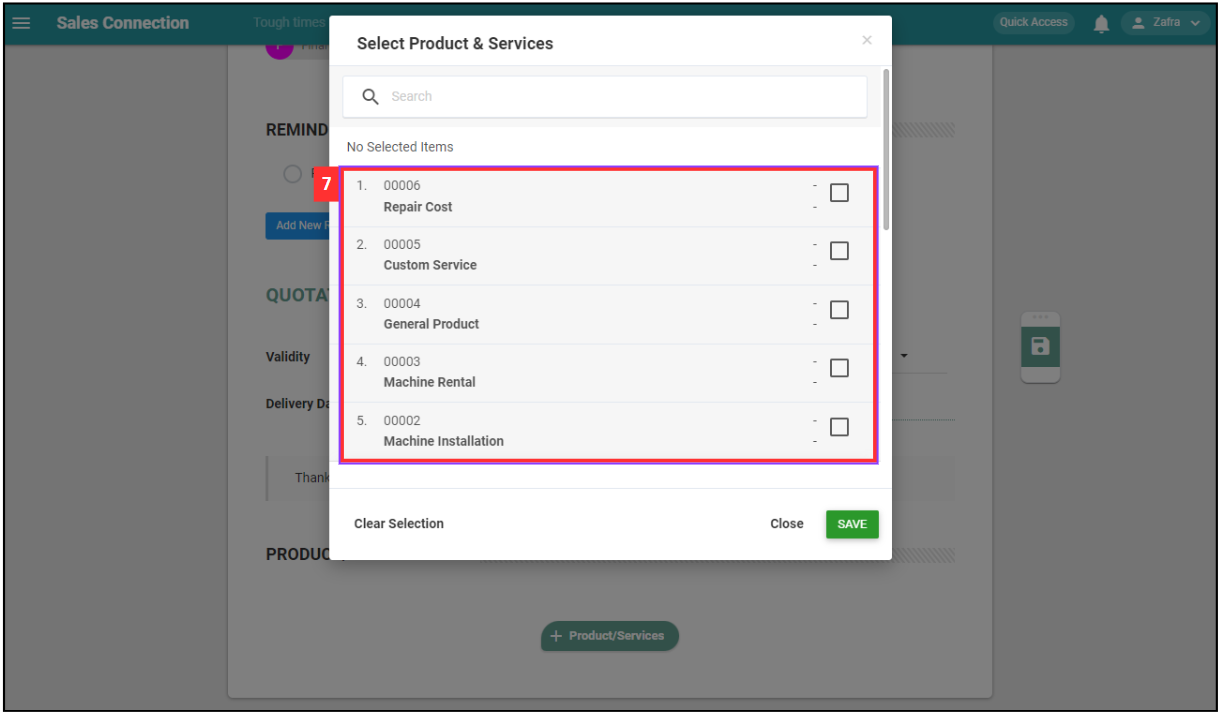
-
Click on the “SAVE” button.
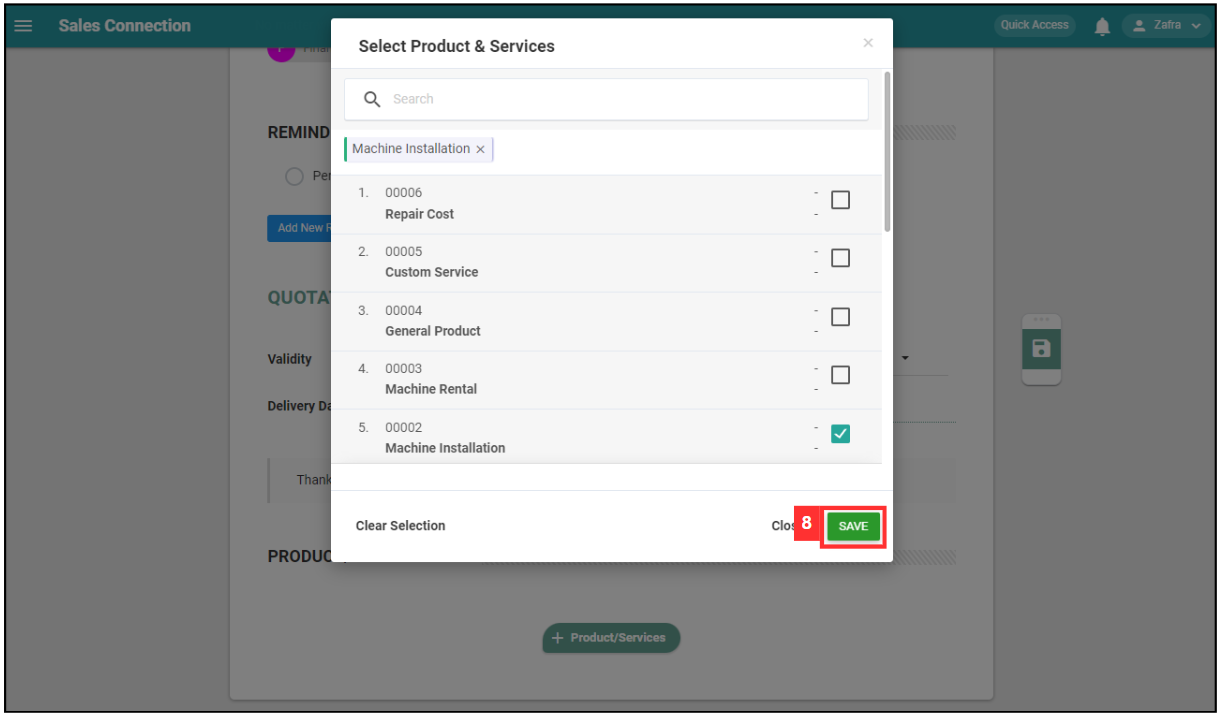
-
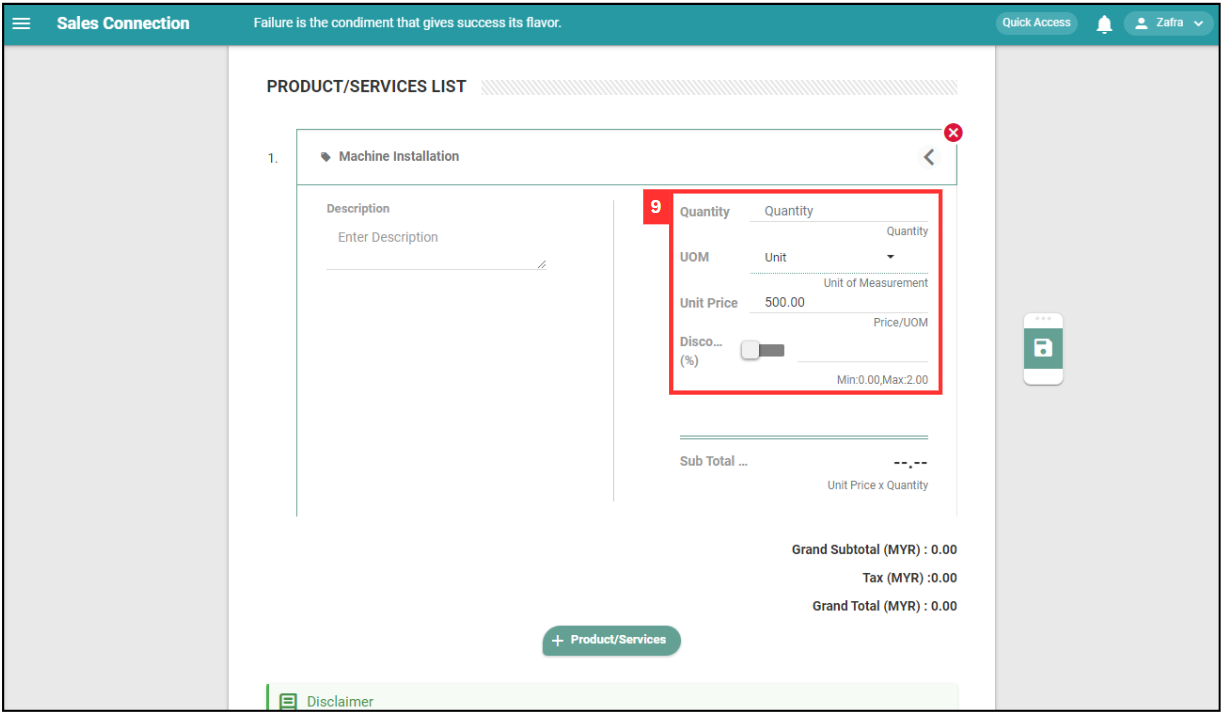
Enter the details of the product/services.
-
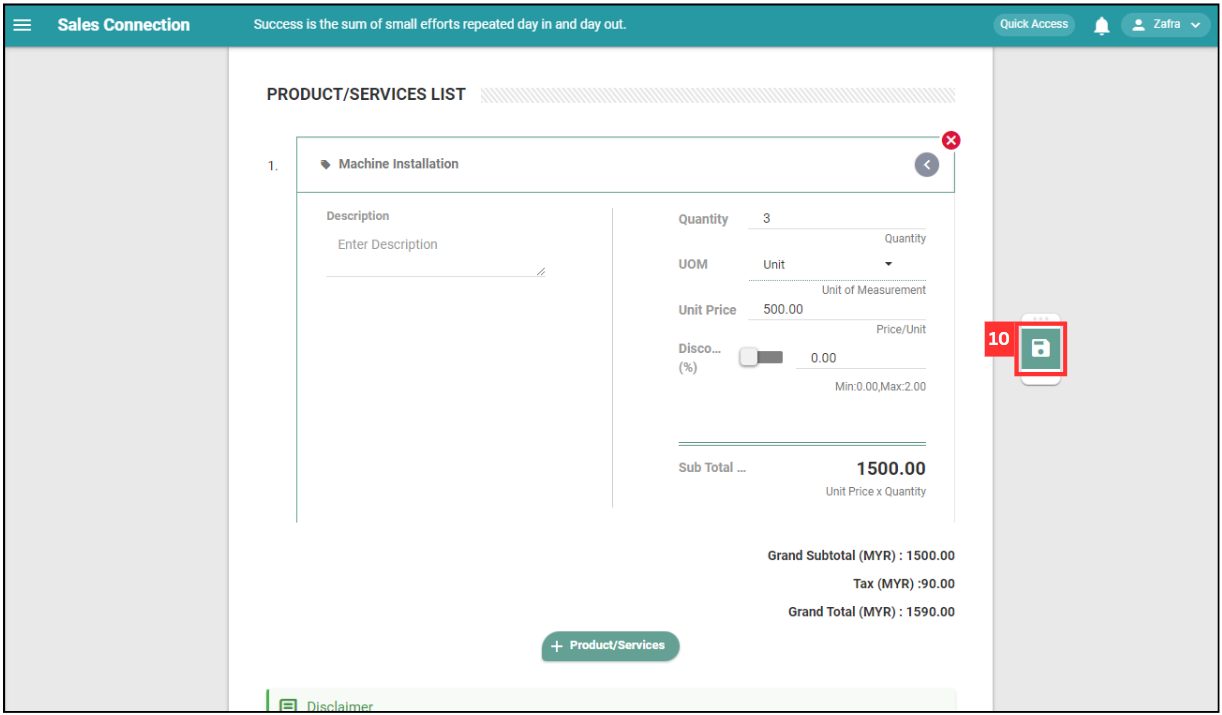
Click on the “Save” icon.
-
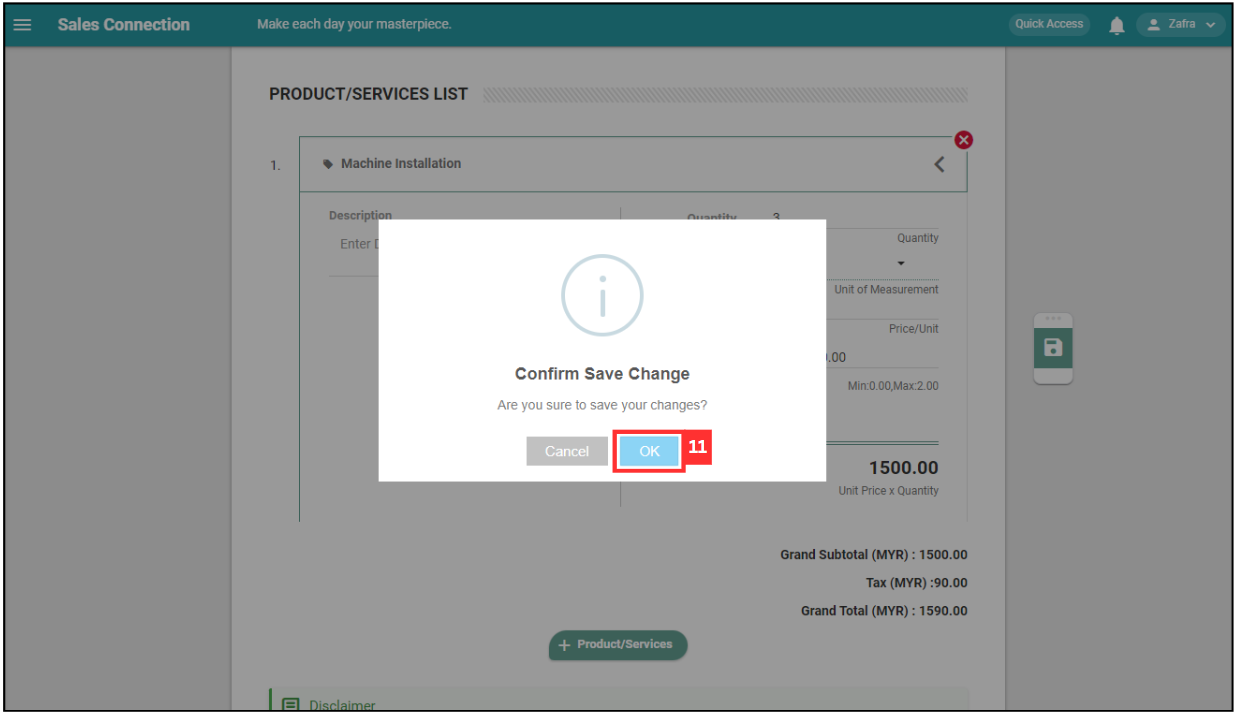
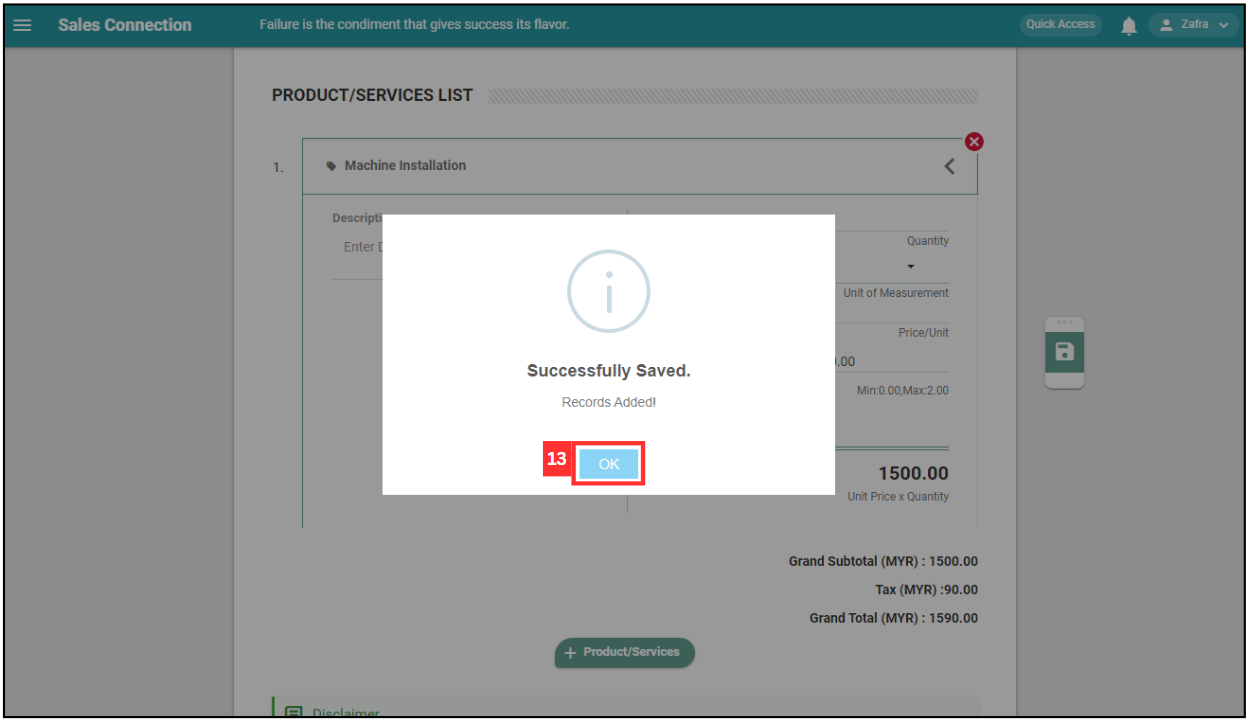
Click “OK” to confirm the save change.
-
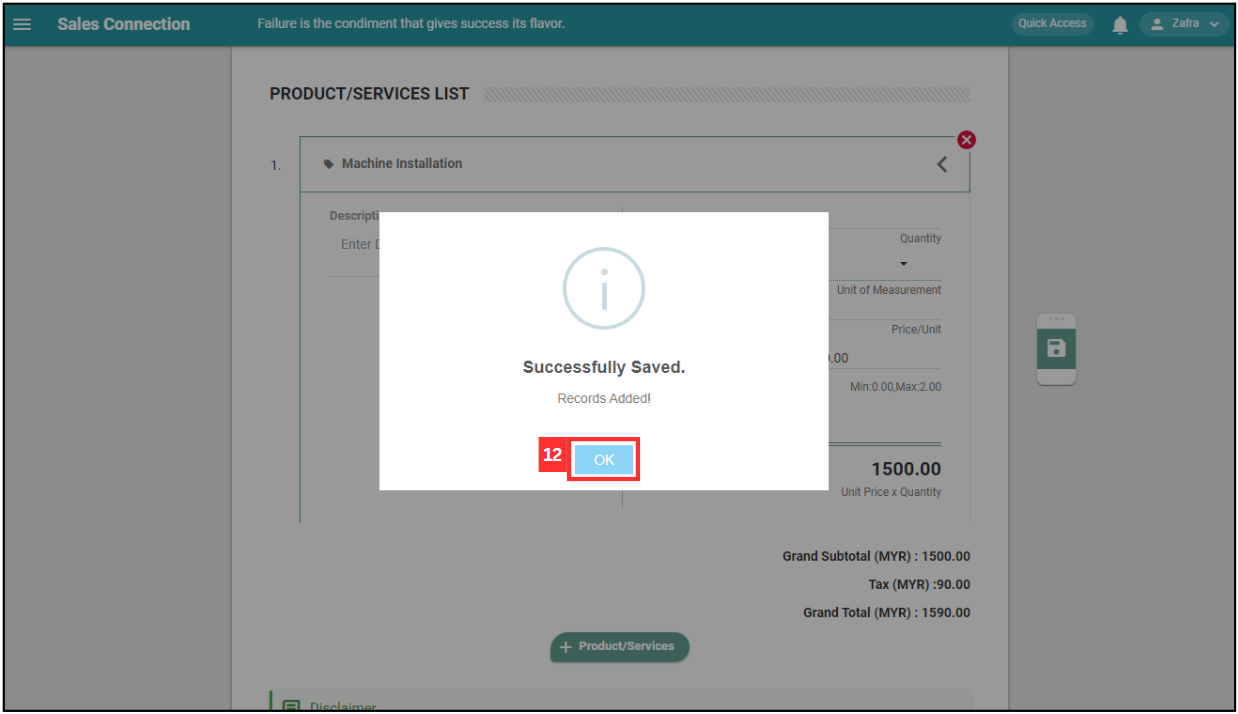
Your form is successfully saved when the “Successfully Saved” prompt appears.
From Project
-
At the desktop site’s navigation bar, go to Business Reports > Project Report.
Create Digital Form Here: https://system.caction.com/reports/deal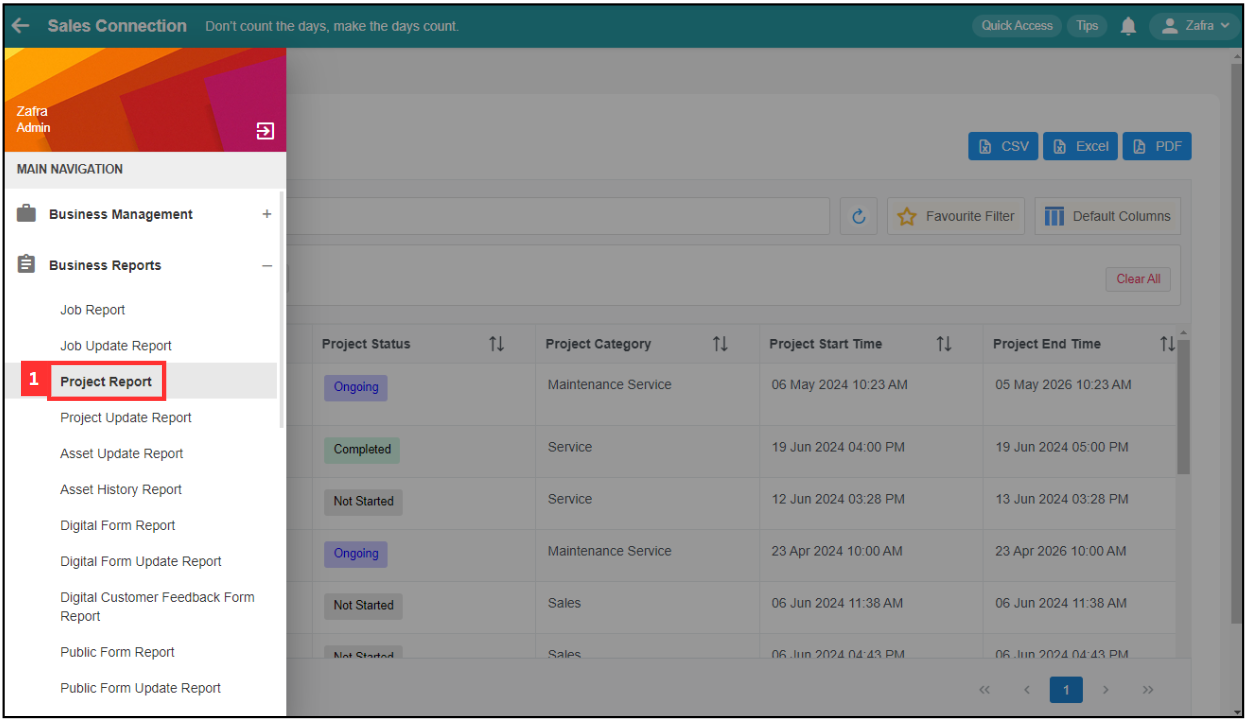
-
Click on the expand button beside the project that you would like to create the digital form in.
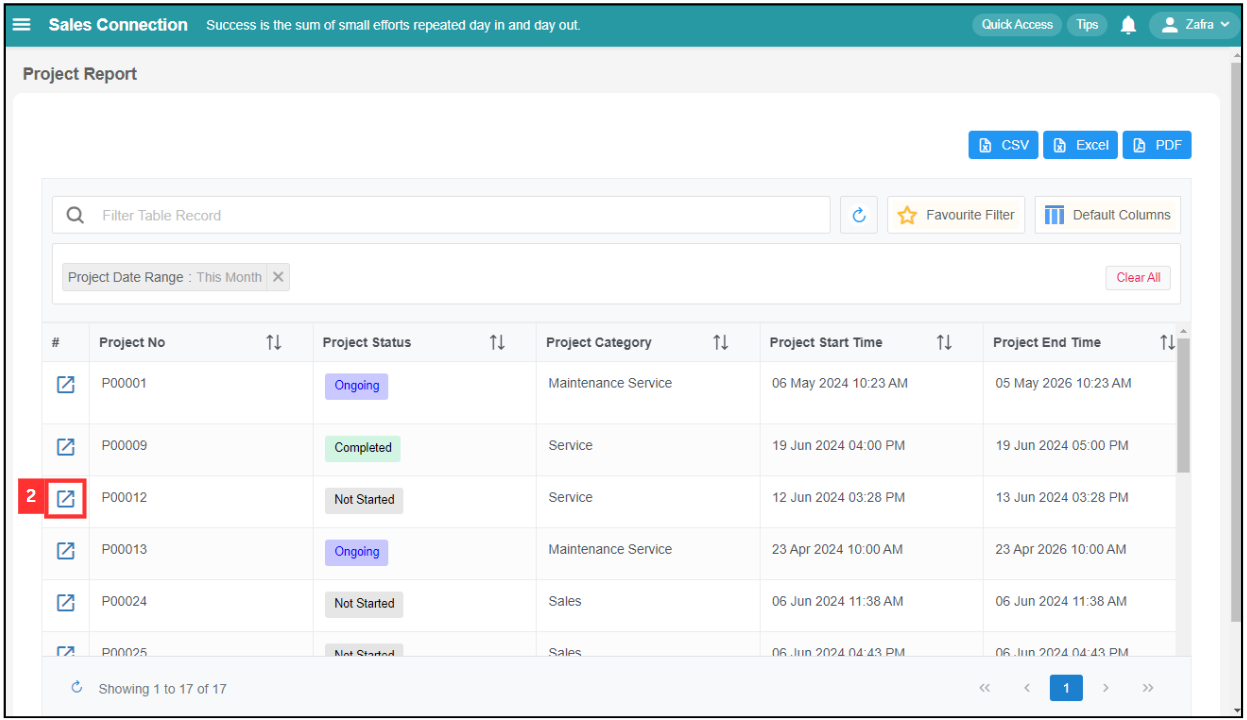
-
Click on the “+” button.
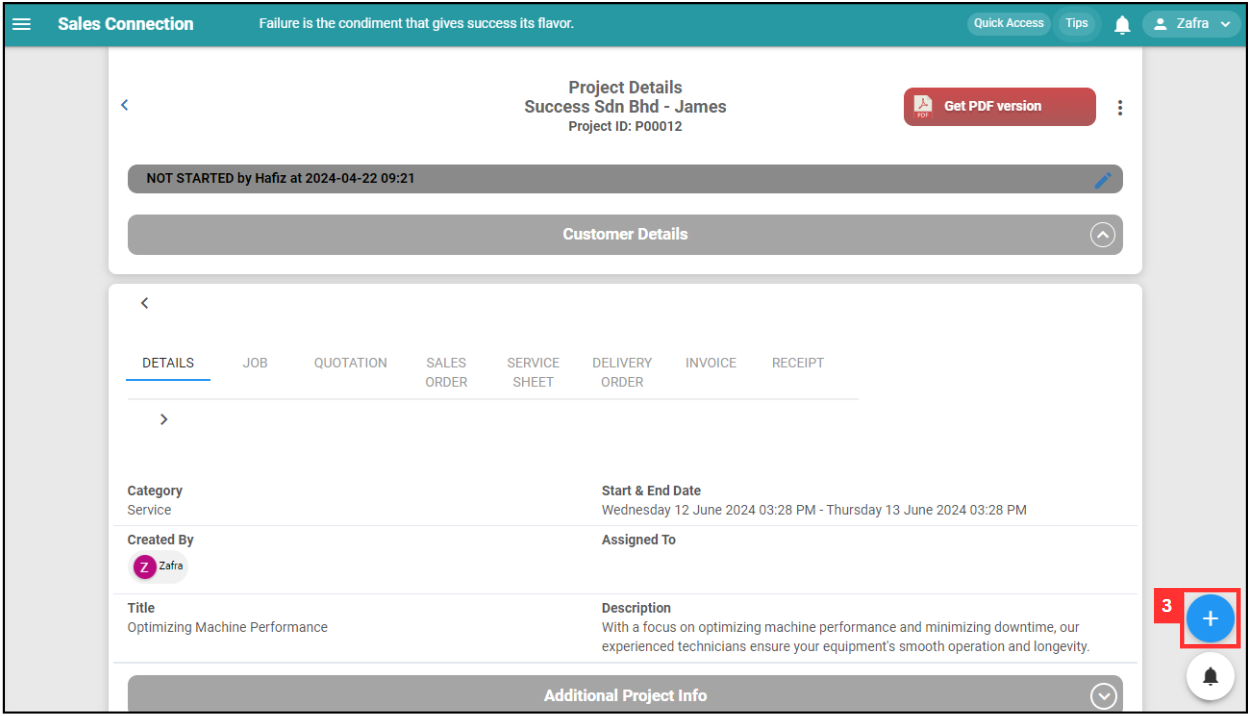
-
Click on the “Create Digital Form” icon.
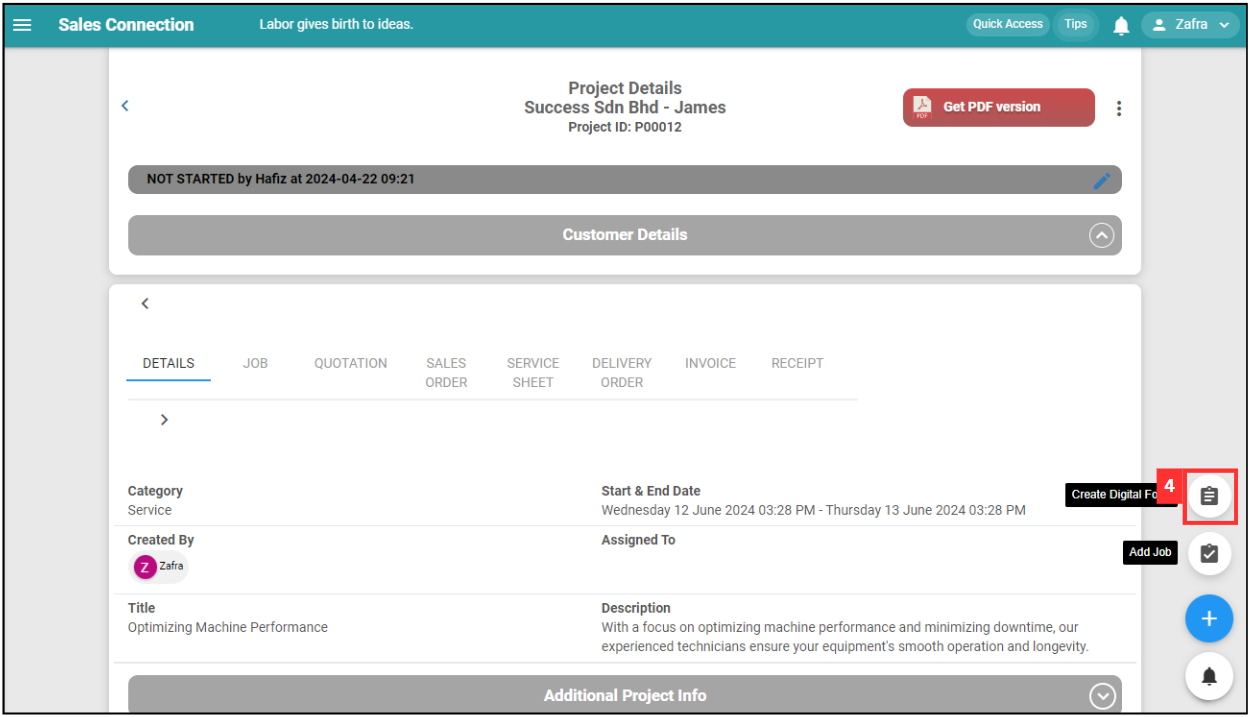
*Note: Digital Form Templates available are based on the access given by your admin. If you do not find your template, please request permission or help from your admin.
-
Select the type of digital form that you would like to create. For this example, we will select “Quotation”.
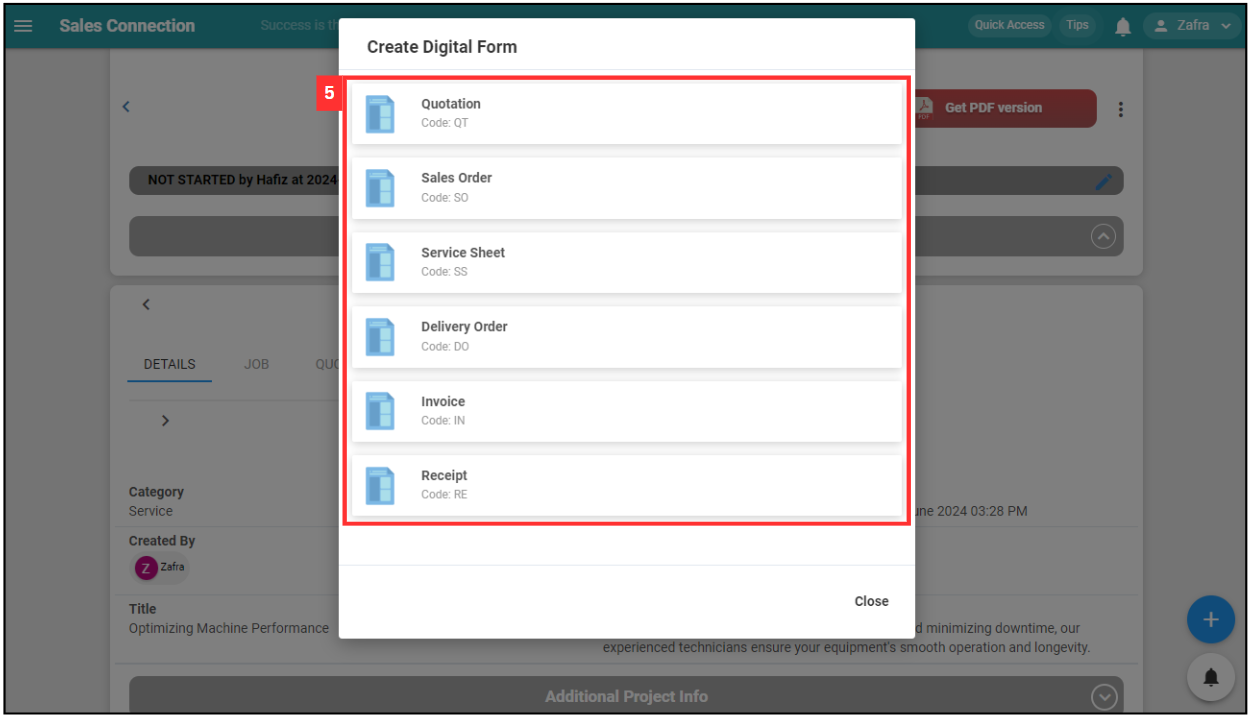
-
Fill out the details of the new quotation. Available fields may differ depending on your company’s system setup.
Field Name Description Category Classifies the type of quotation. Status Indicates the current status of the quotation. Customer Select the address of the customer or attach the customer. Project The project associated with this quotation. Start Date The date when the quotation is created. Assigned User The user responsible for this quotation. Reminder Set a reminder for follow-ups or important dates. Product/Services List The list of products or services included in the quotation. Description Additional details or description of the quotation. 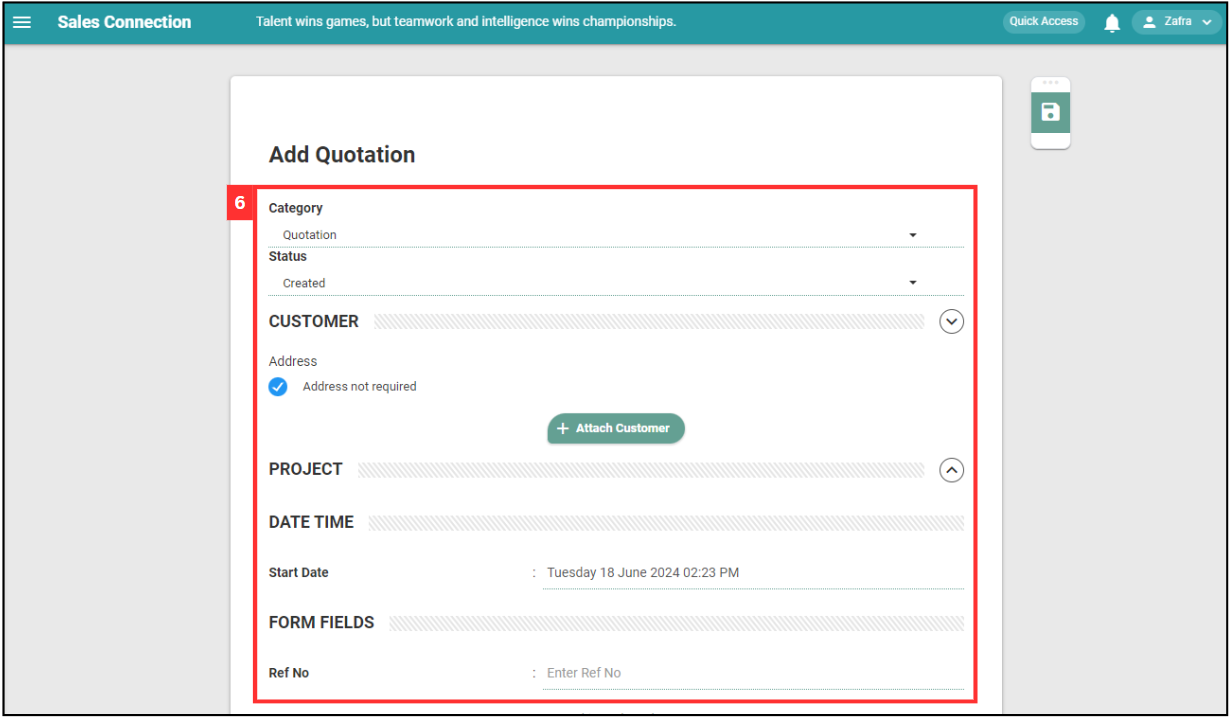
-
Click “+ Product/Service” if needed.
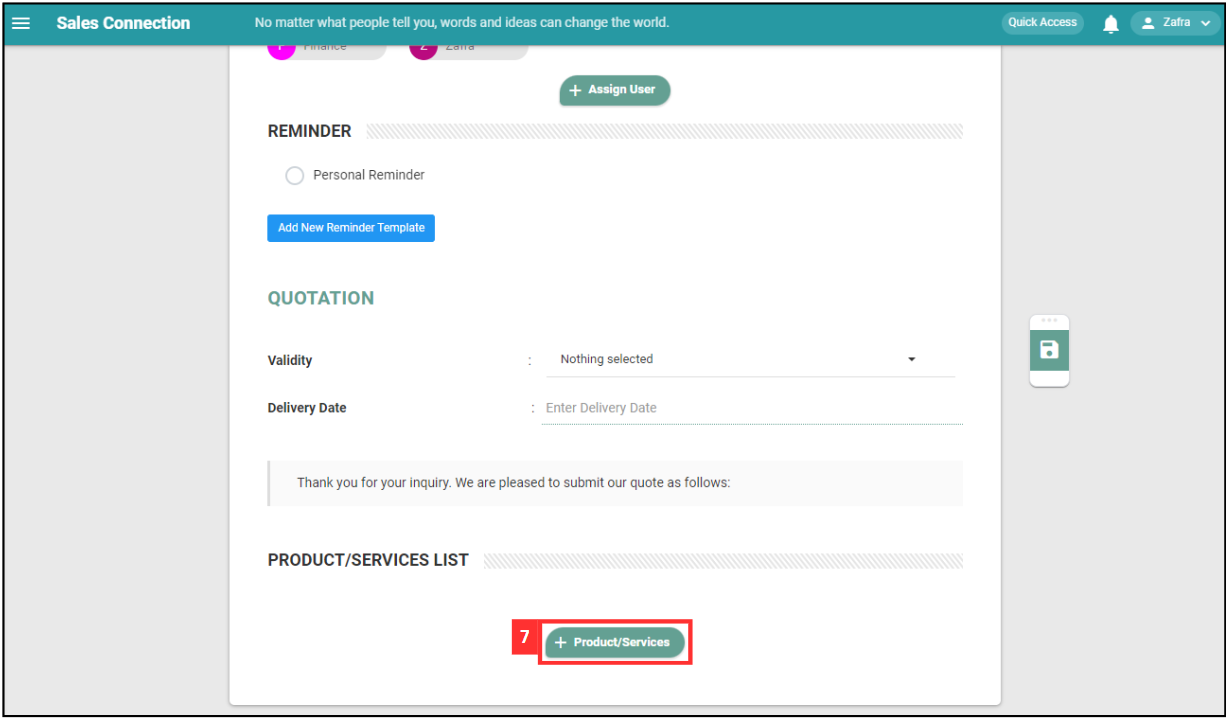
*Note: Product/Service section may not be available in your selected digital form.
-
Select the Product/Services that needed in this form.
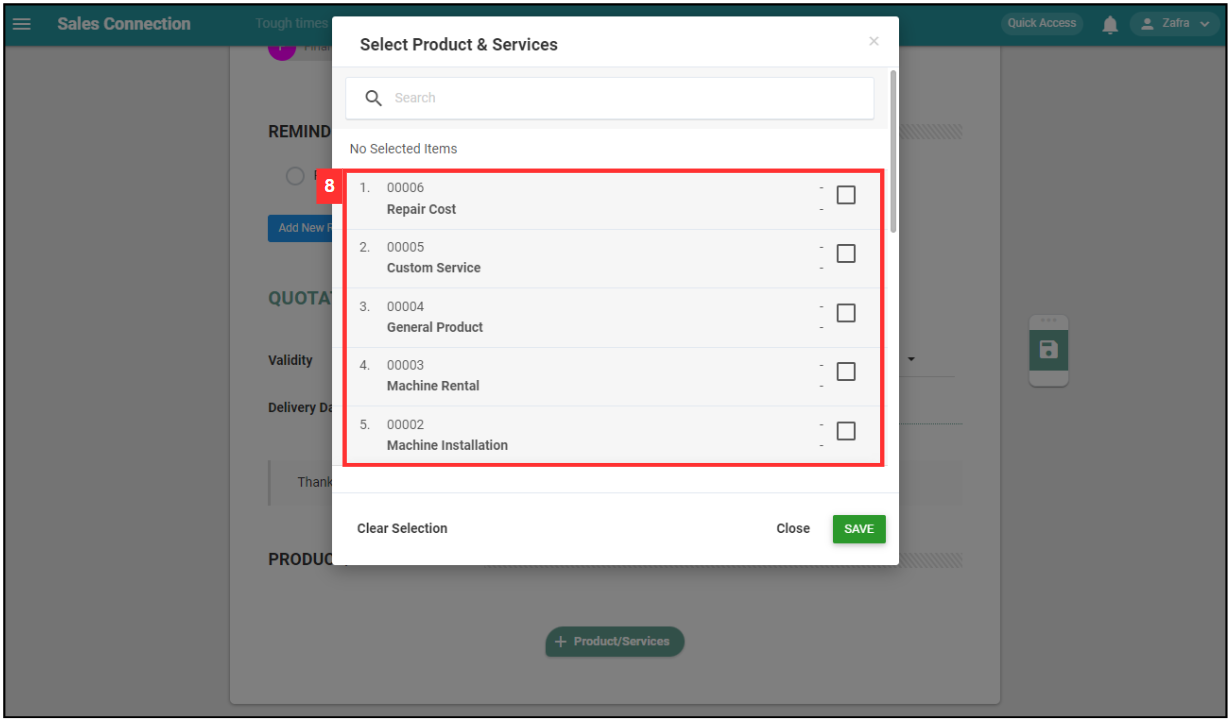
-
Click on the “SAVE” button.
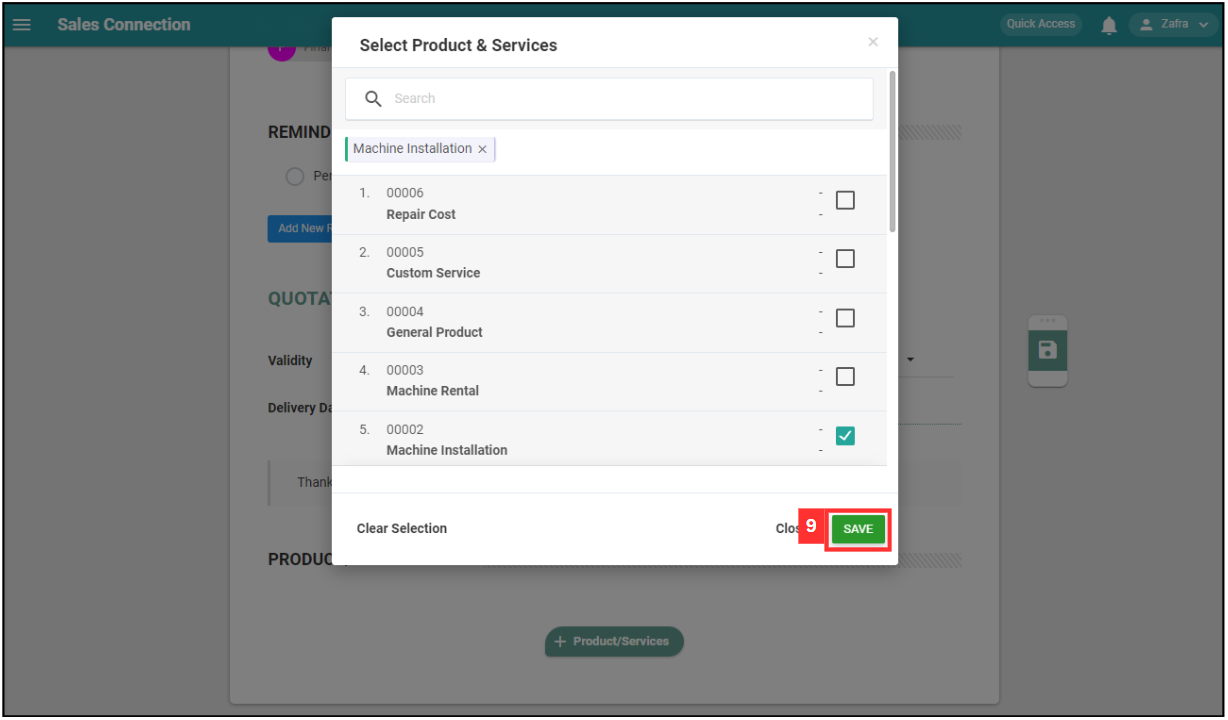
-
Enter the details of the product/services.
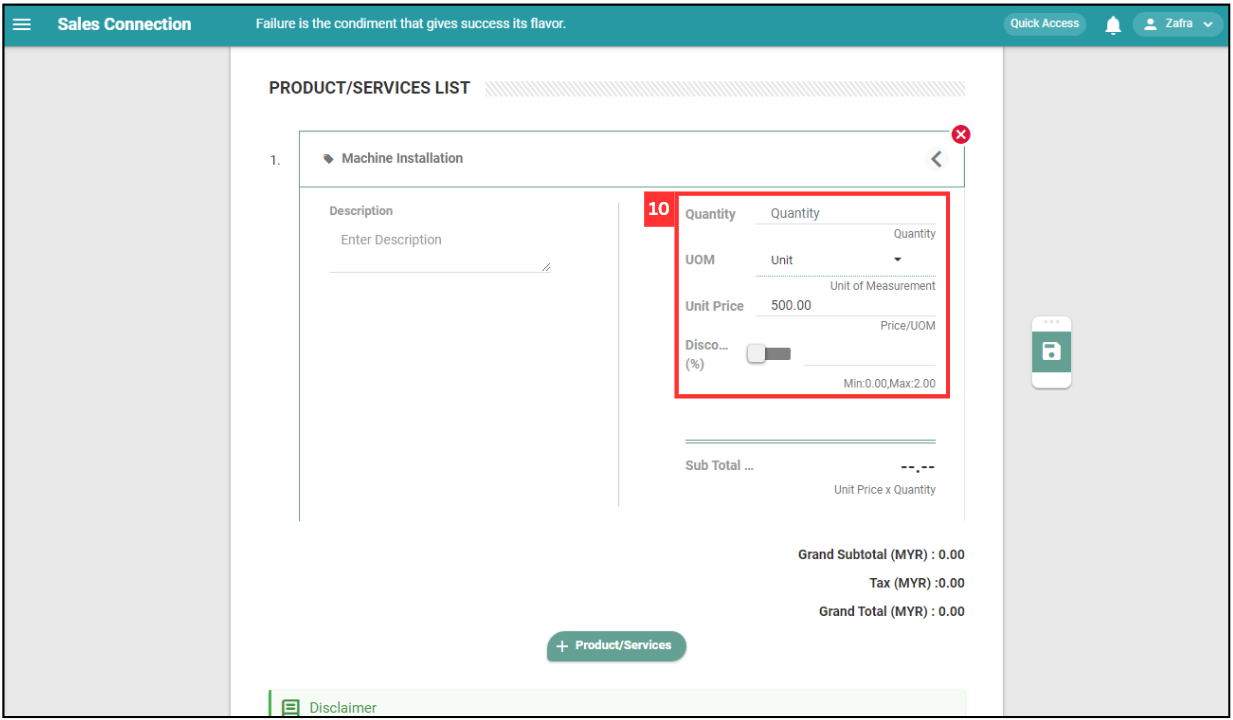
-
Click on the “Save” icon.
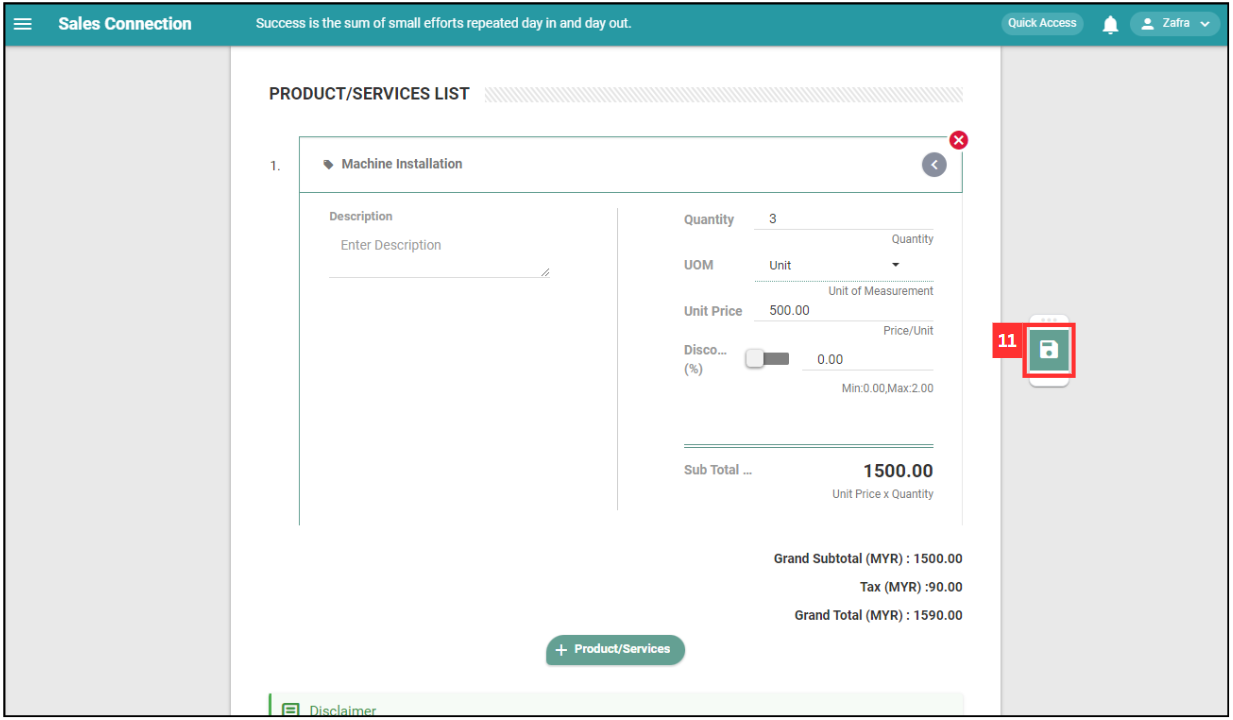
-
Click “OK” to confirm the save change.
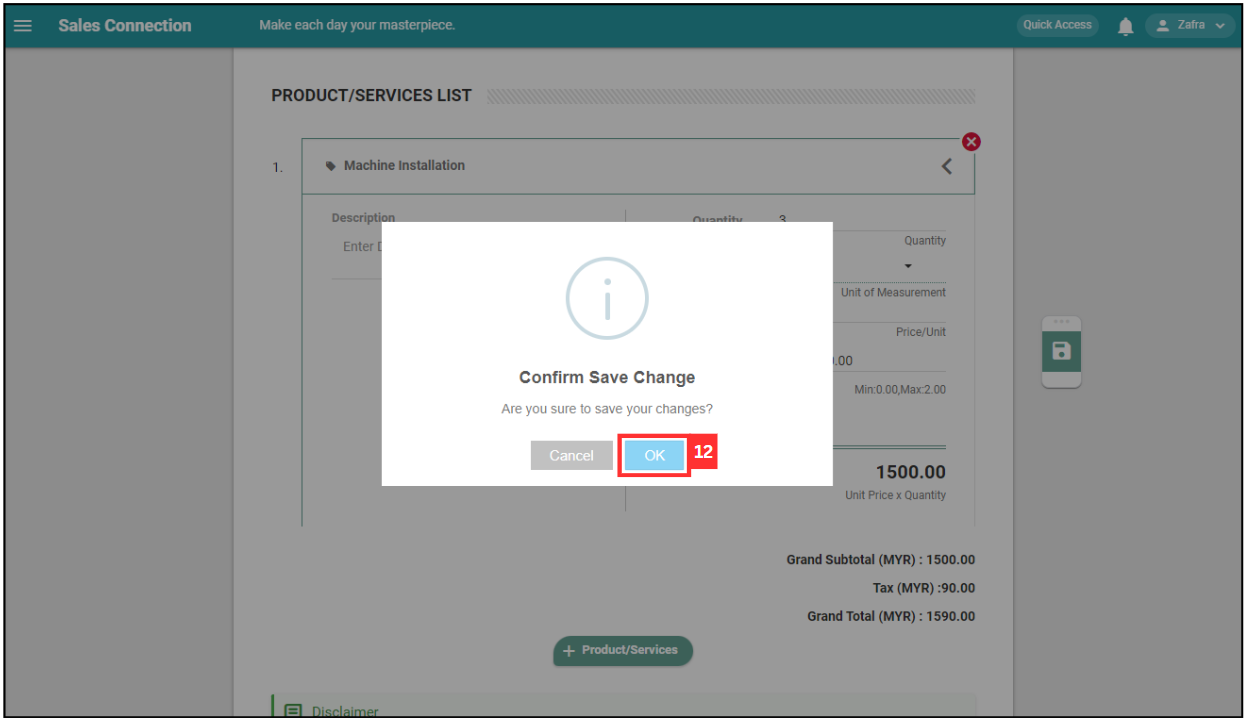
-
Your form is successfully saved when the “Successfully Saved” prompt appears.
From Digital Form
-
At the desktop site’s navigation bar, go to Business Reports > Digital Form Report.
Create Digital Form Here: https://system.caction.com/reports/digitalform?code=DR01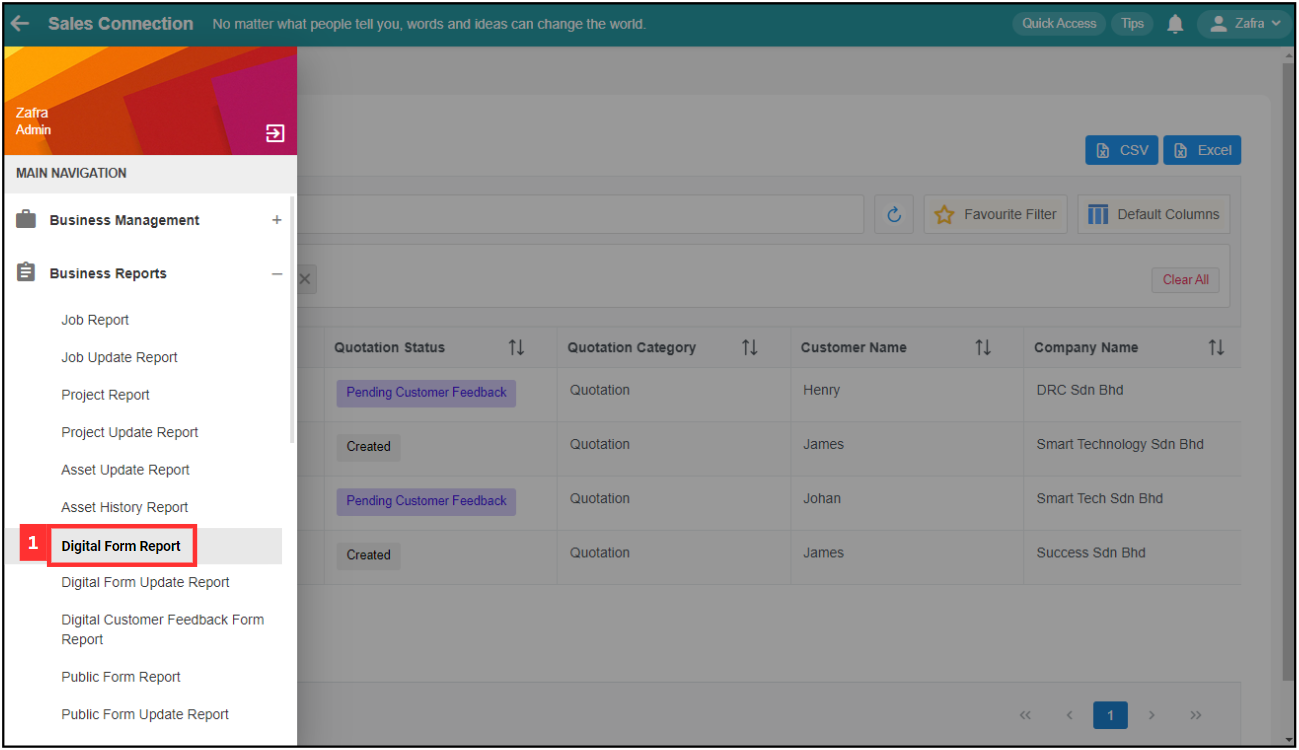
-
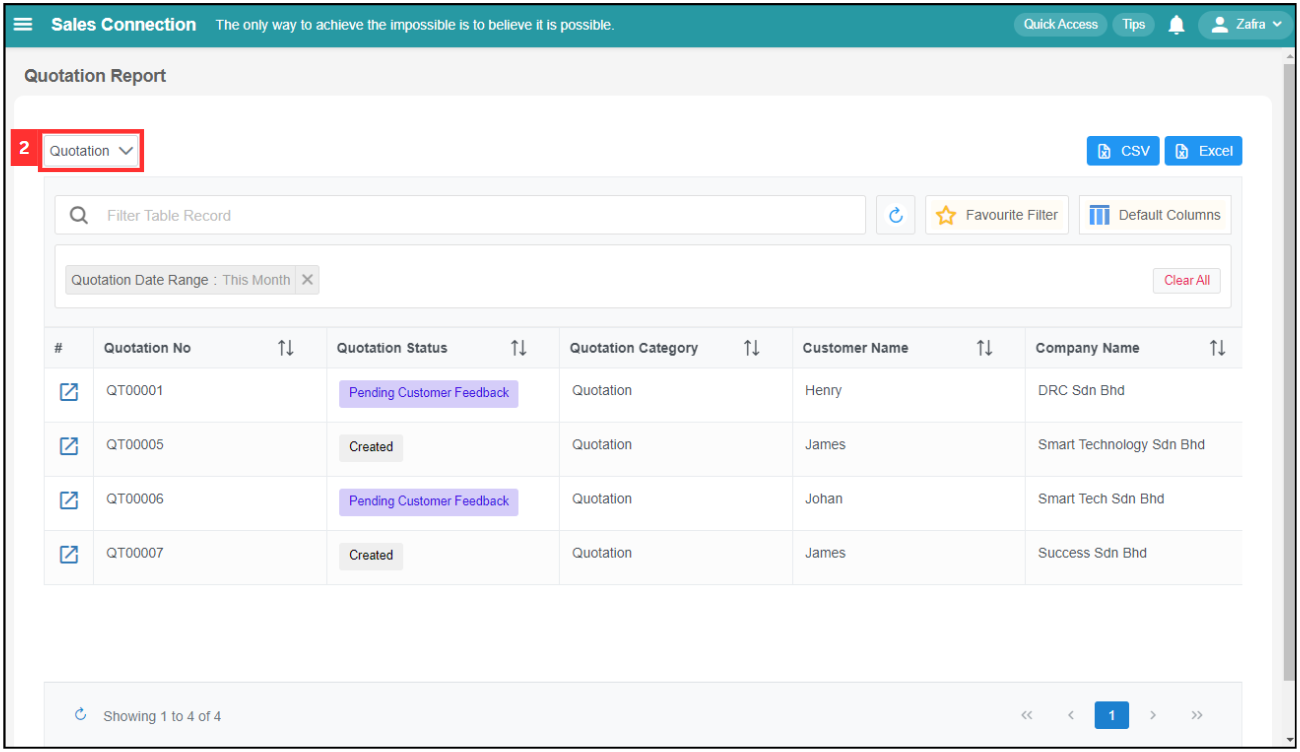
Click on the dropdown button to select the digital form template to use.
-
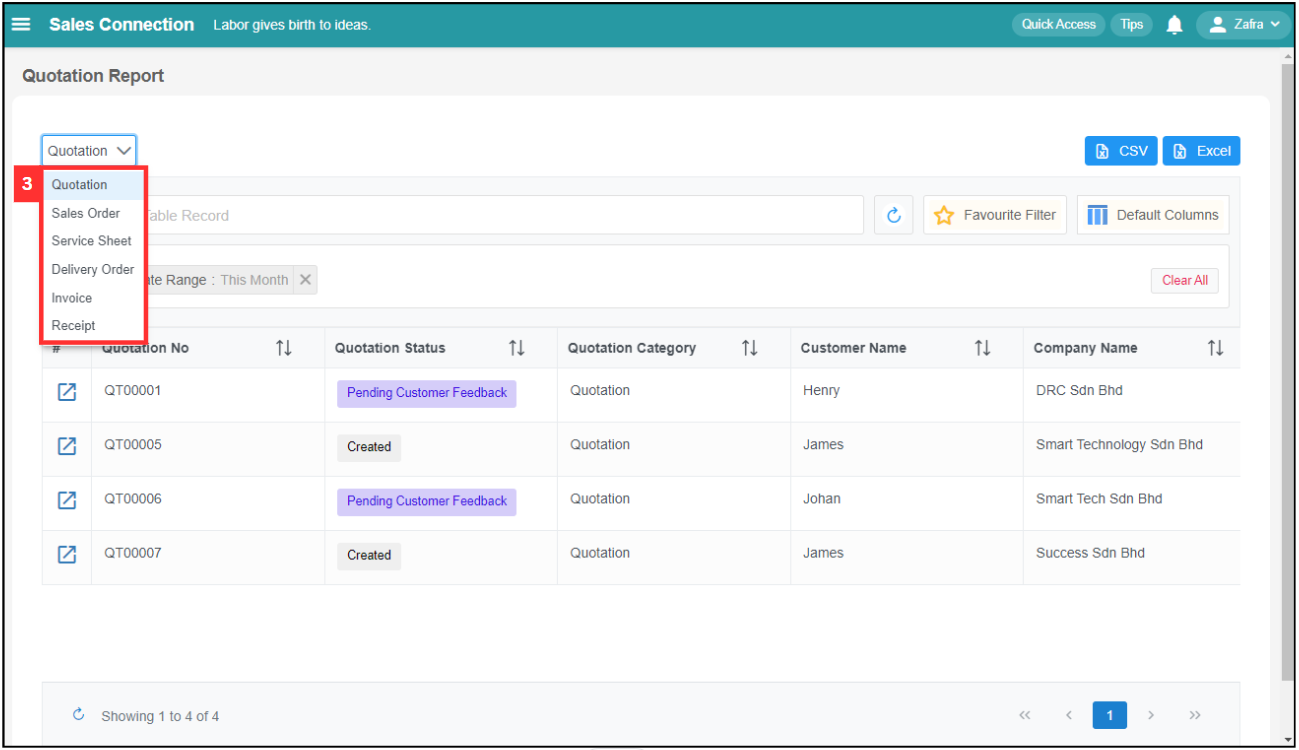
Select the type of digital form.
-
Click on the expand button beside the digital form that you would like to create the new digital form in.
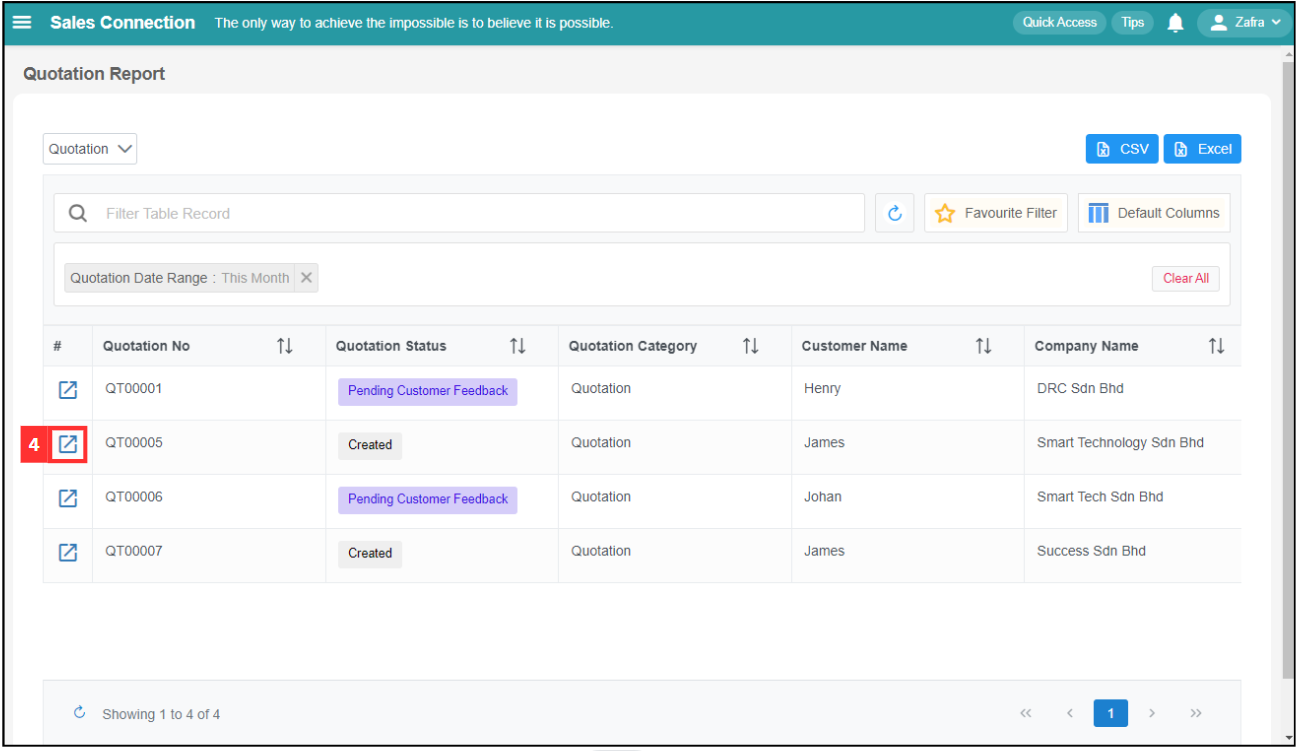
-
Click on the “+” button.
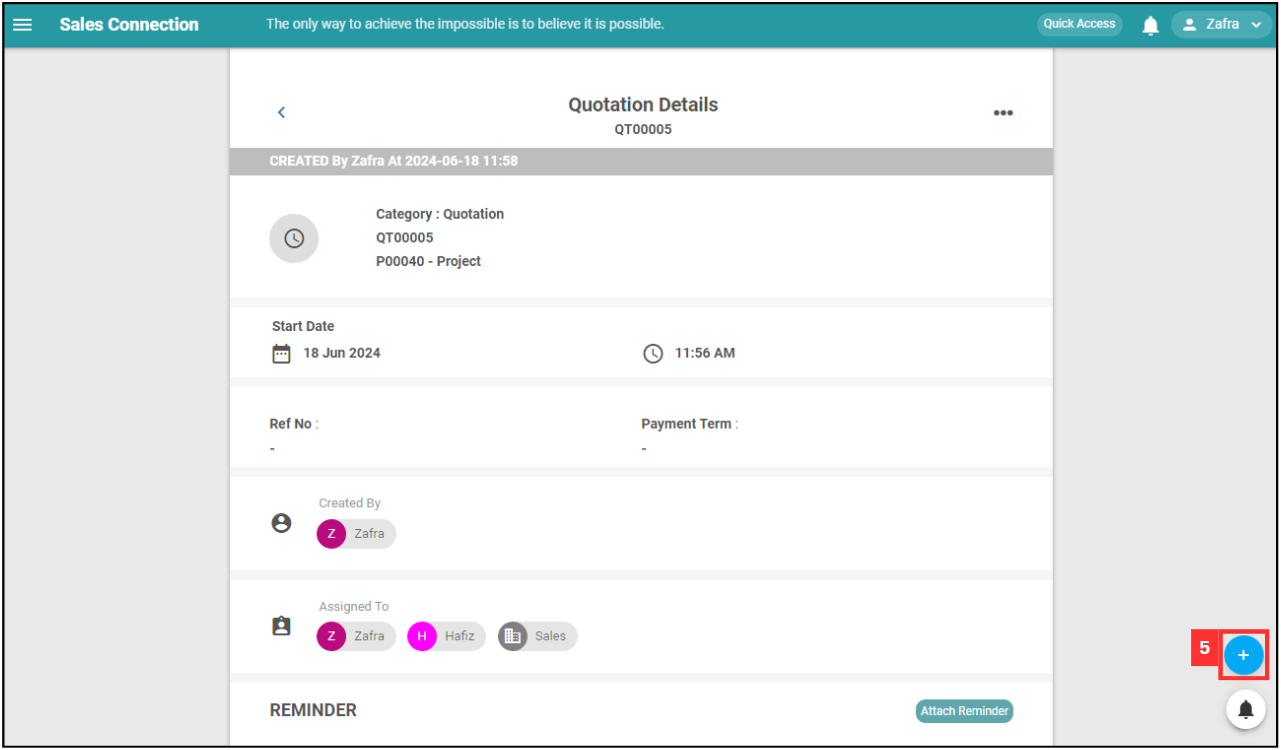
*Note: Digital Form Templates available are based on the access given by your admin. If you do not find your template, please request permission or help from your admin.
-
Select the type of digital form that you would like to create. For this example, we will select “Sales Order”.
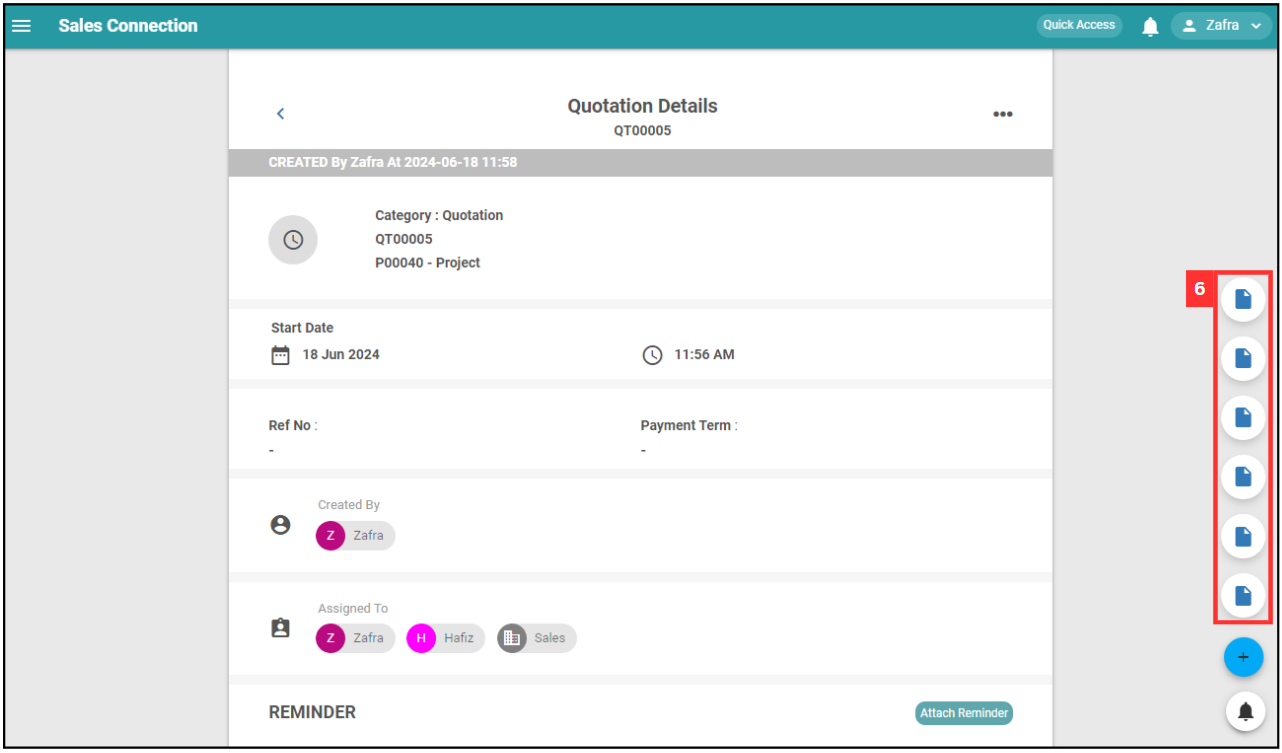
-
Fill out the details of the new sales order. Available fields may differ depending on your company’s system setup.
Field Name Description Category Classifies the type of sales order. Status Indicates the current status of the sales order. Customer Select the address of the customer or attach the customer. Project The project associated with this sales order. Start Date The date when the sales order is created. Assigned User The user responsible for this sales order. Reminder Set a reminder for follow-ups or important dates. Product/Services List The list of products or services included in the sales order. 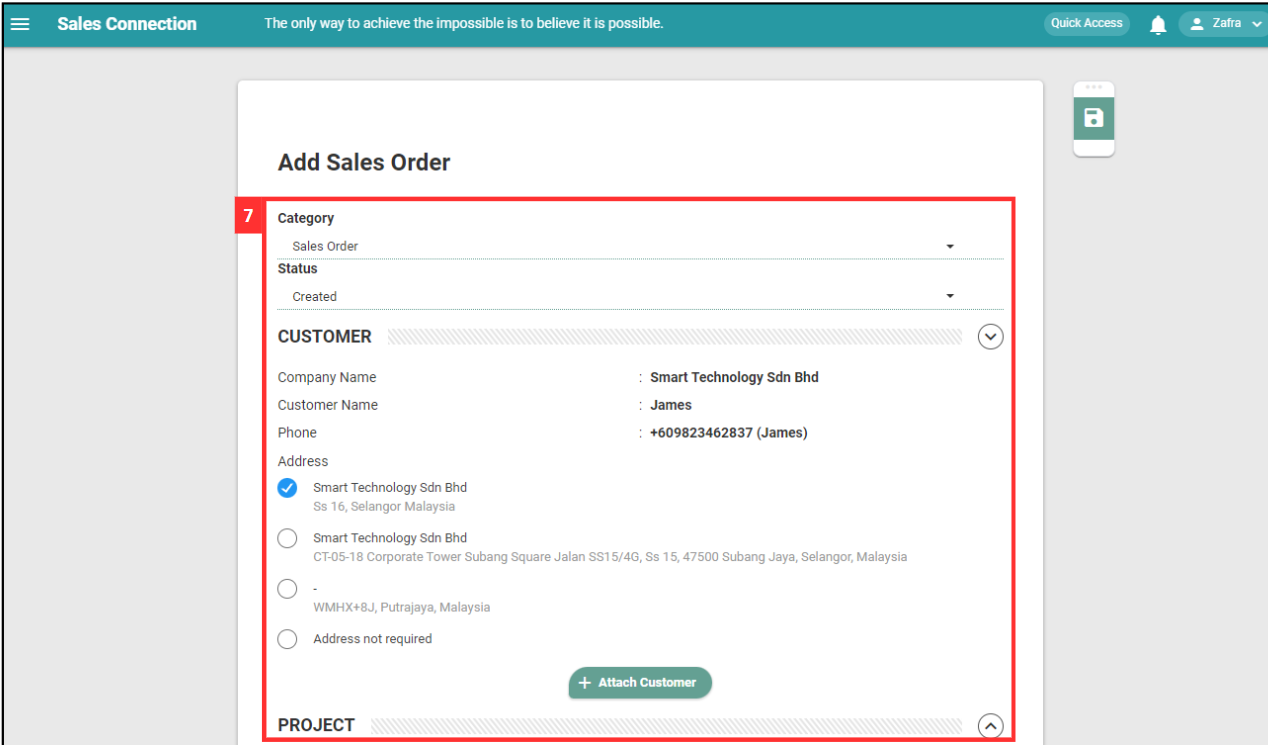
-
Click “+ Product/Service” if needed.
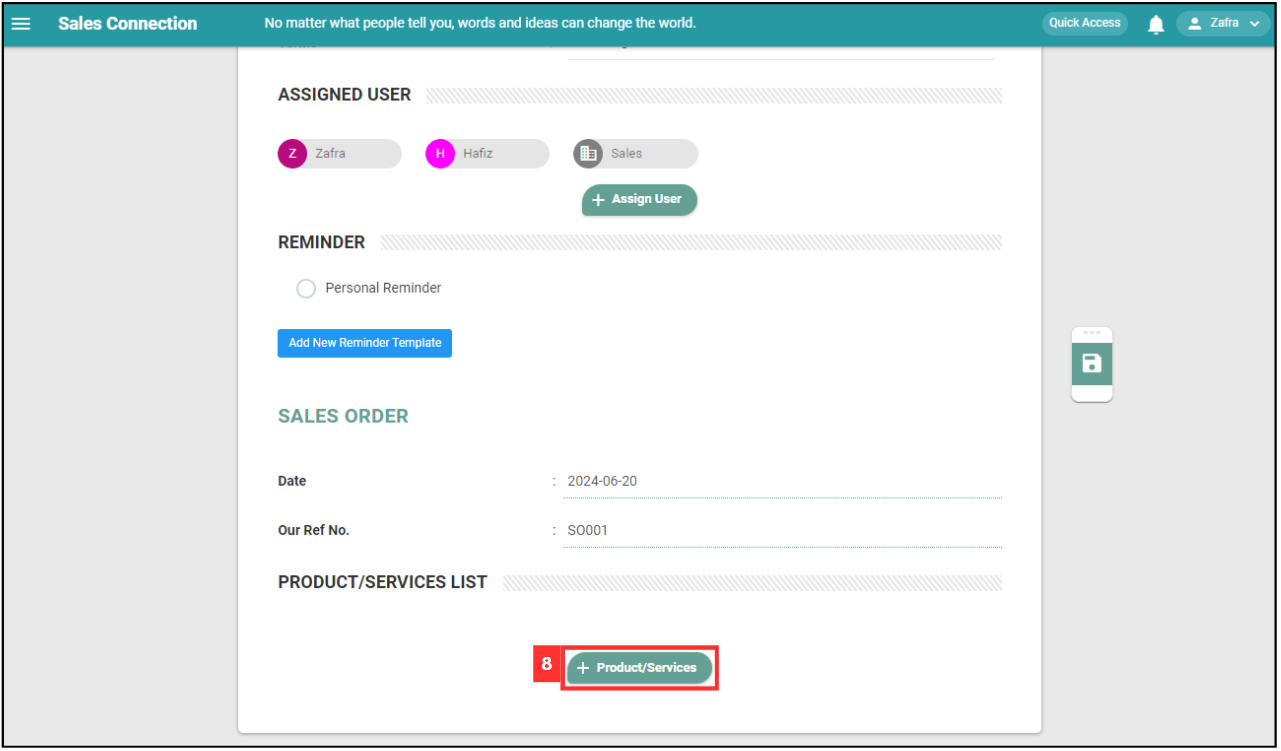
*Note: Product/Service section may not be available in your selected digital form.
-
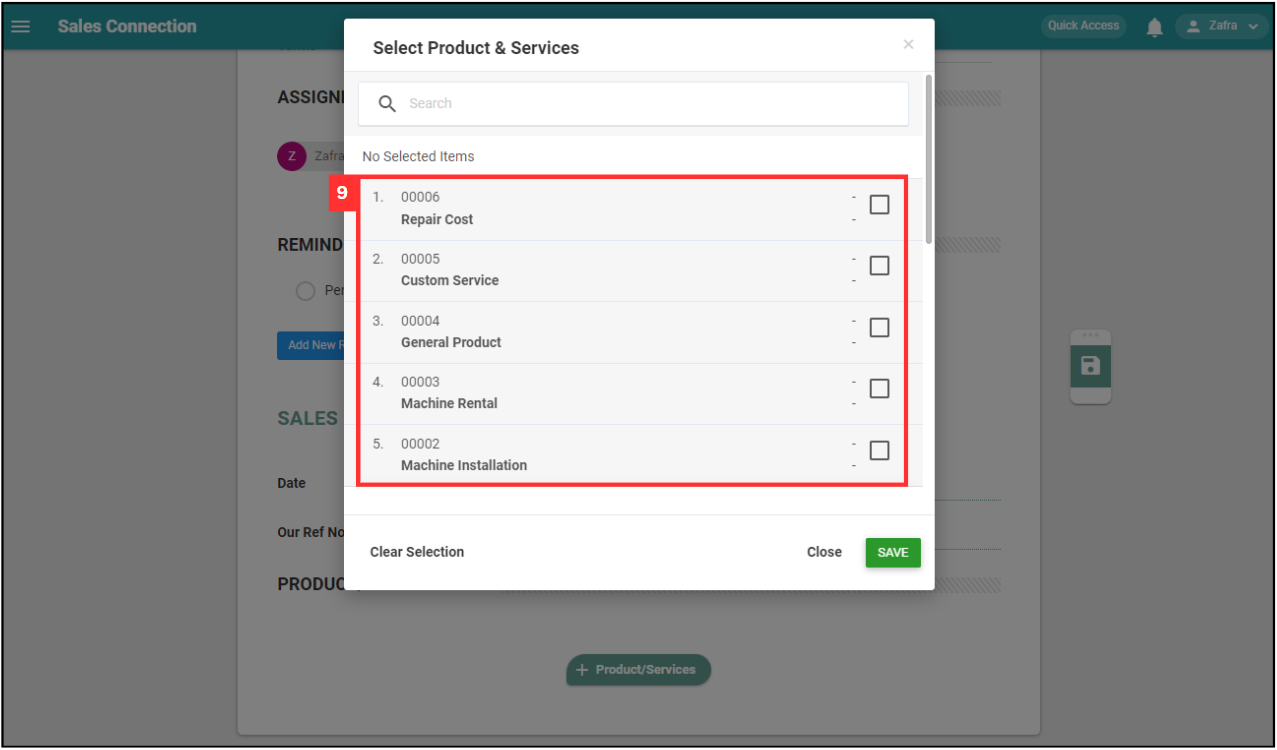
Select the Product/Services that needed in this form.
-
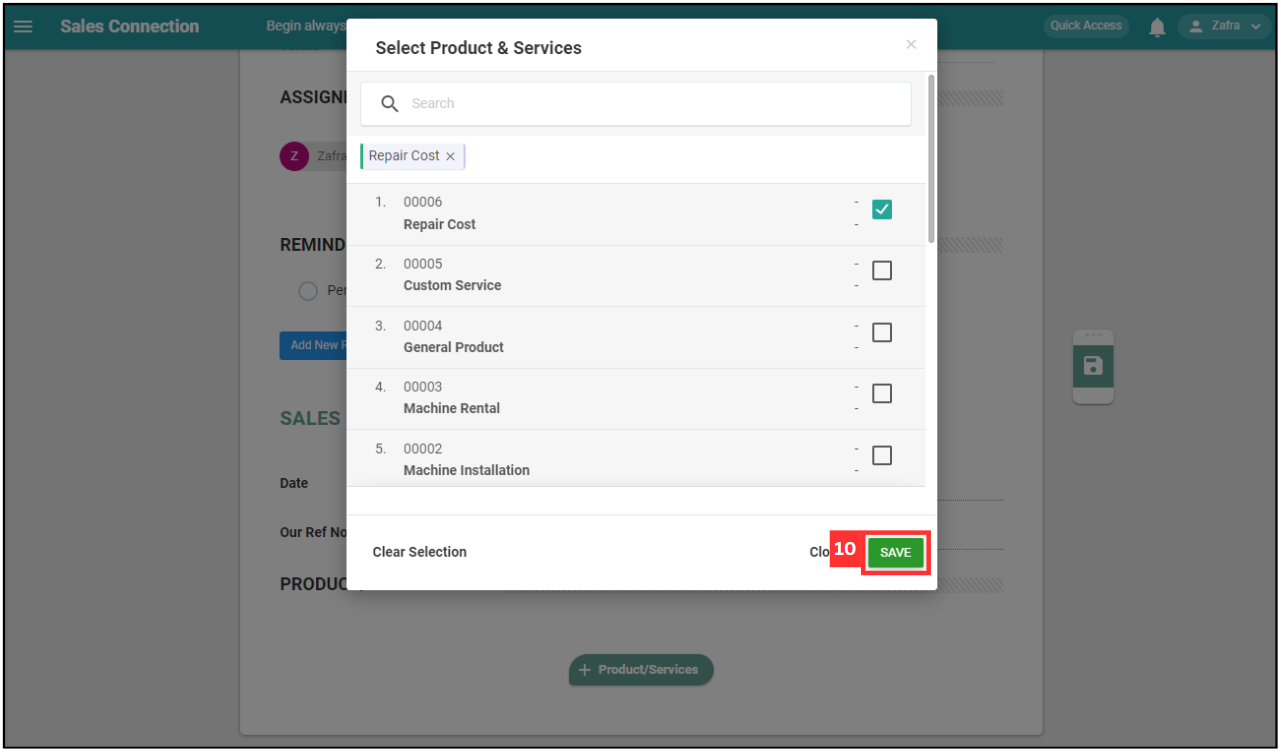
Click on the “SAVE” button.
-
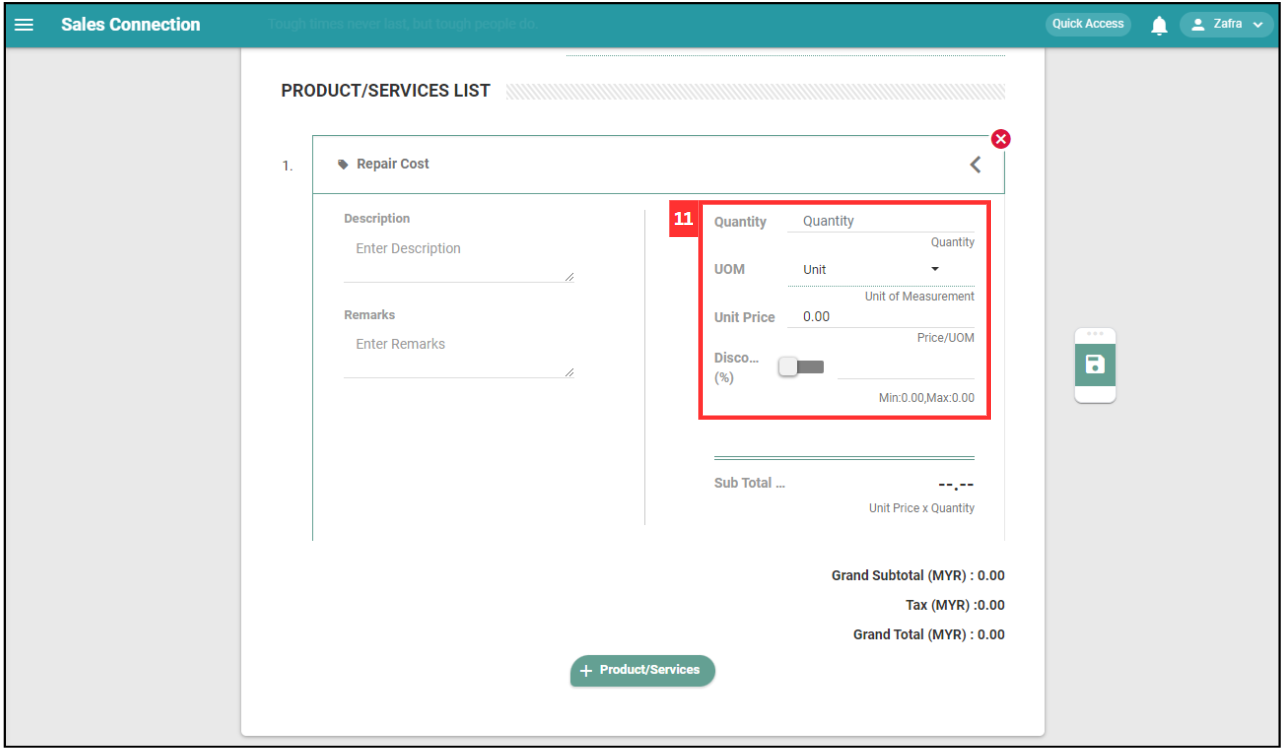
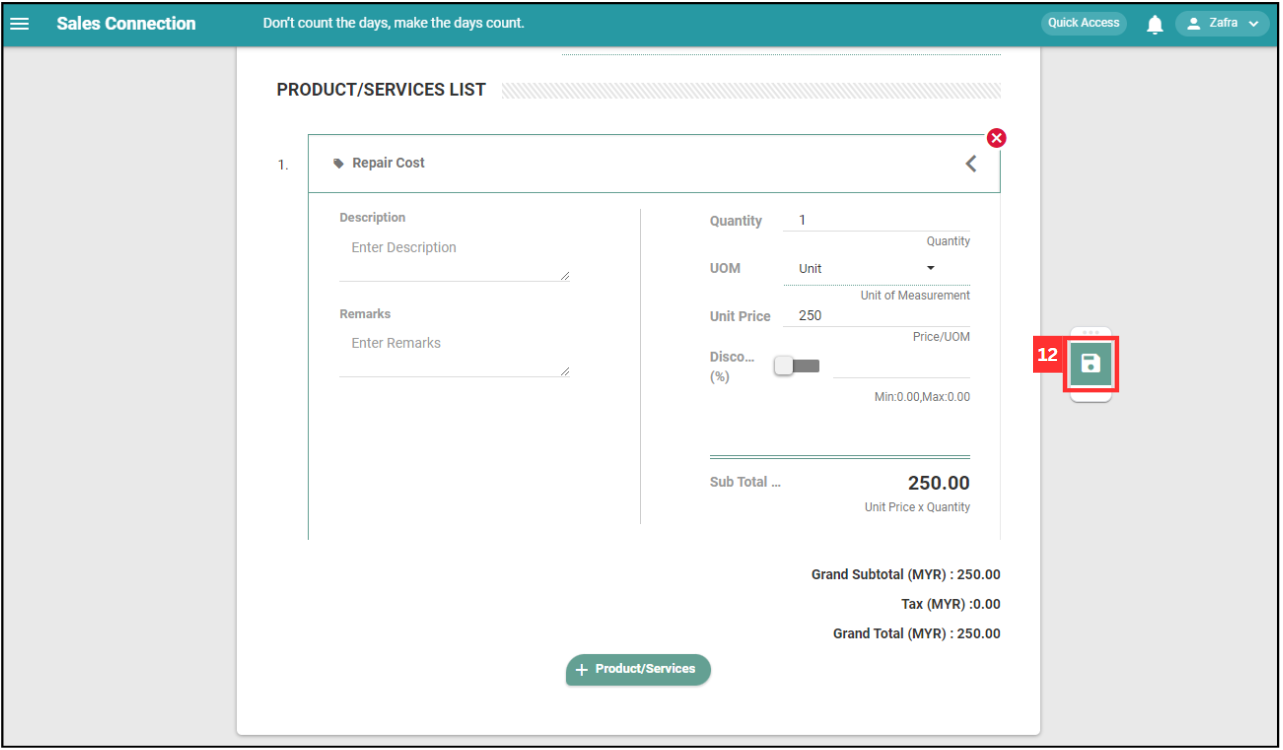
Enter the details of the product/services.
-
Click on the “Save” icon.
-
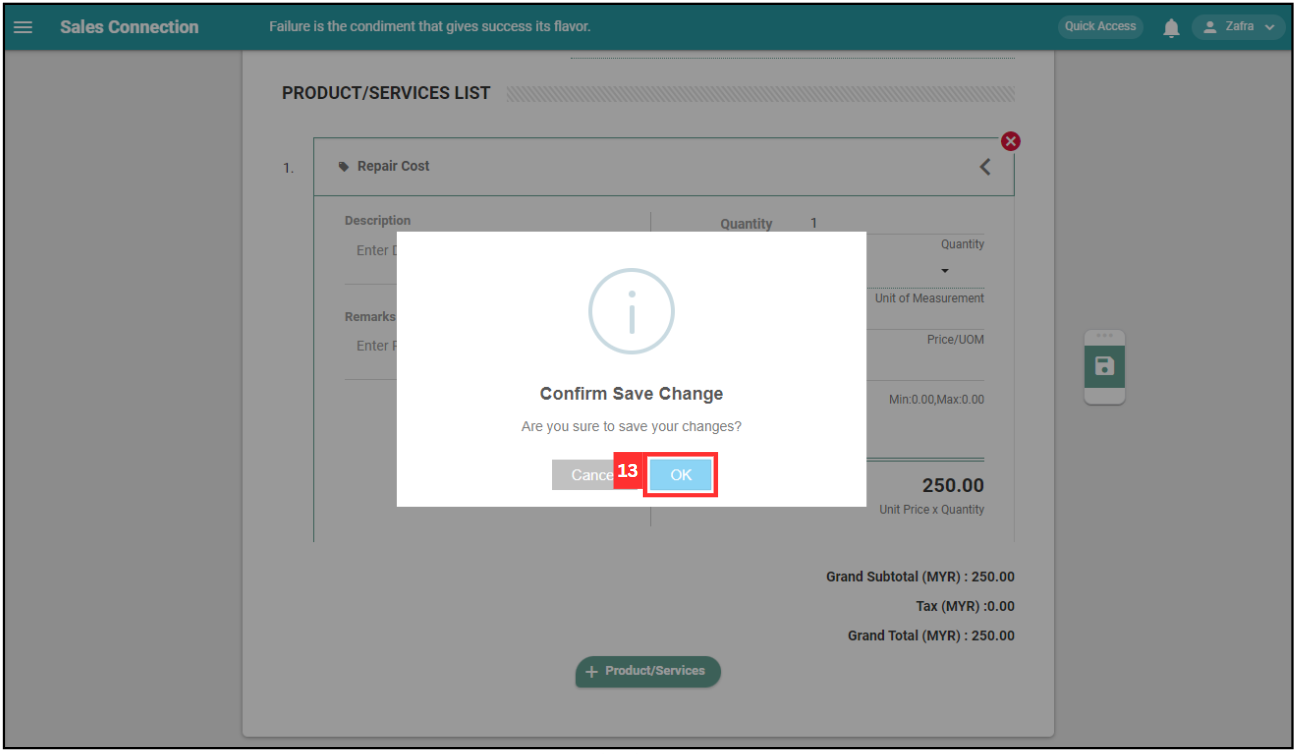
Click “OK” to confirm the save change.
-
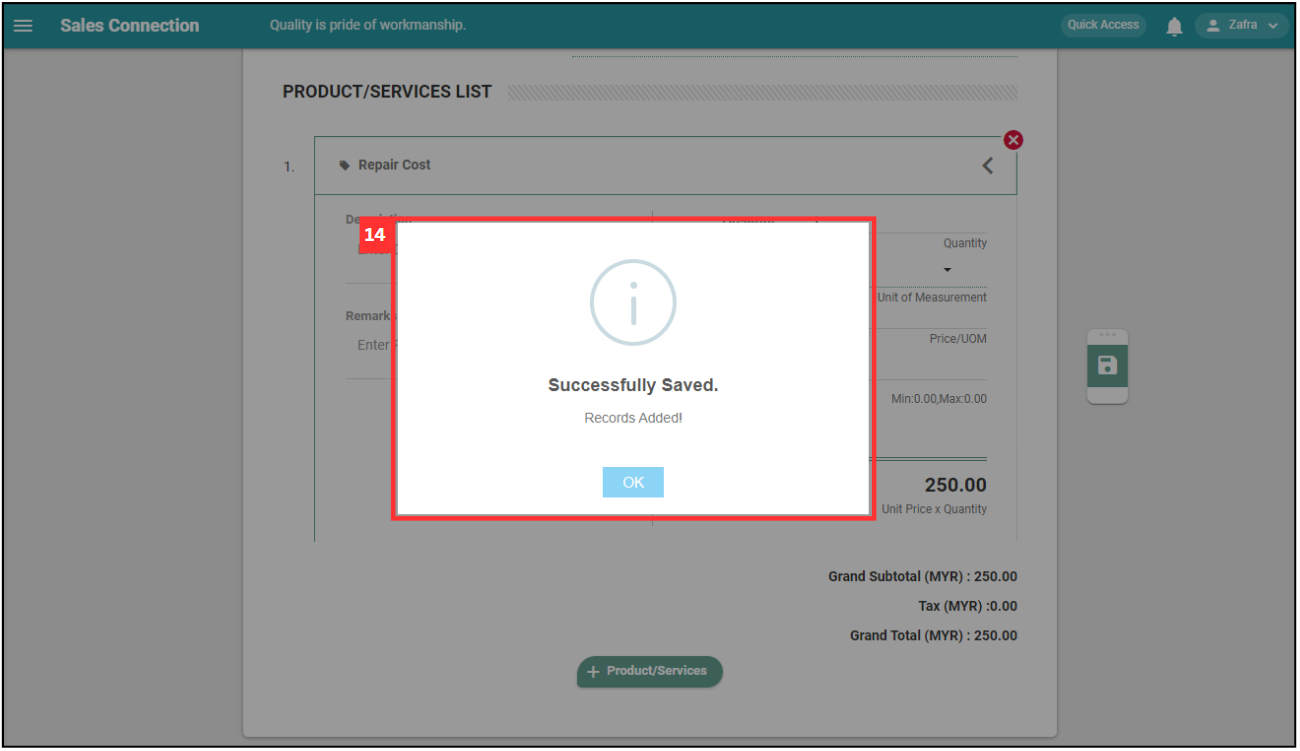
Your form is successfully saved when the “Successfully Saved” prompt appears.
Related Articles