Version 1.0
Created: 18 June 2024
Updated: 23 January 2025
How to Add a New Customer?
Note: In your system, Customer may have been renamed to other (i.e Site, Client, Company, etc.)
Navigate to the section by clicking it.
Using Desktop
From Customer List
-
At the desktop site’s navigation bar, go to Business Management > Customer List.
Add New Customer Here: https://system.caction.com/customers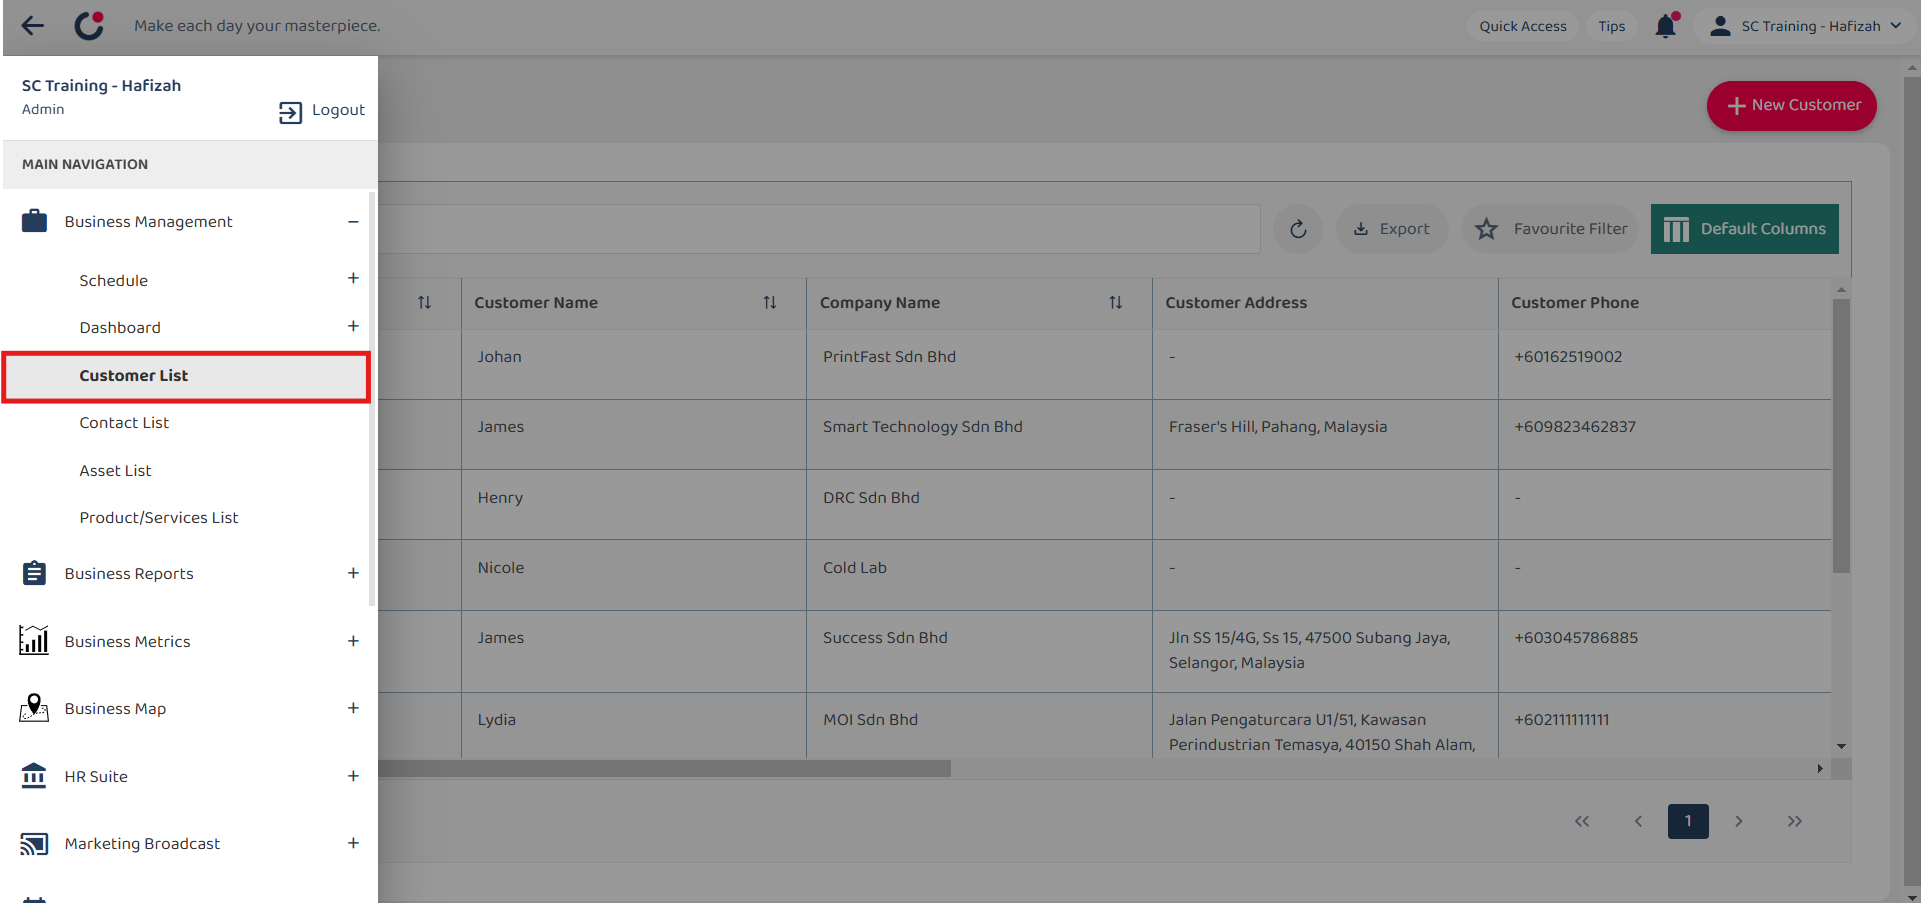
-
Click on the “+” button to add new customer.
*Note: If you do not see the “+” button, you may need to request permission or help from your Admin to register new Customer.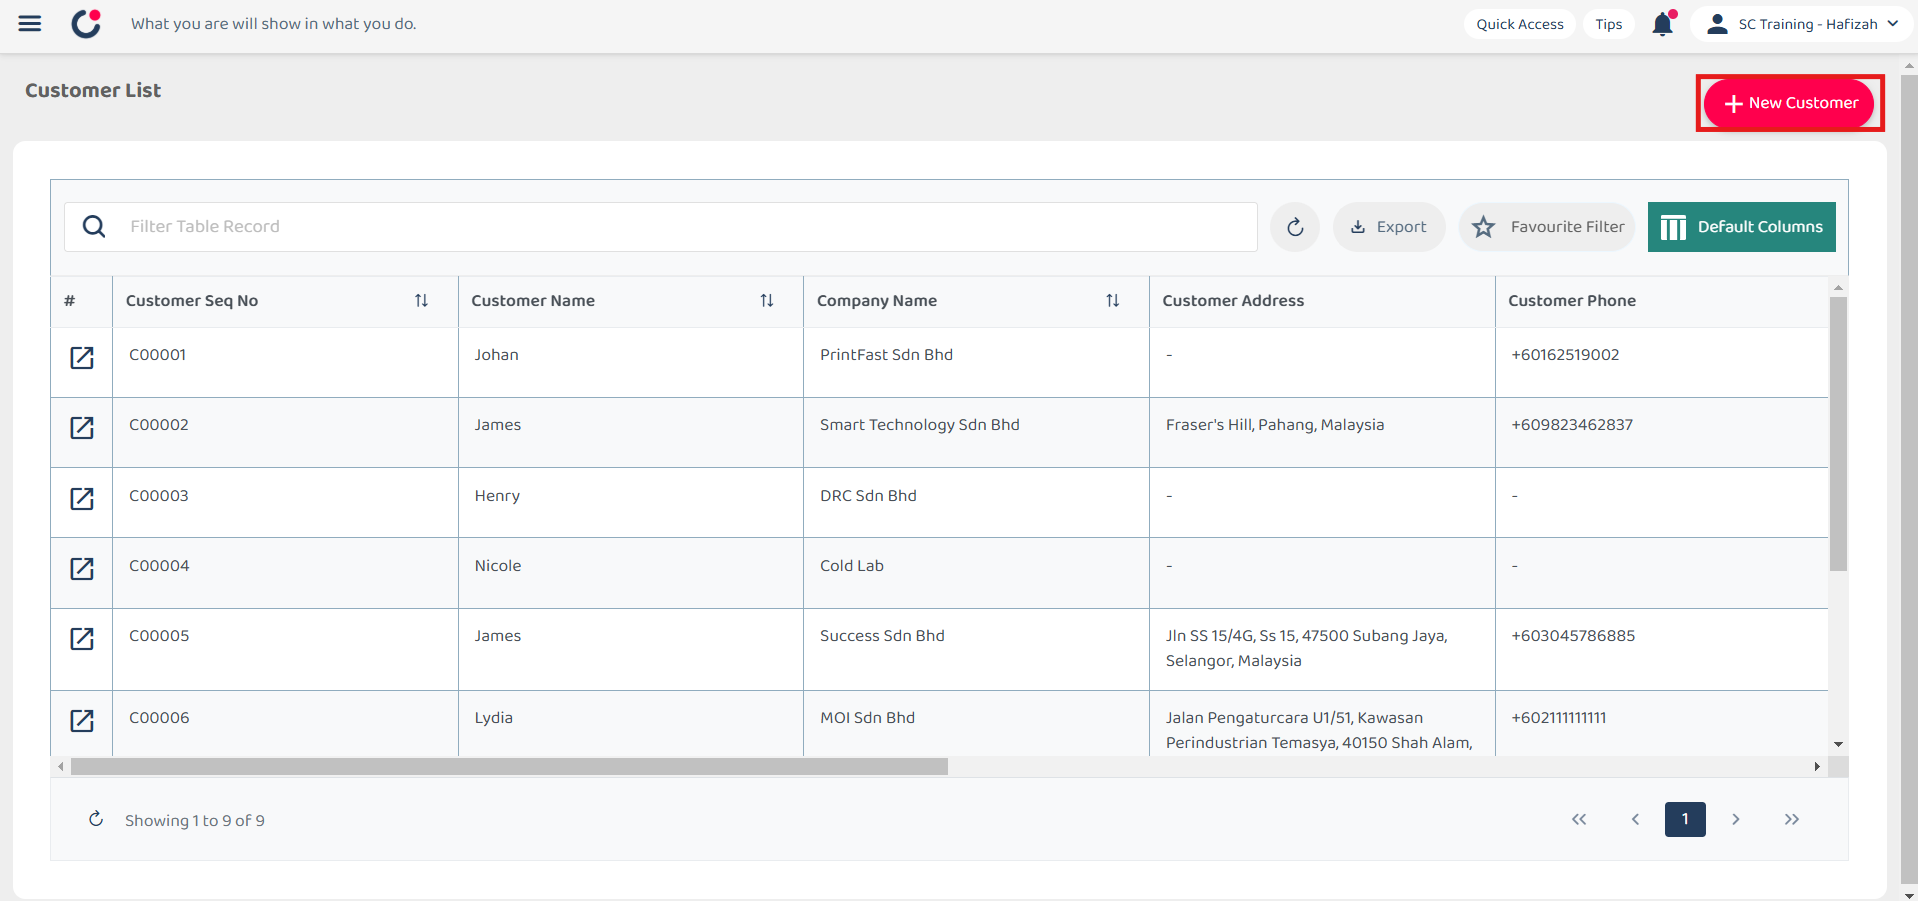
-
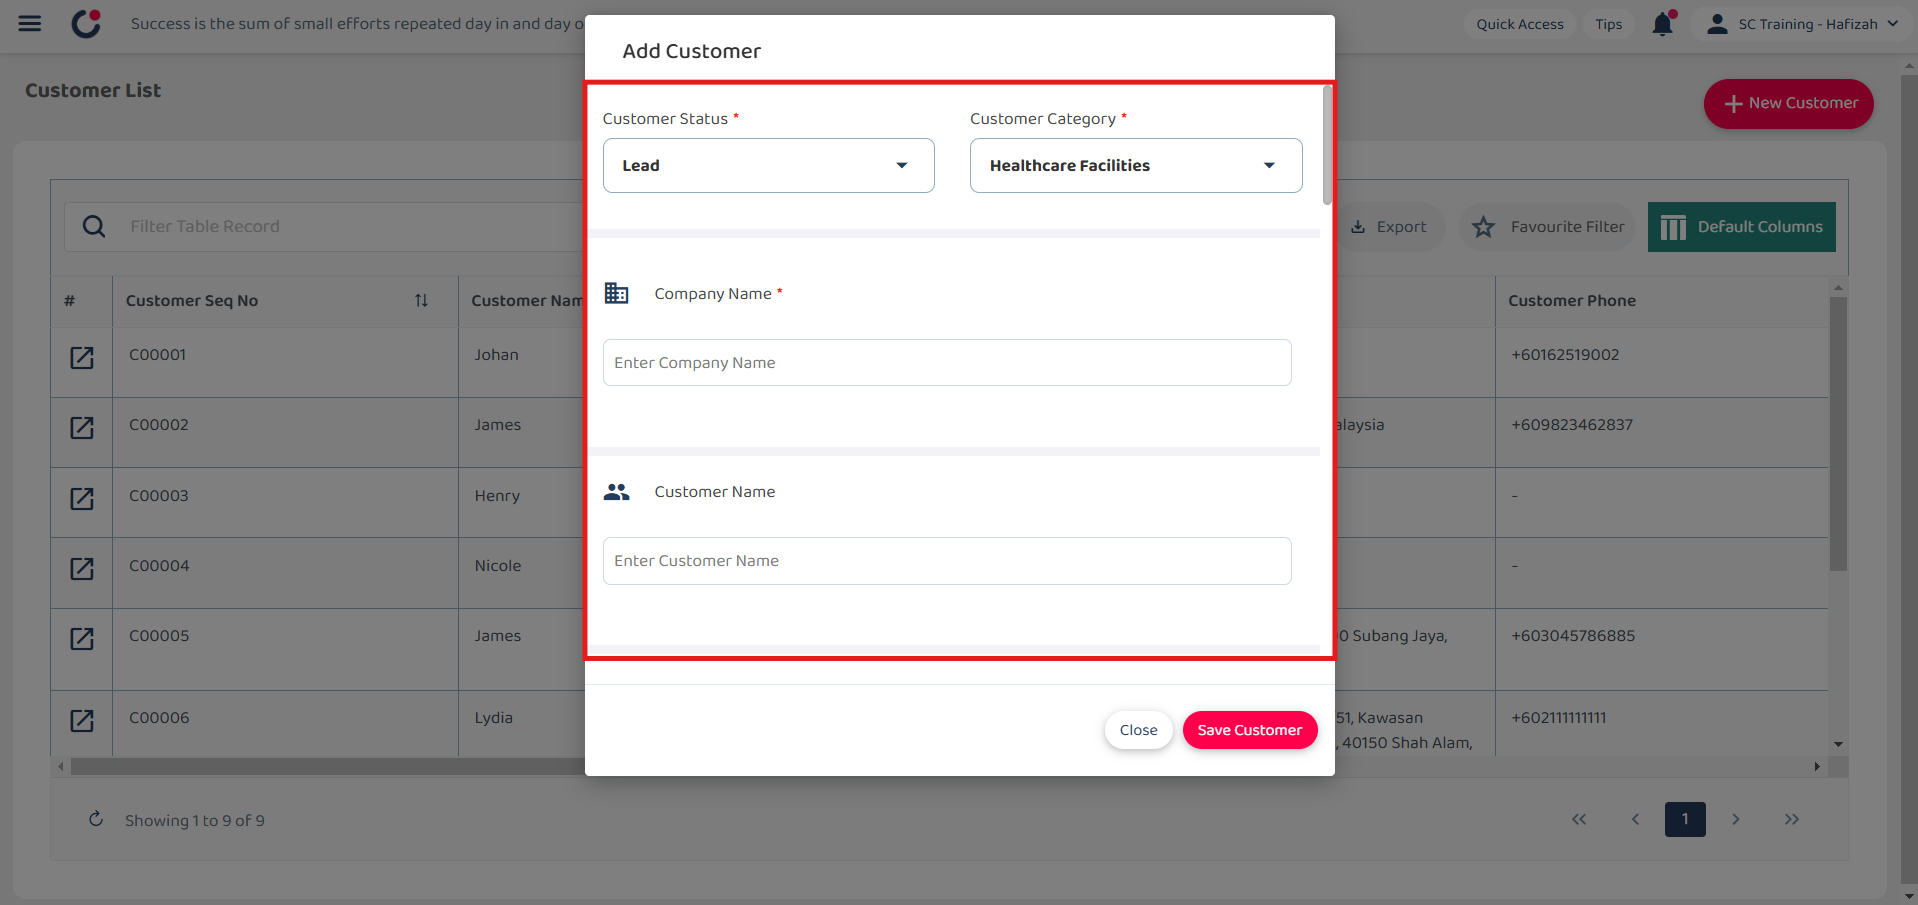
Fill out the details of the new Customer. Available fields may differ depending on your company’s system setup.
Field Name Description Customer Status* Indicates the current status of the customer. Customer Category* Classifies the customer based on their type. Company Name* The official name of the customer’s company. Customer Name The full name of the customer contact person. Asset Any asset registered in the system associated with the customer. Assigned User The user responsible for managing this customer. Customer Phone The customer’s contact phone number. Customer Email The customer’s email address. Customer Address The physical address of the customer. *Note: Fields marked with an asterisk ( * ) are required.
-
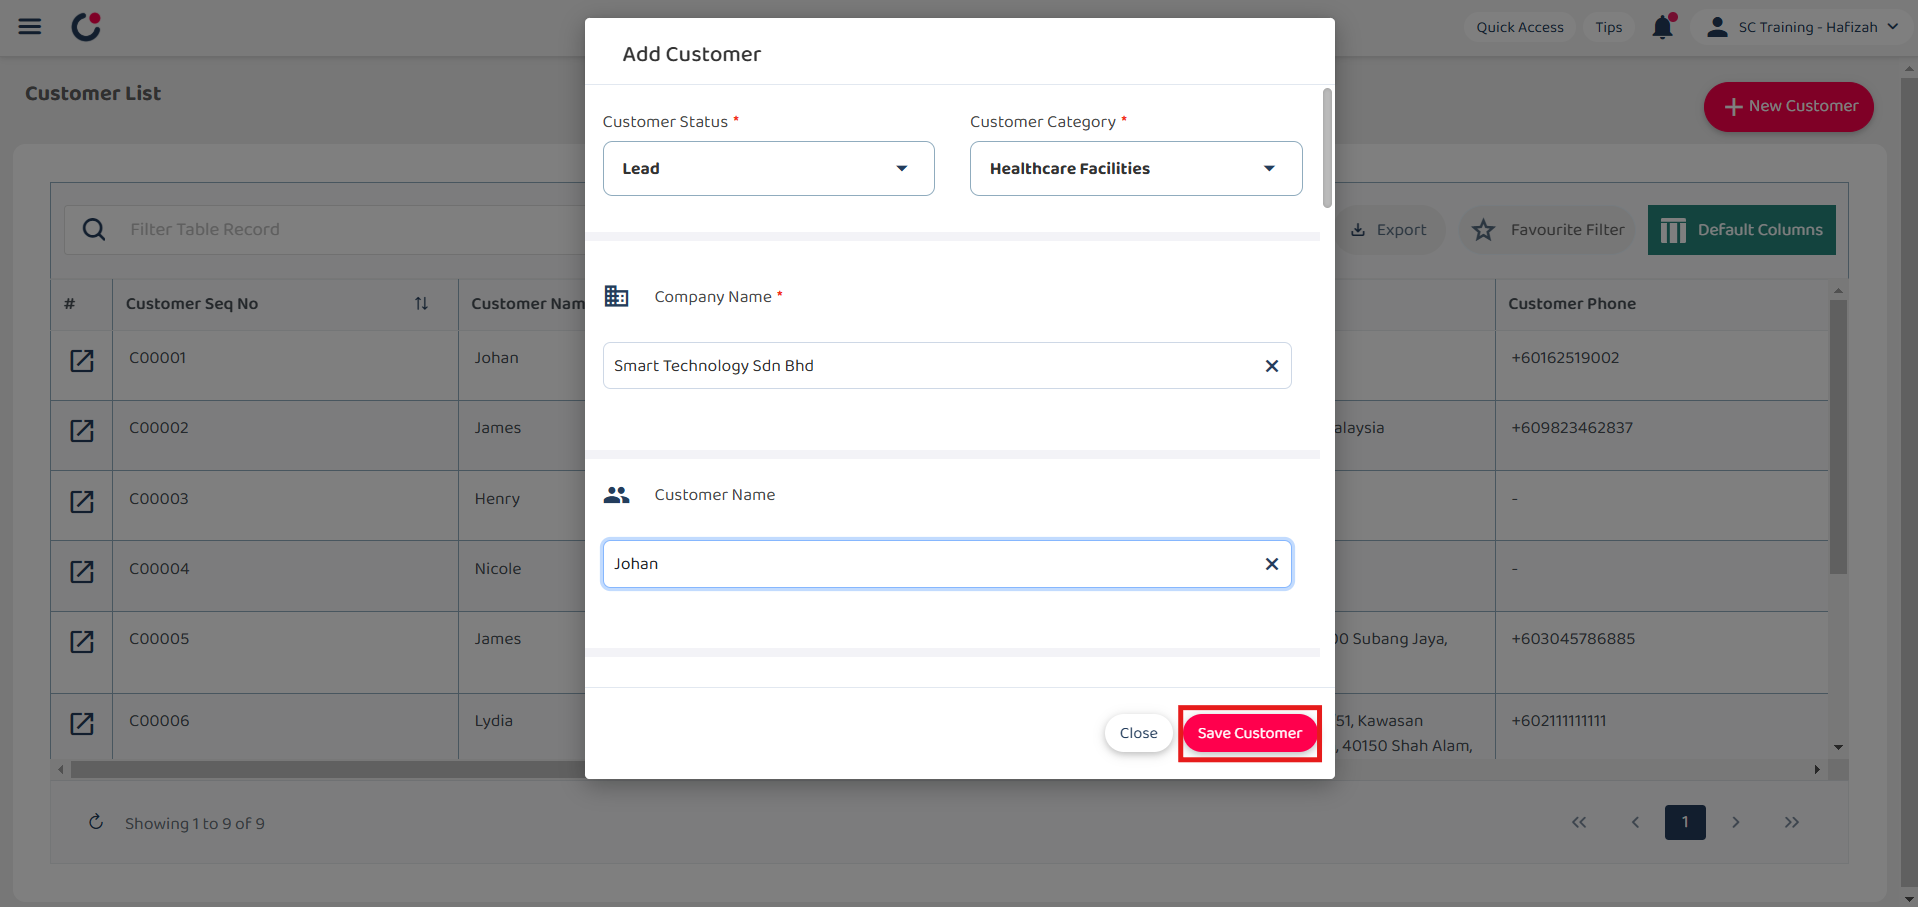
Click on the “Save Customer” button.
-
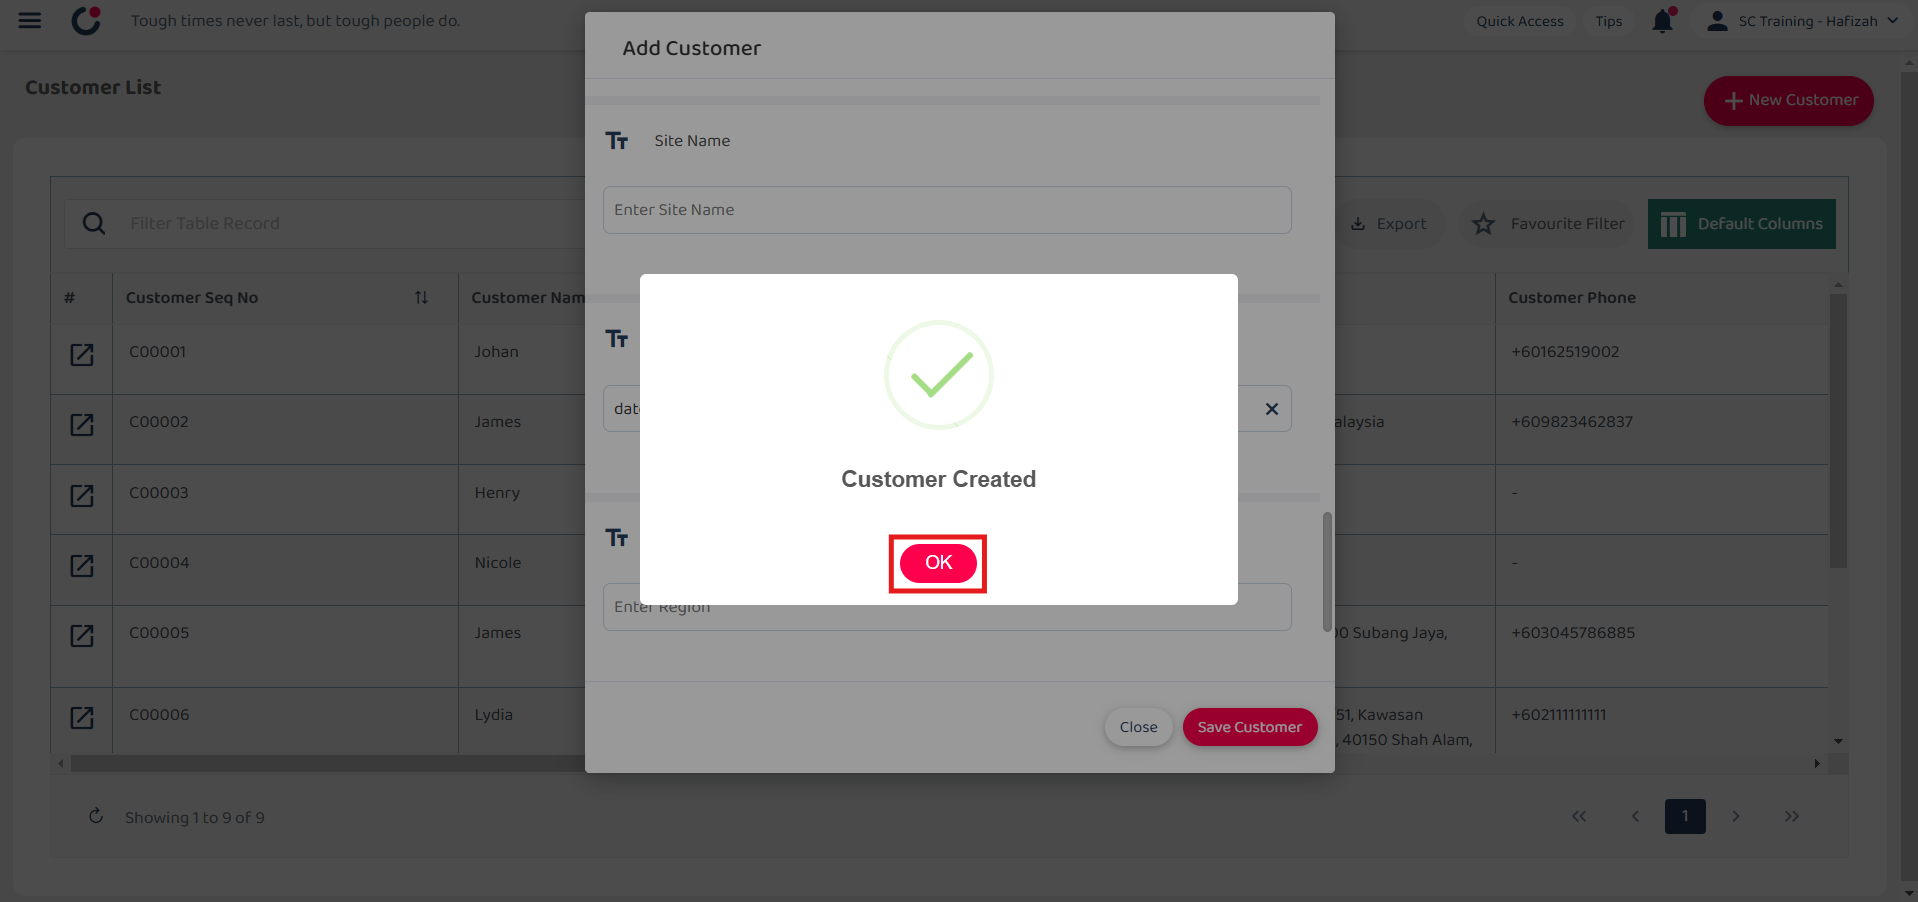
Click “OK” and the new customer is added successfully.
From Job Creation Page
-
At the desktop site’s navigation bar, go to Business Management > Schedule > Job Schedule.
Create Job Here: https://system.caction.com/activity/scheduler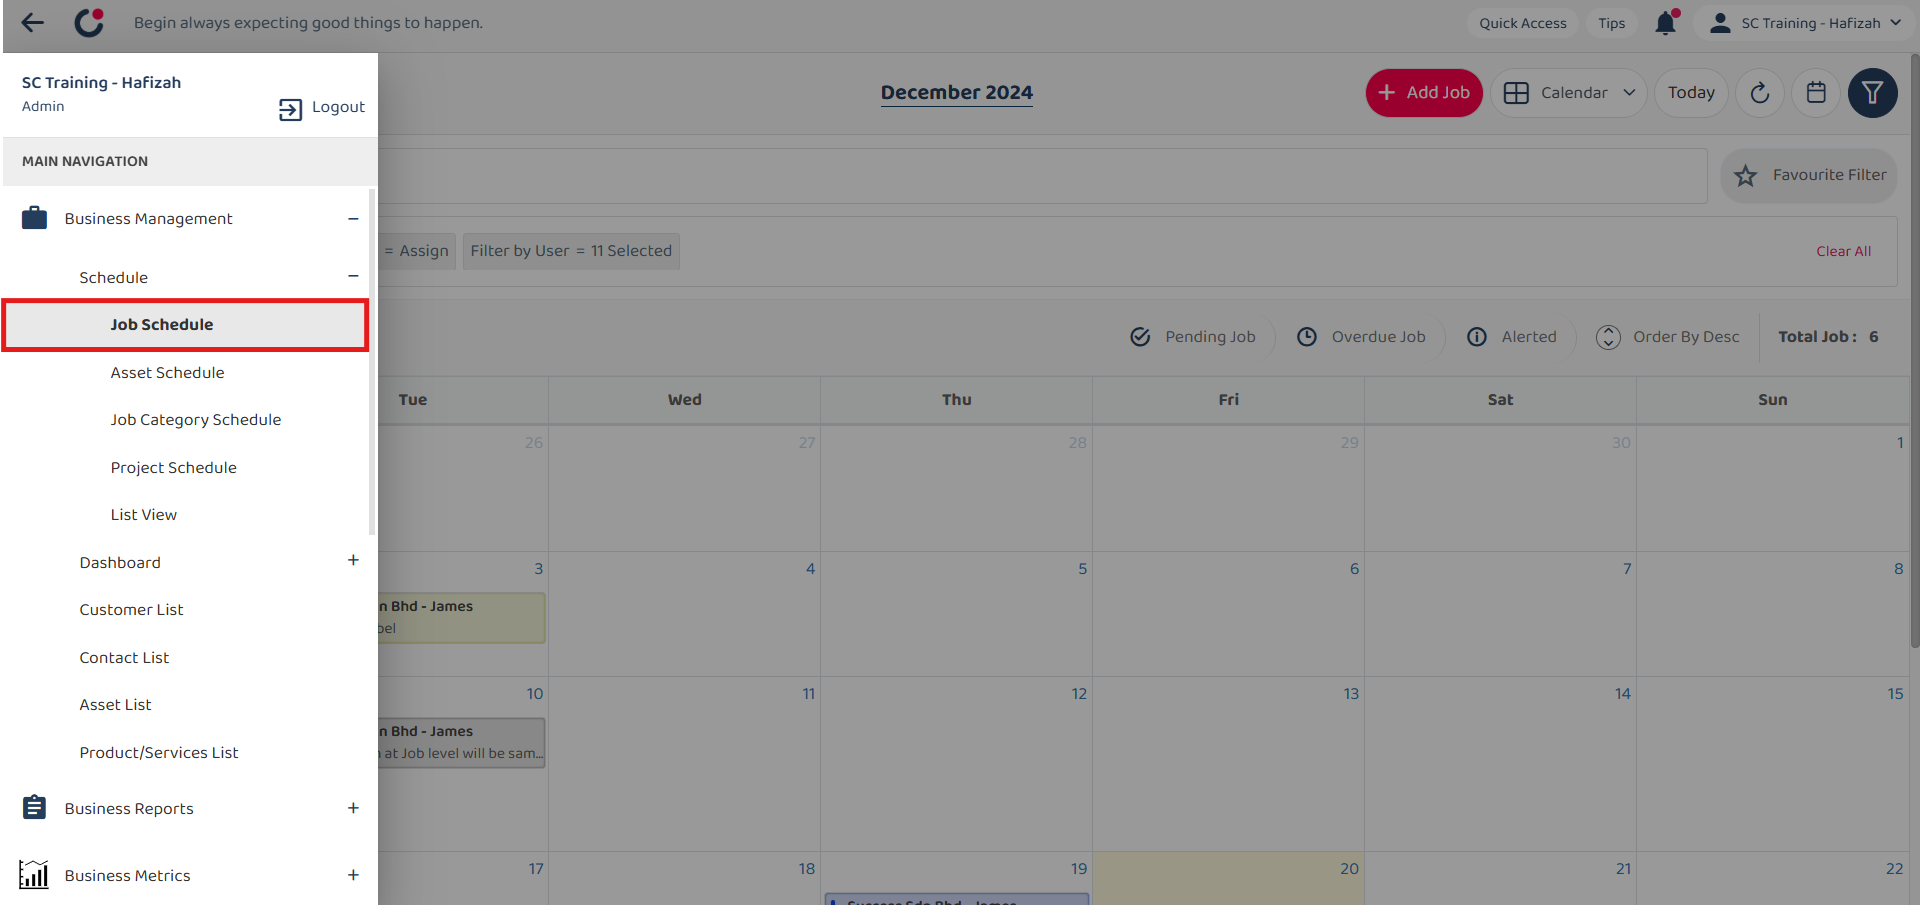
-
Click on the “+” button to create new job.
*Note: If you do not see the “+” button, you may need to request permission or help from your Admin to register new job.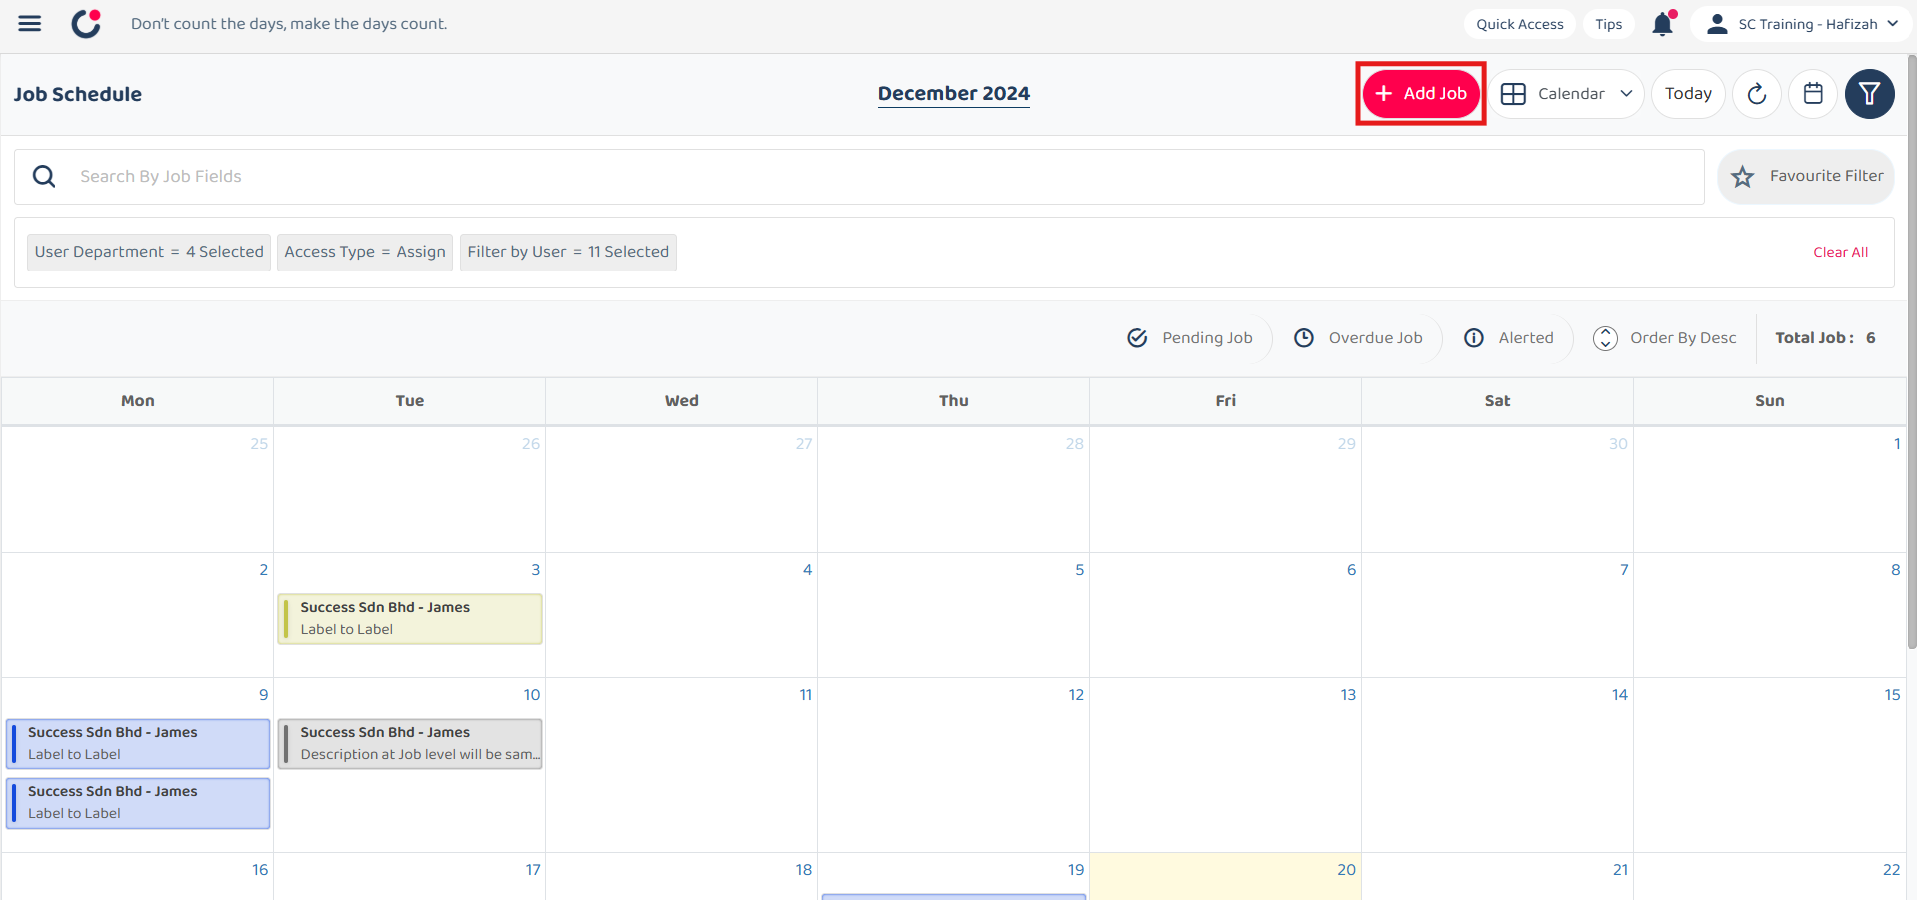
-
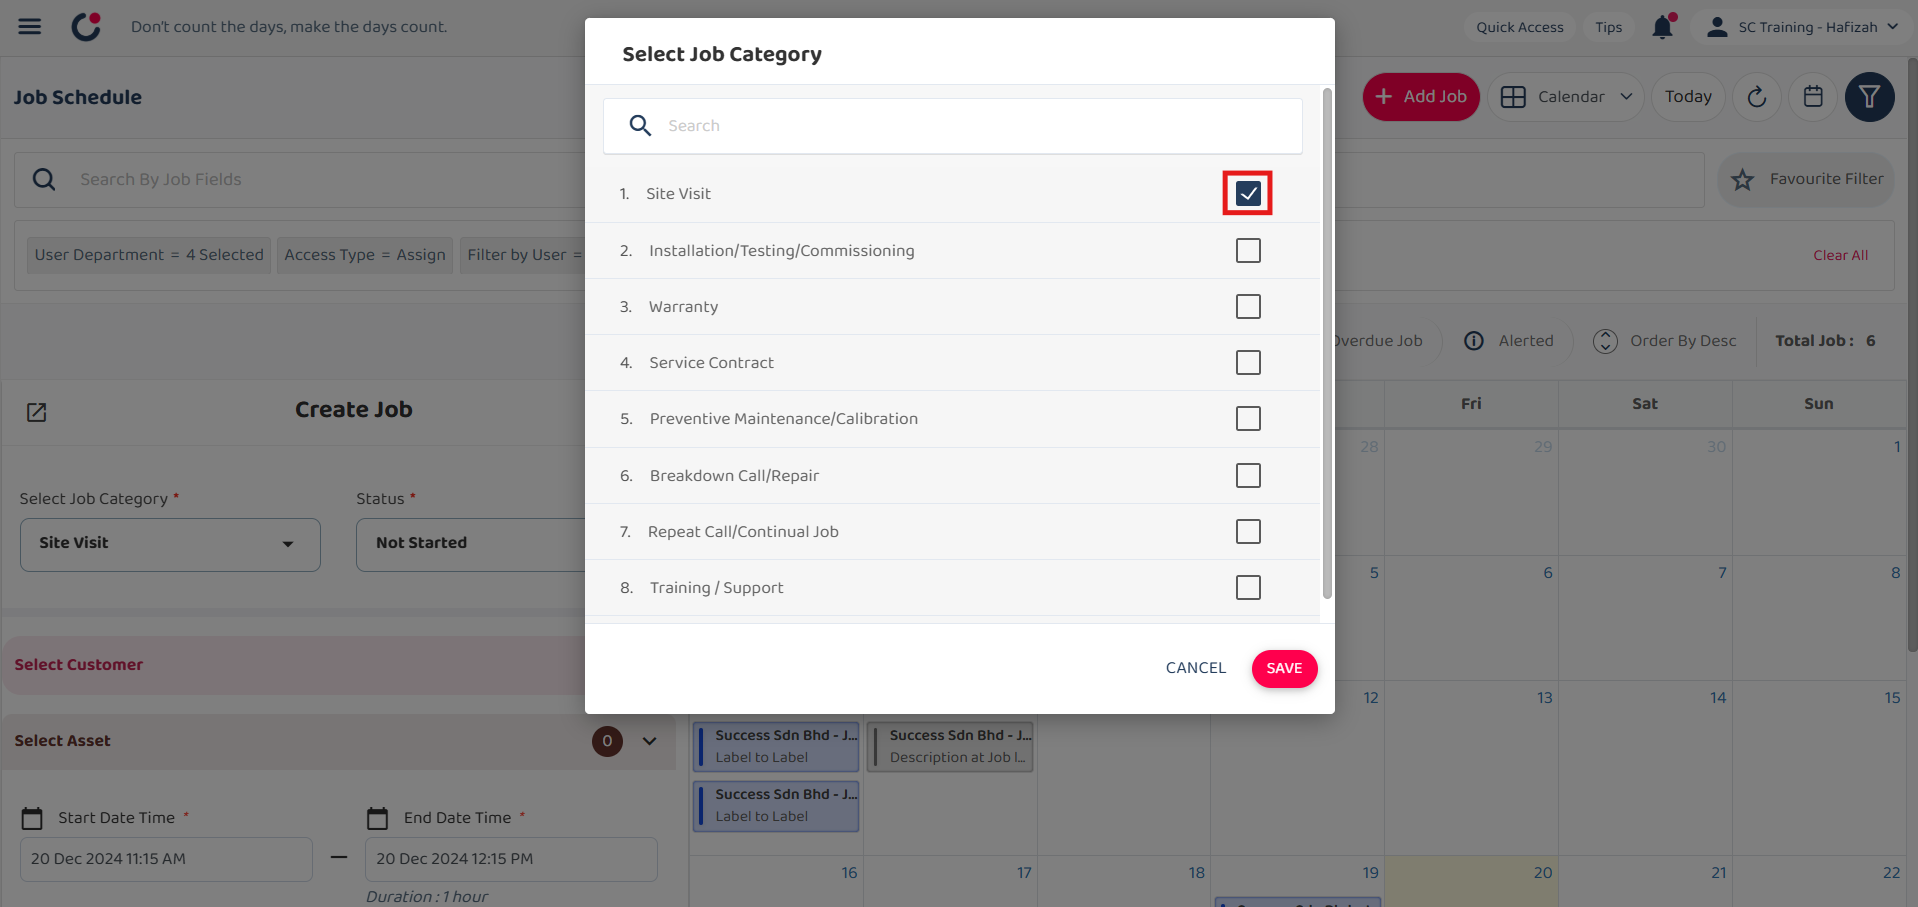
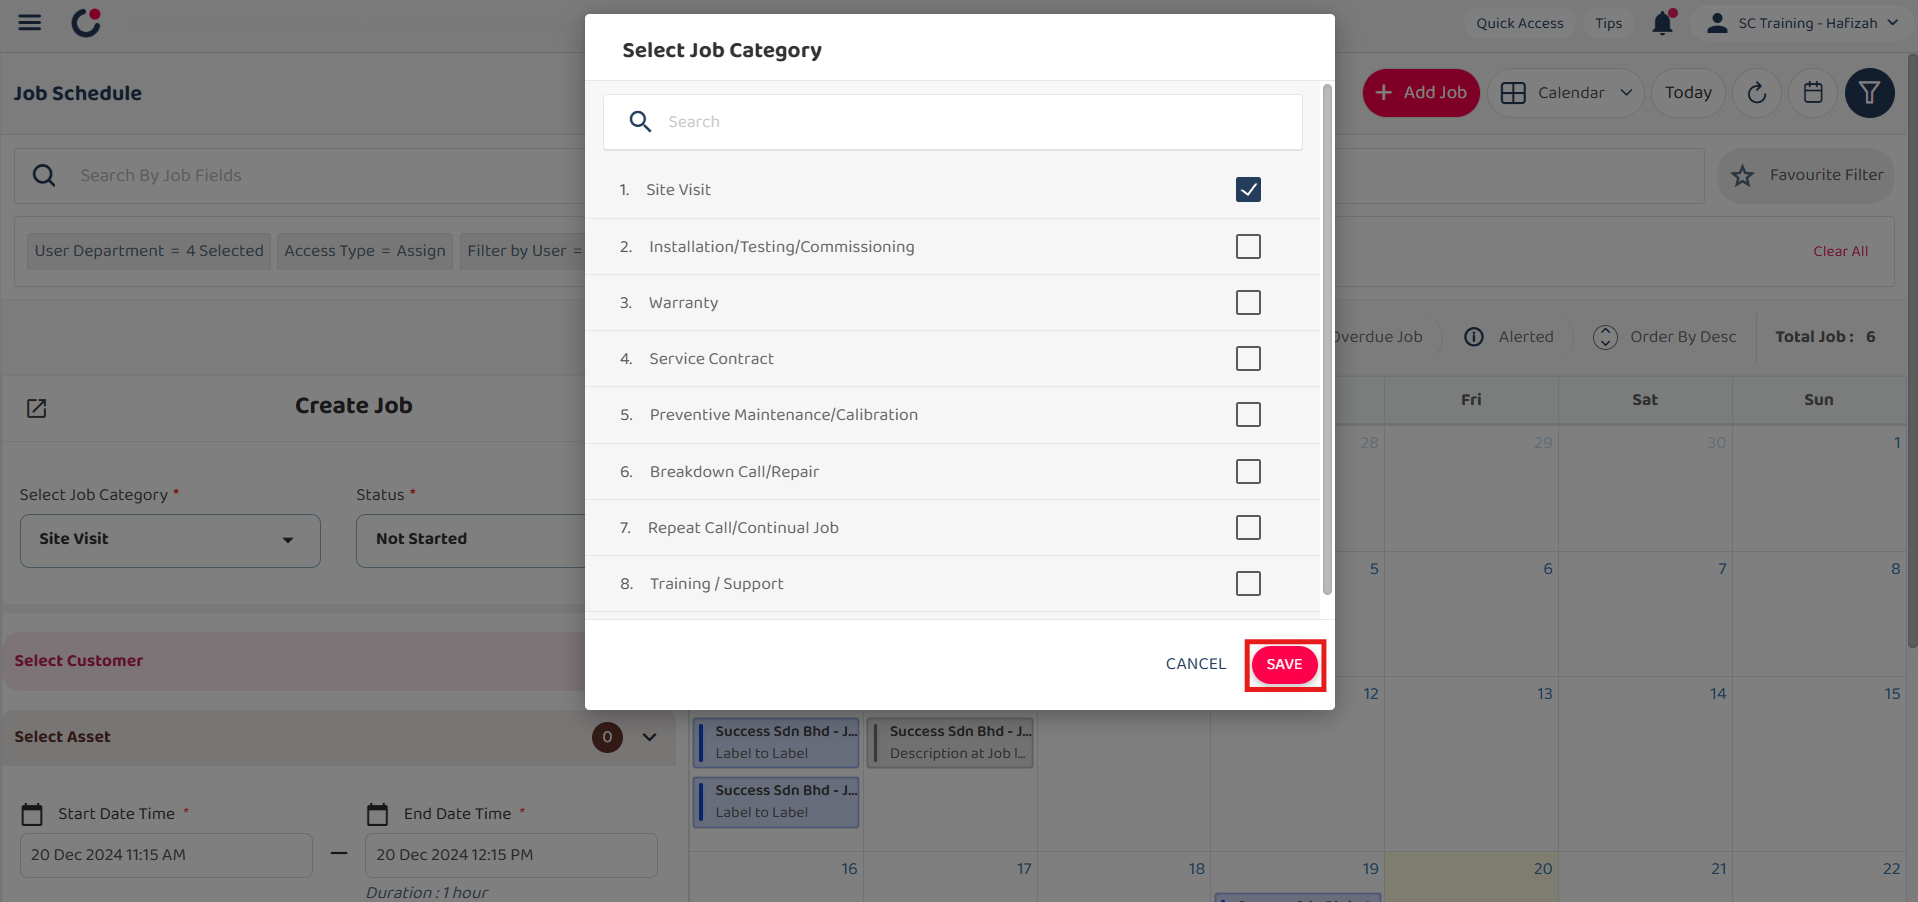
Select the job category.
-
Click on the “Save” button.
-
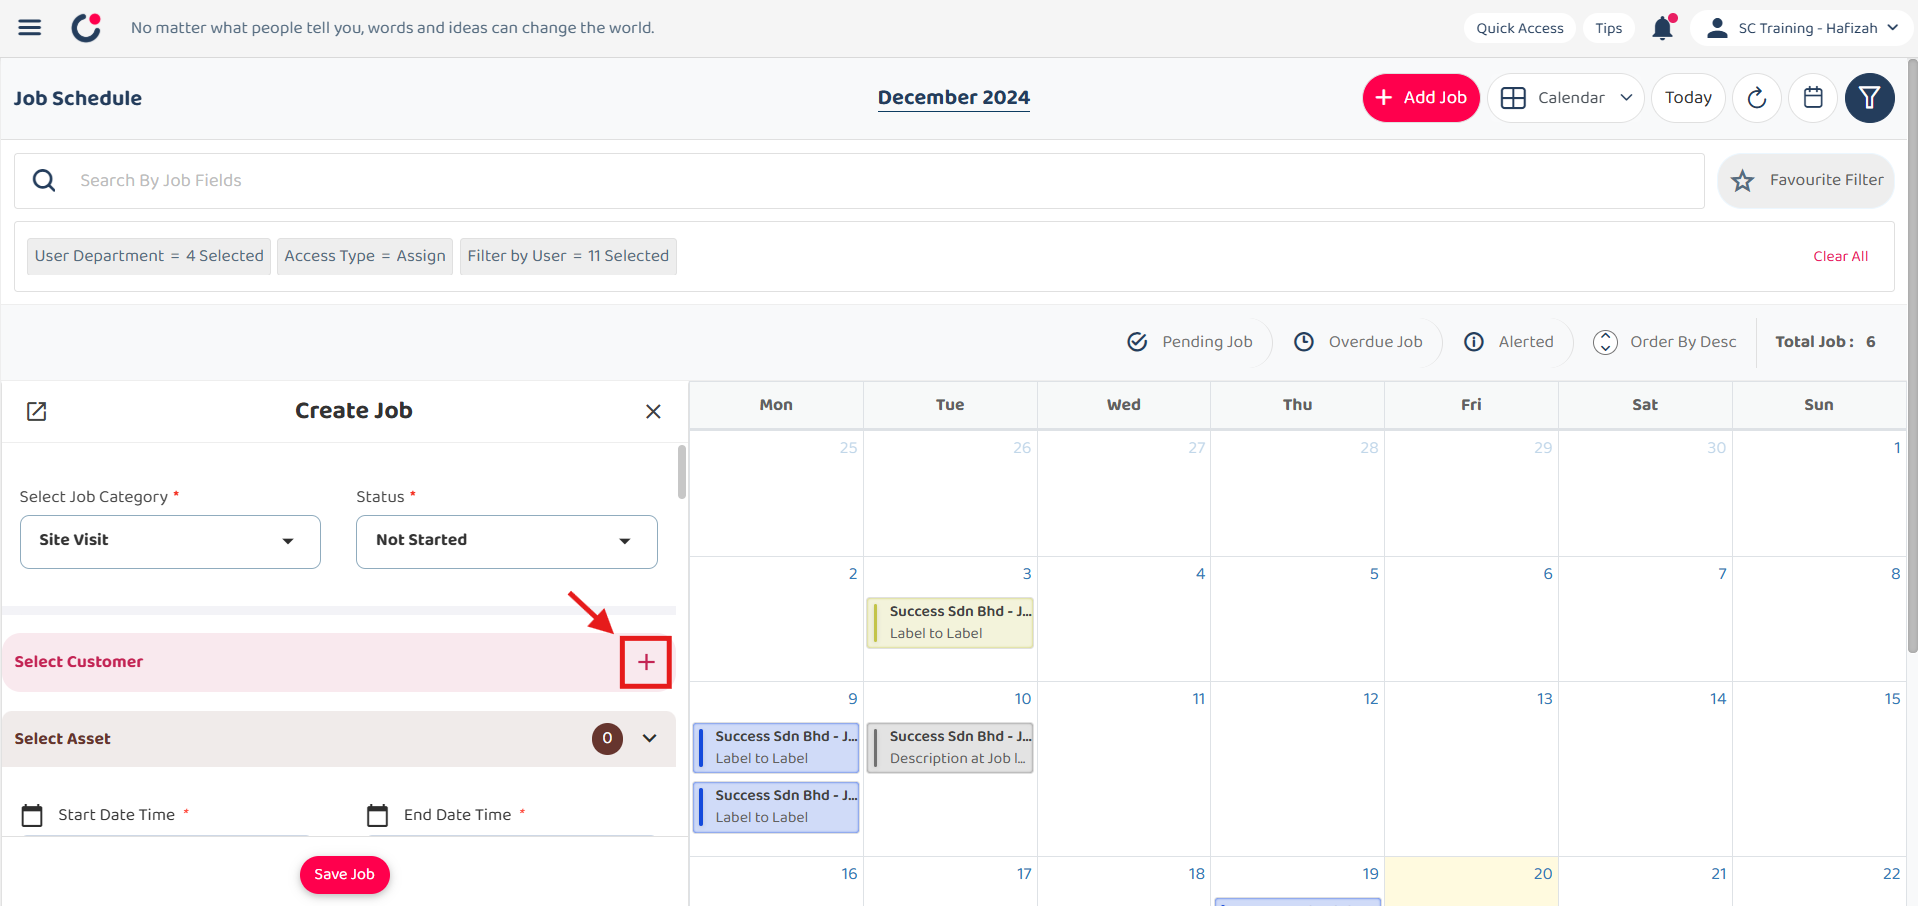
Click on the “+” button to select customer for the job.
-
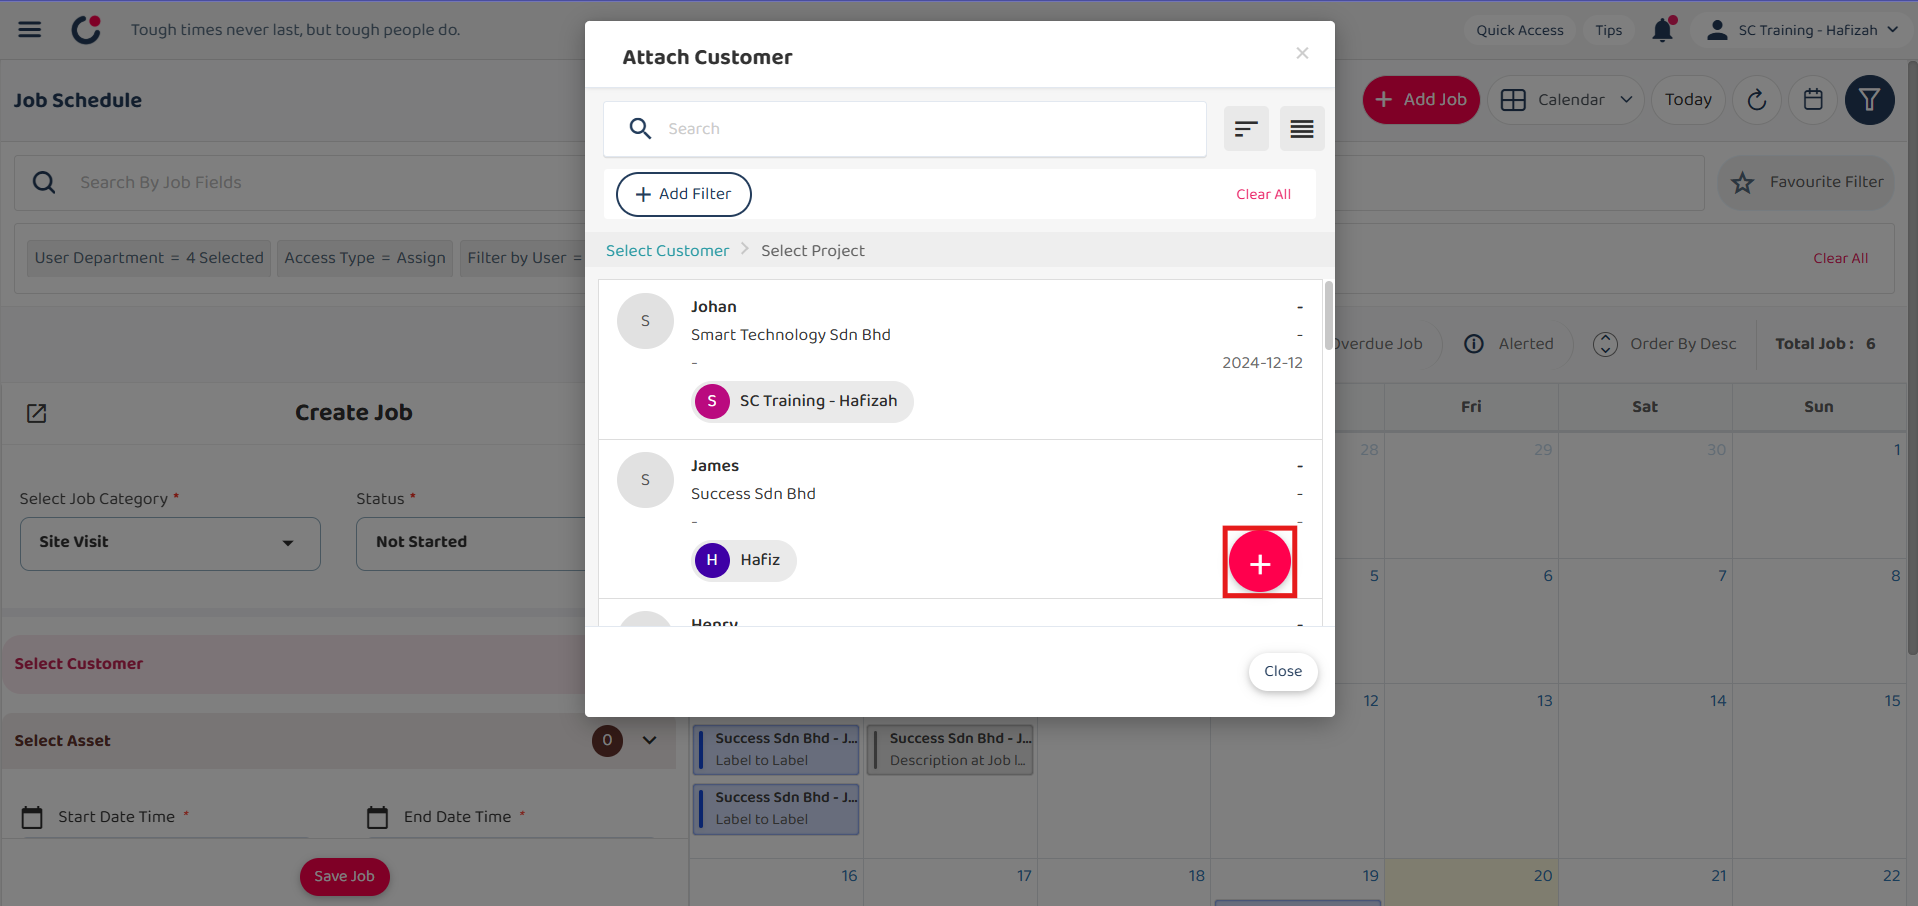
Click “+” to add new customer.
-
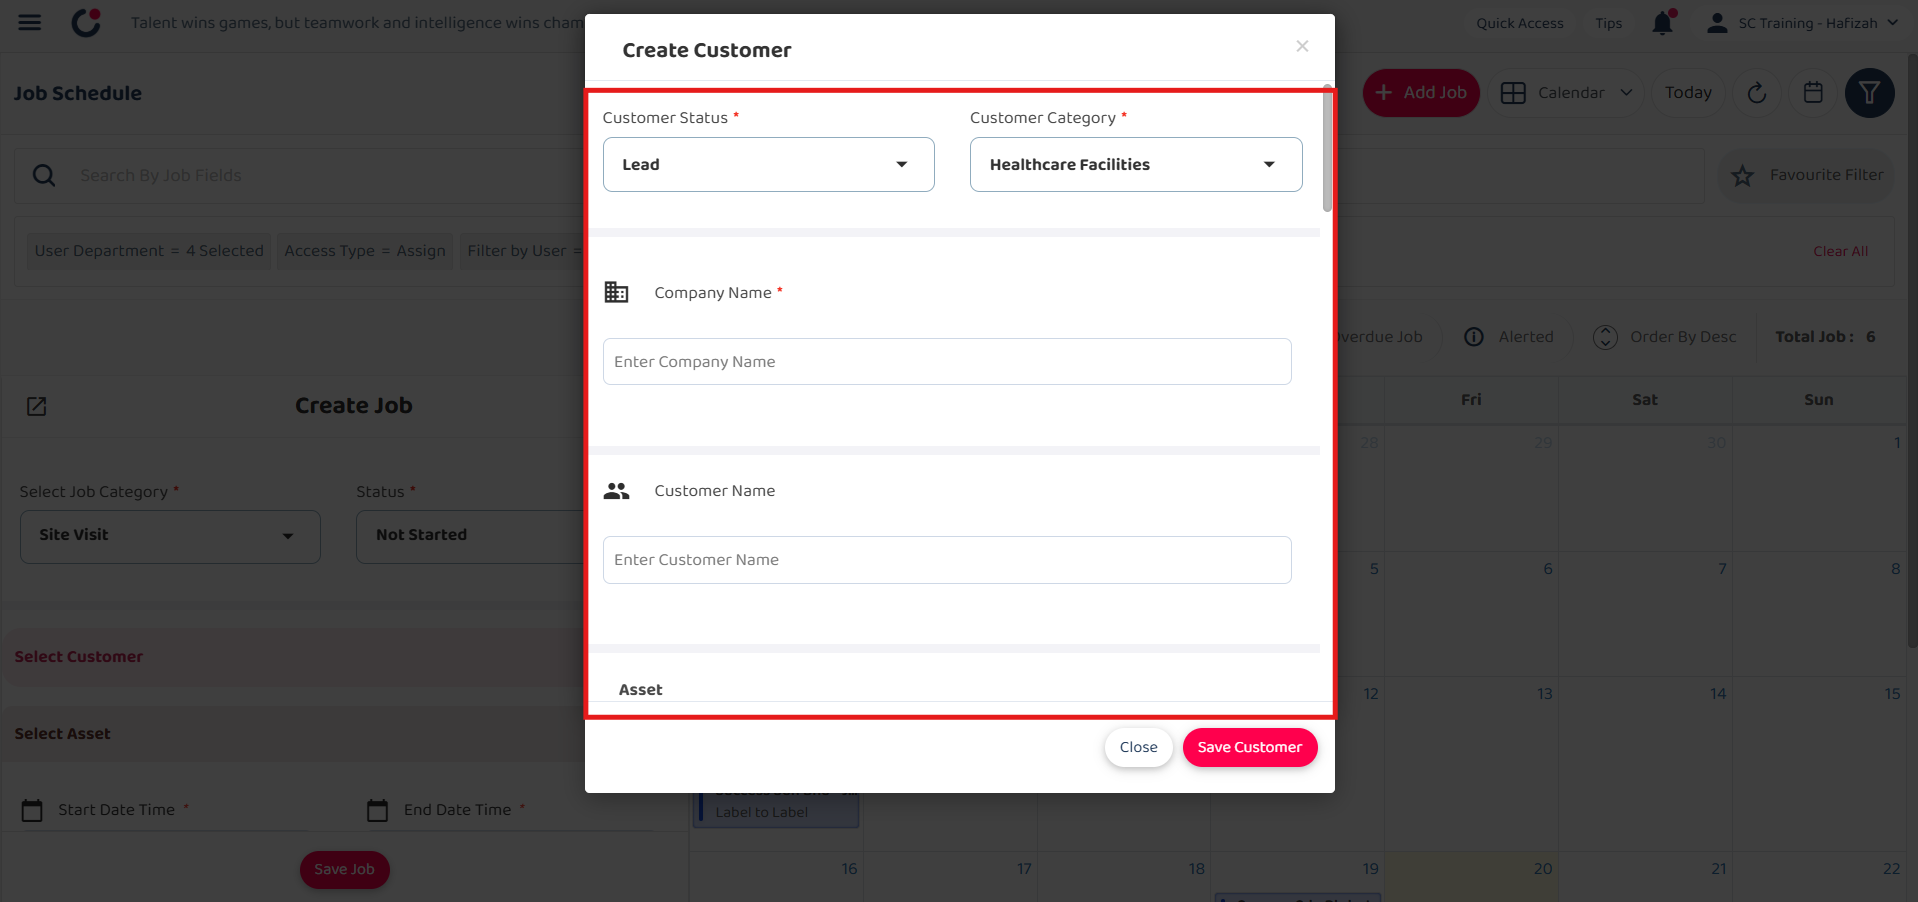
Fill out the details of the new Customer. Available fields may differ depending on your company’s system setup.
Field Name Description Customer Status* Indicates the current status of the customer. Customer Category* Classifies the customer based on their type. Company Name* The official name of the customer’s company. Customer Name The full name of the customer contact person. Asset Any asset registered in the system associated with the customer. Assigned User The user responsible for managing this customer. Customer Phone The customer’s contact phone number. Customer Email The customer’s email address. Customer Address The physical address of the customer. *Note: Fields marked with an asterisk ( * ) are required.
-
Click on the “Save Customer” button.
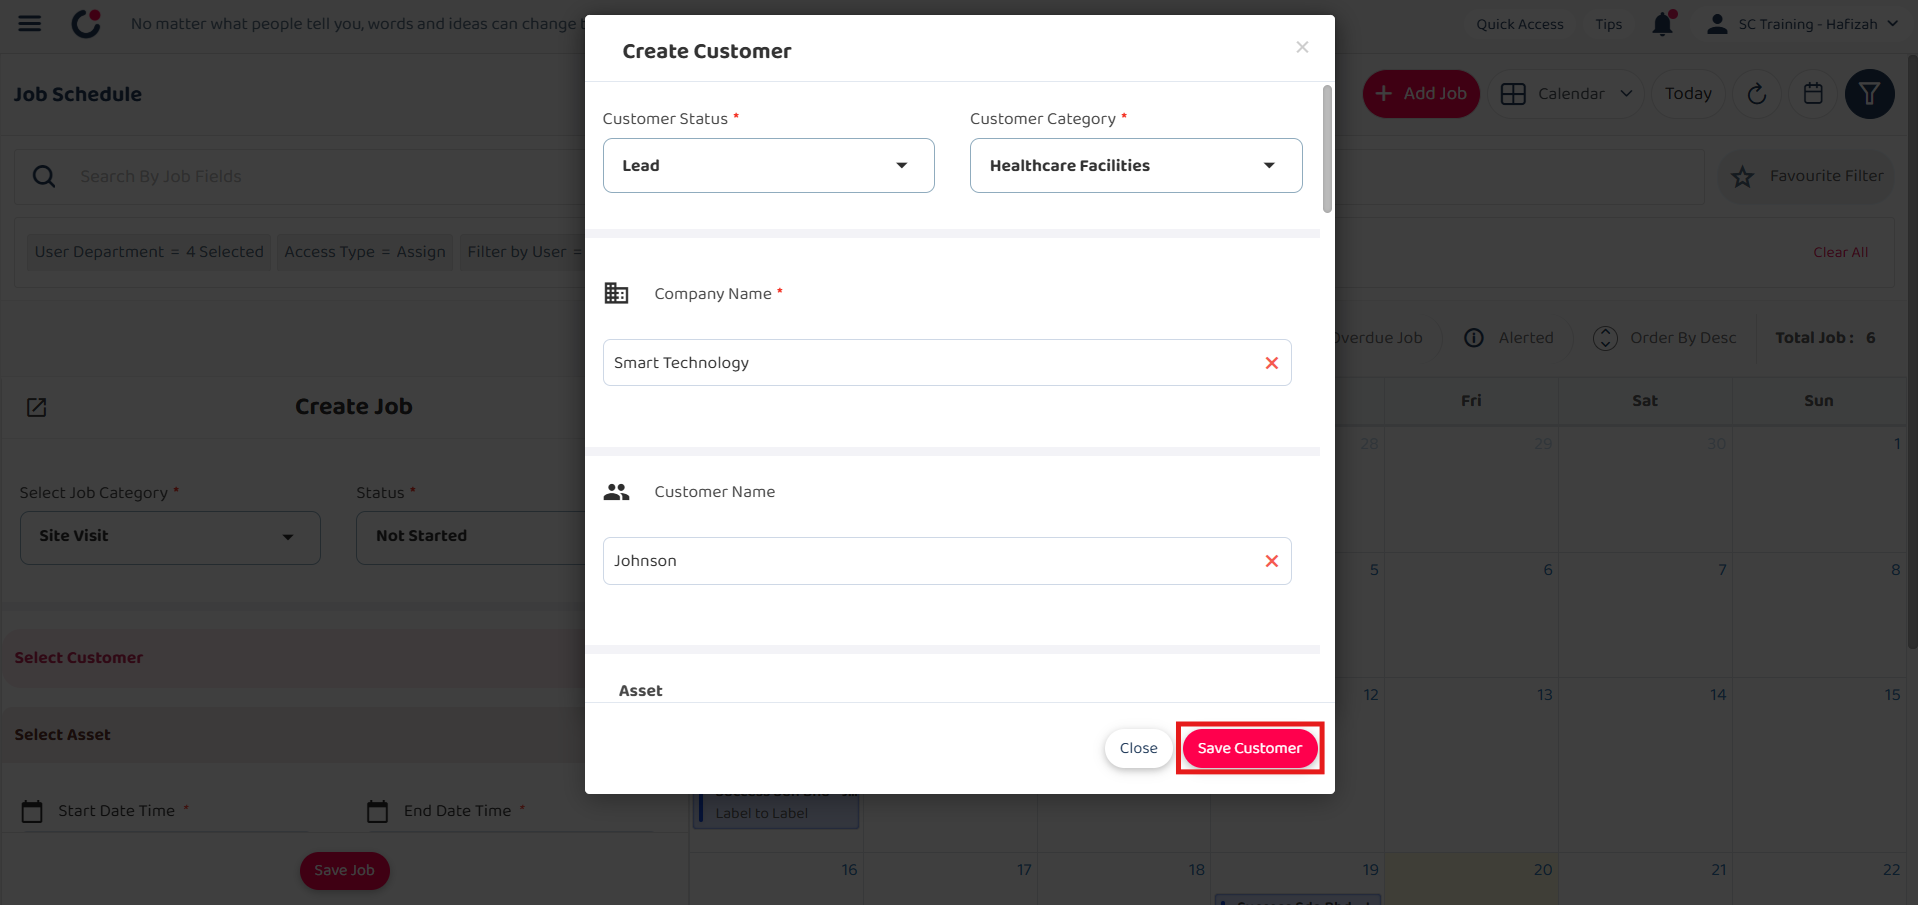
-
Click “OK” and the new customer is added successfully. You may continue with creating a new Job.
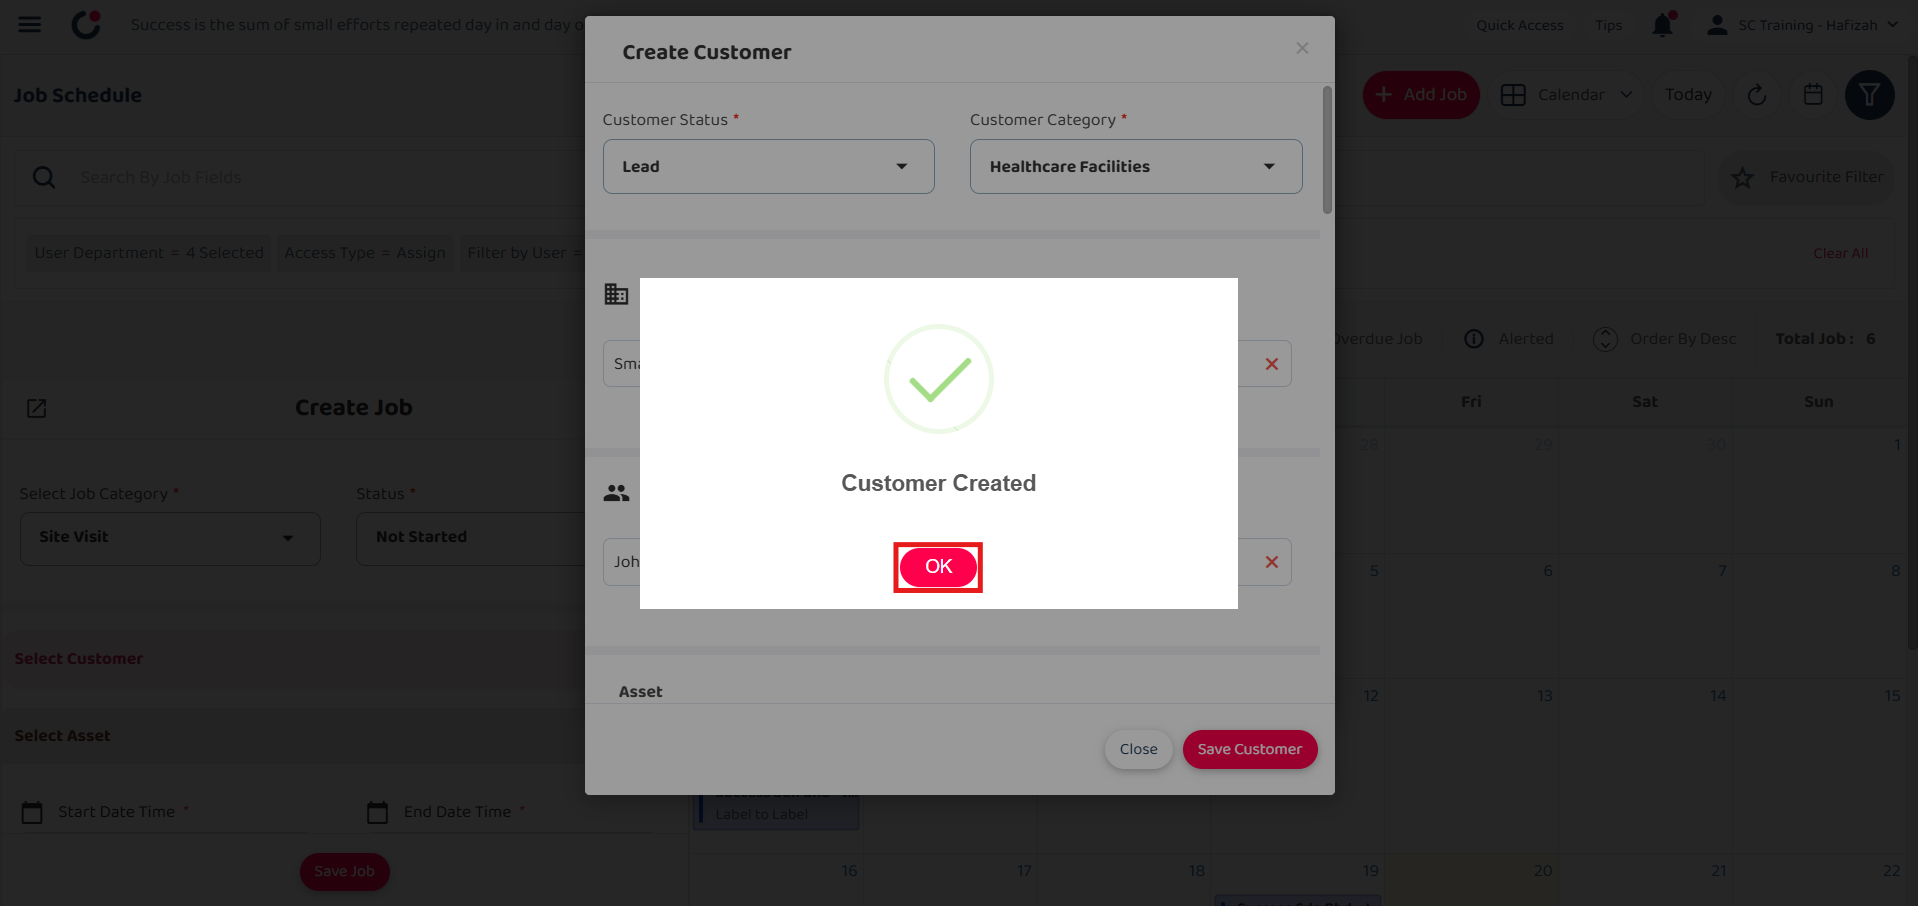
From Public Form
-
At the desktop site’s navigation bar, go to Template Settings > Public Form Templates.
Open Public Form Templates Page Here: https://system.caction.com/PublicForm/TemplateSetting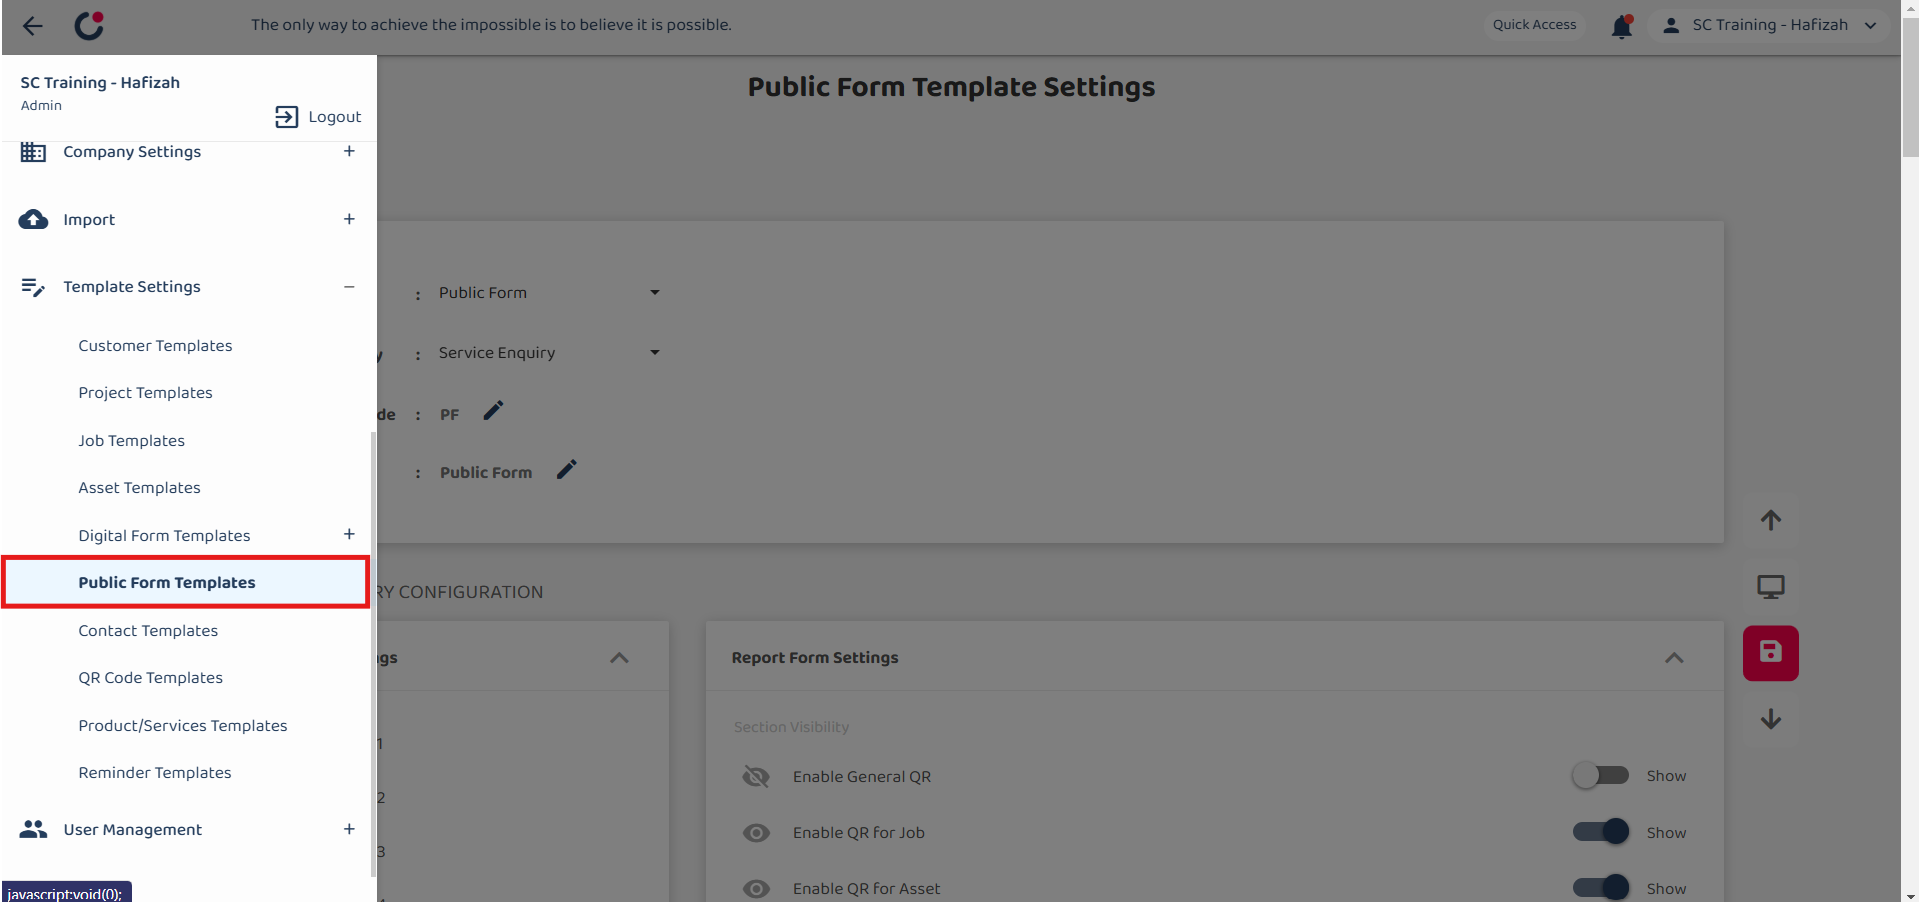
-
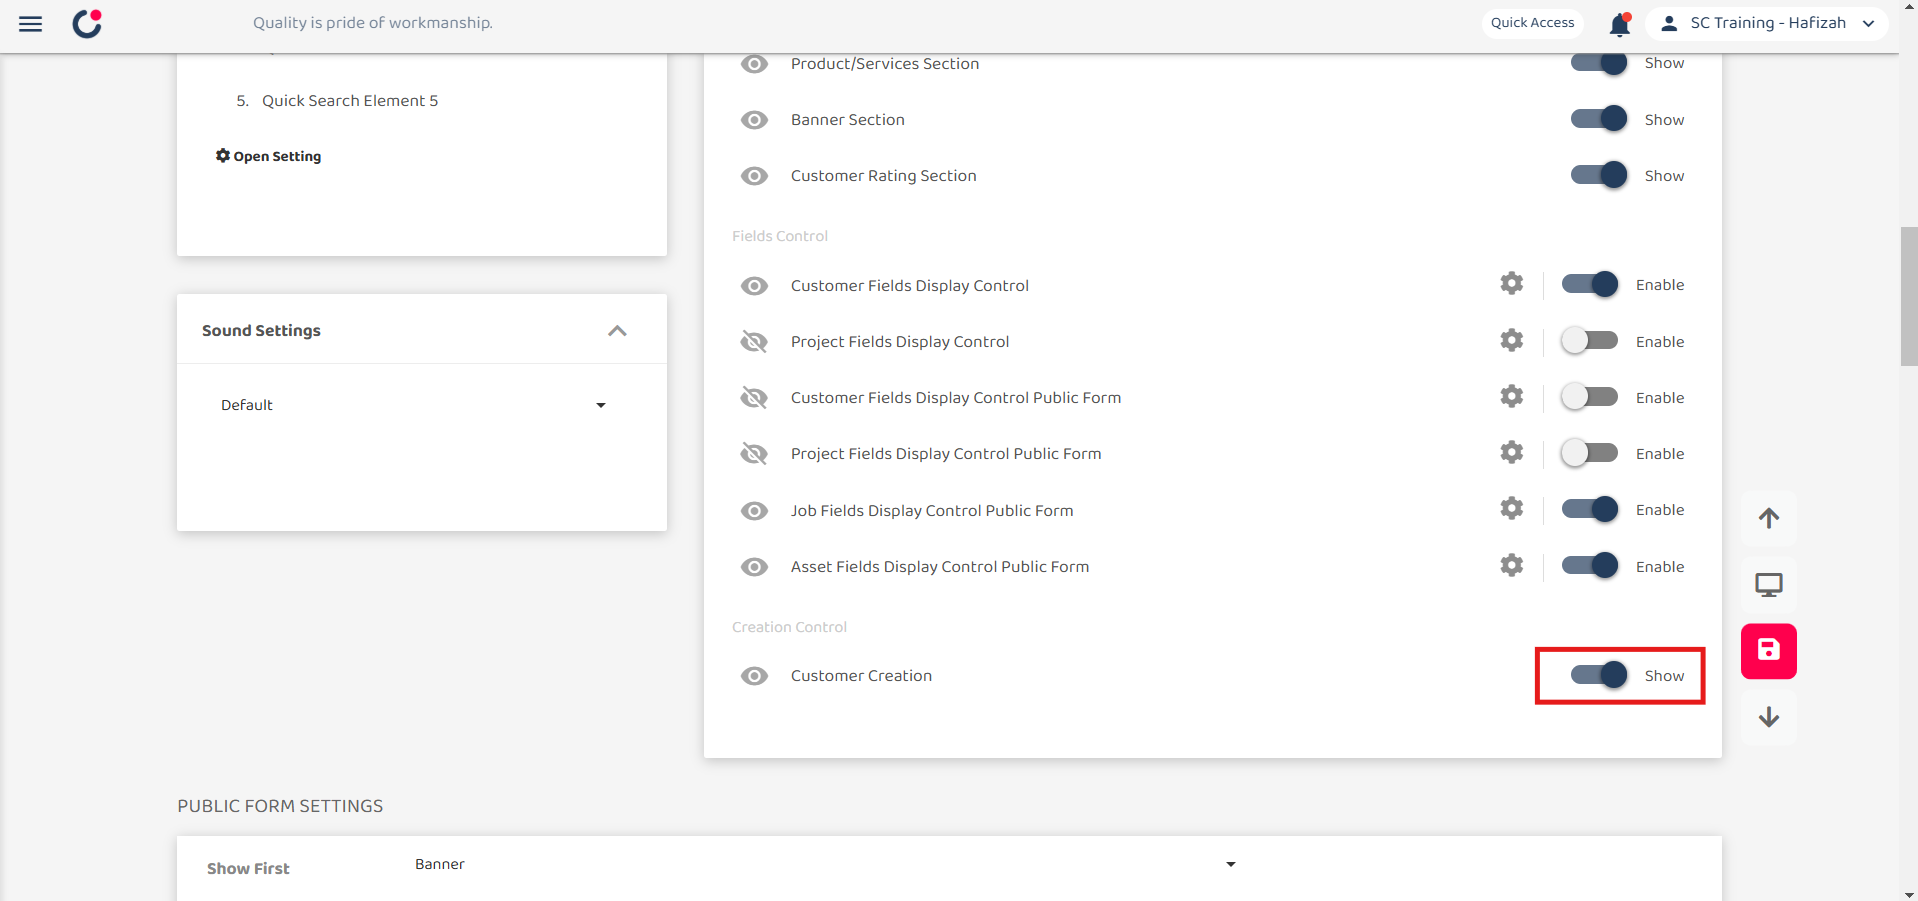
Scroll down to “Creation Control”.
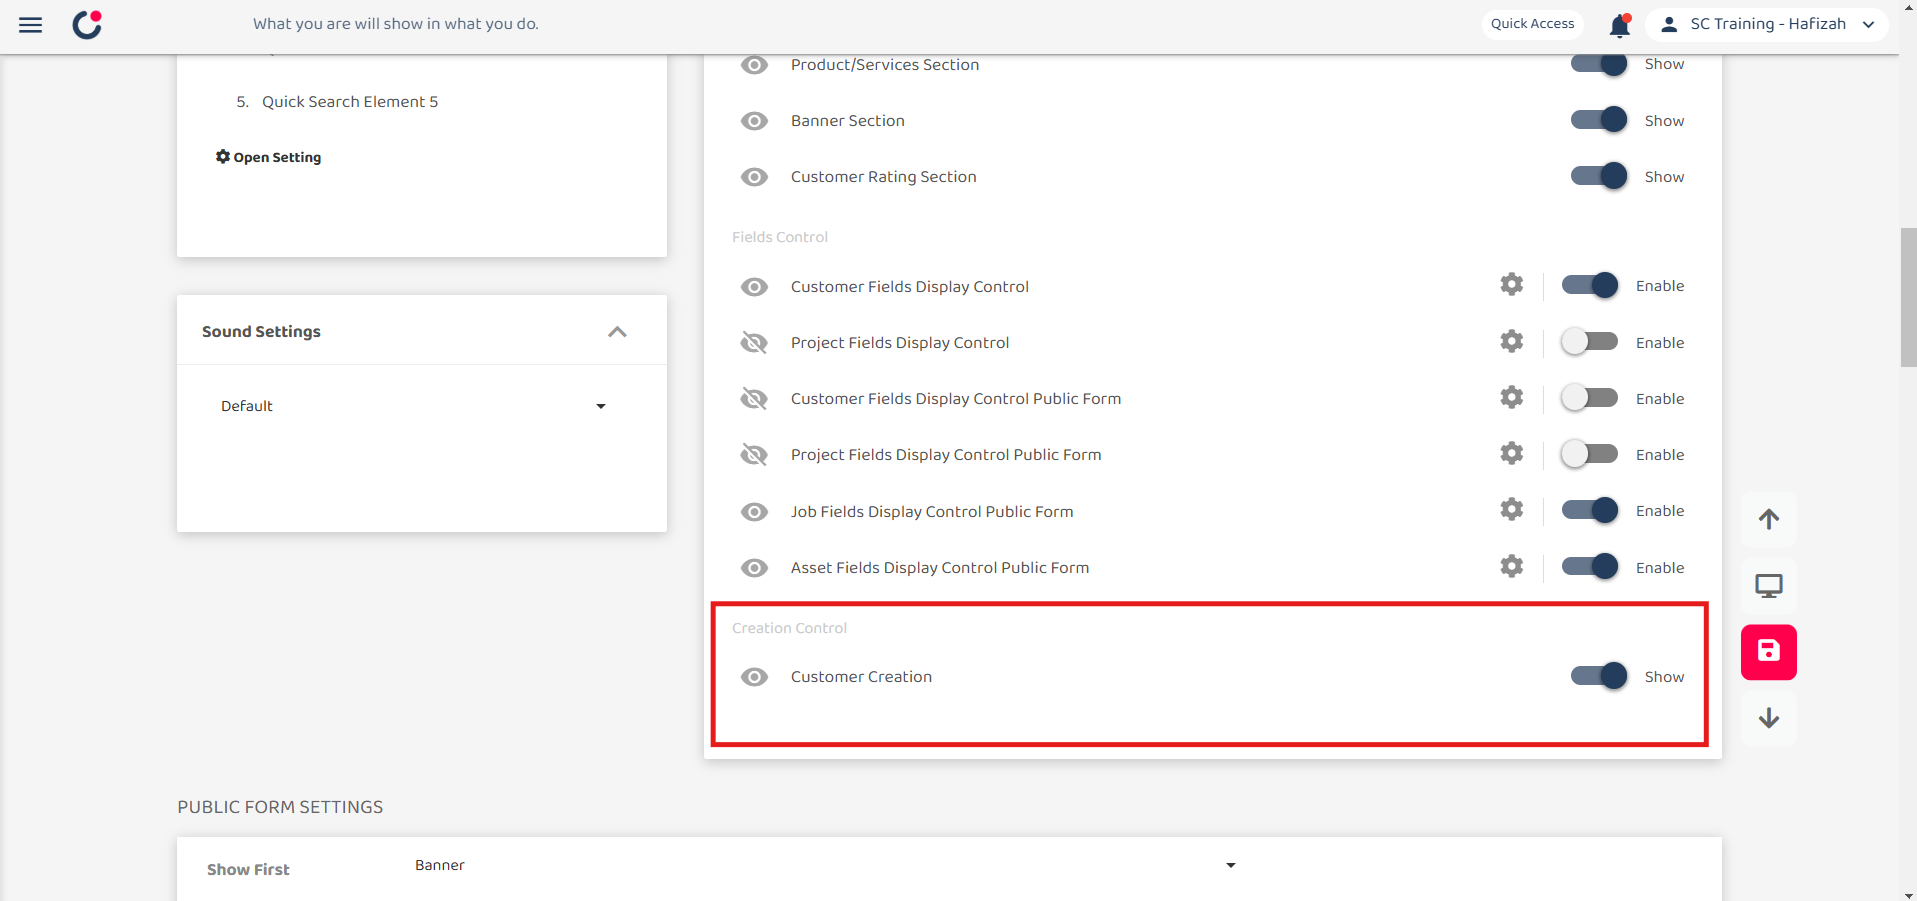
-
Make sure the “Customer Creation” is enabled as below.
-
At the desktop’s navigation bar, go to Business Reports > Public Form Report.
Open Public Form Report Page Here: https://system.caction.com/reports/publicform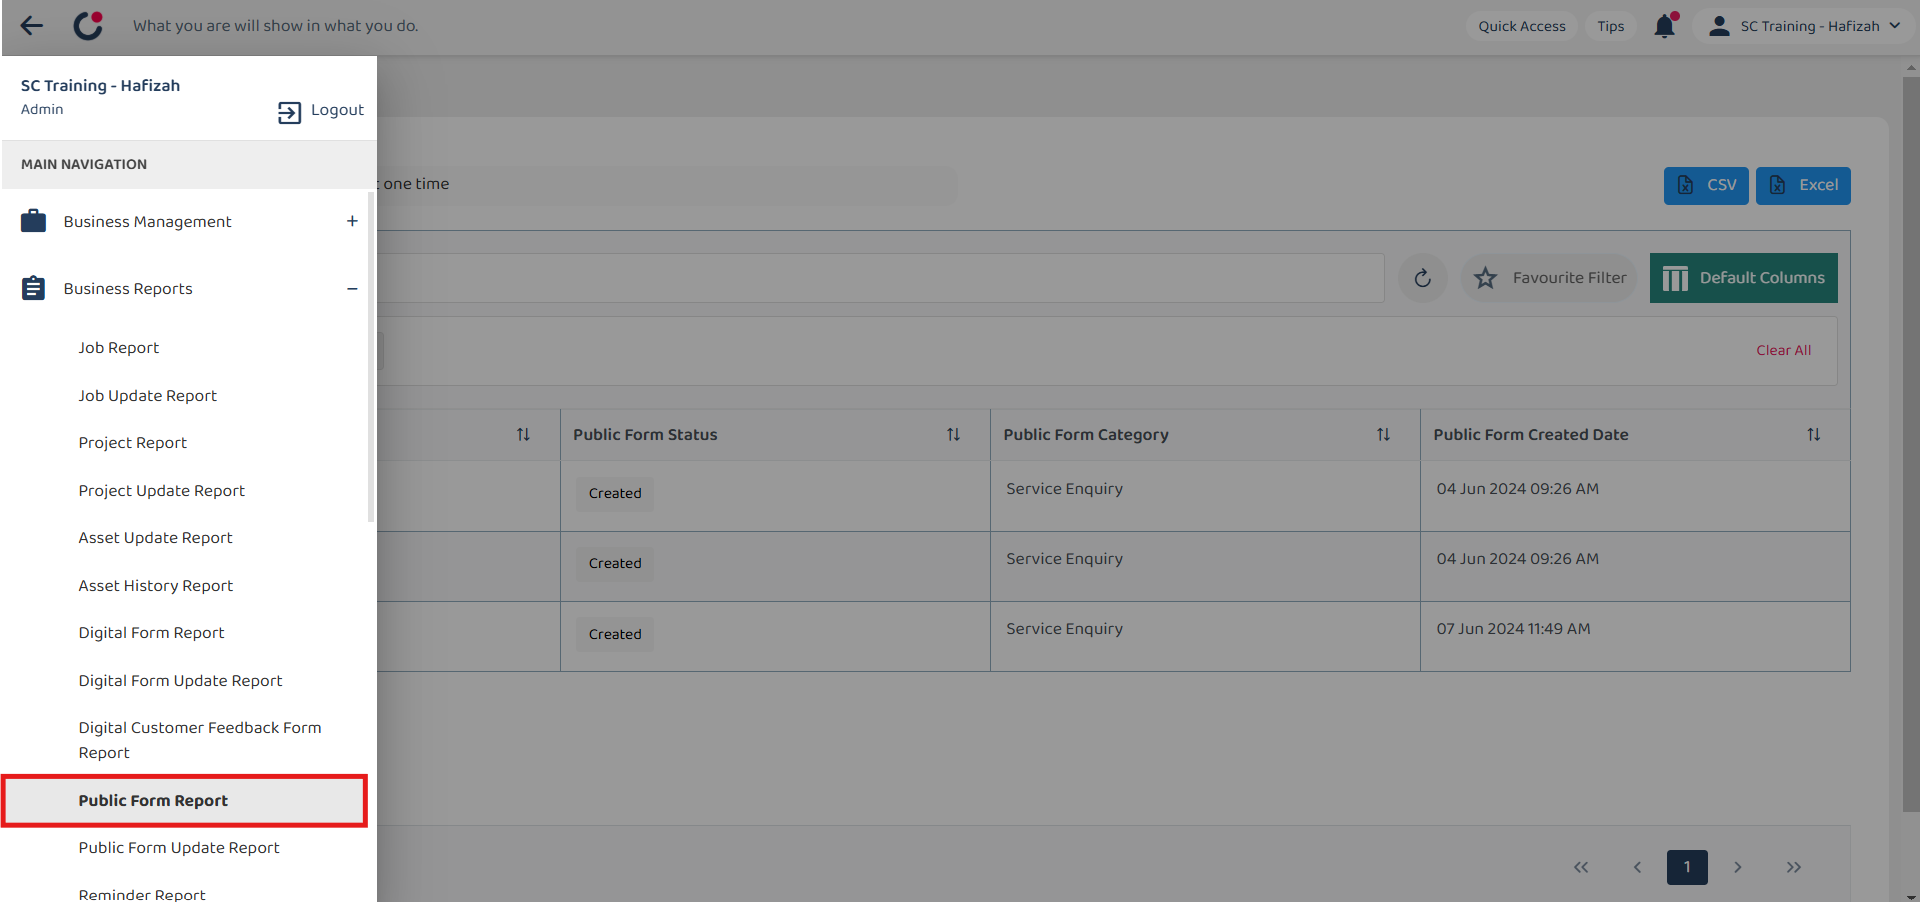
-
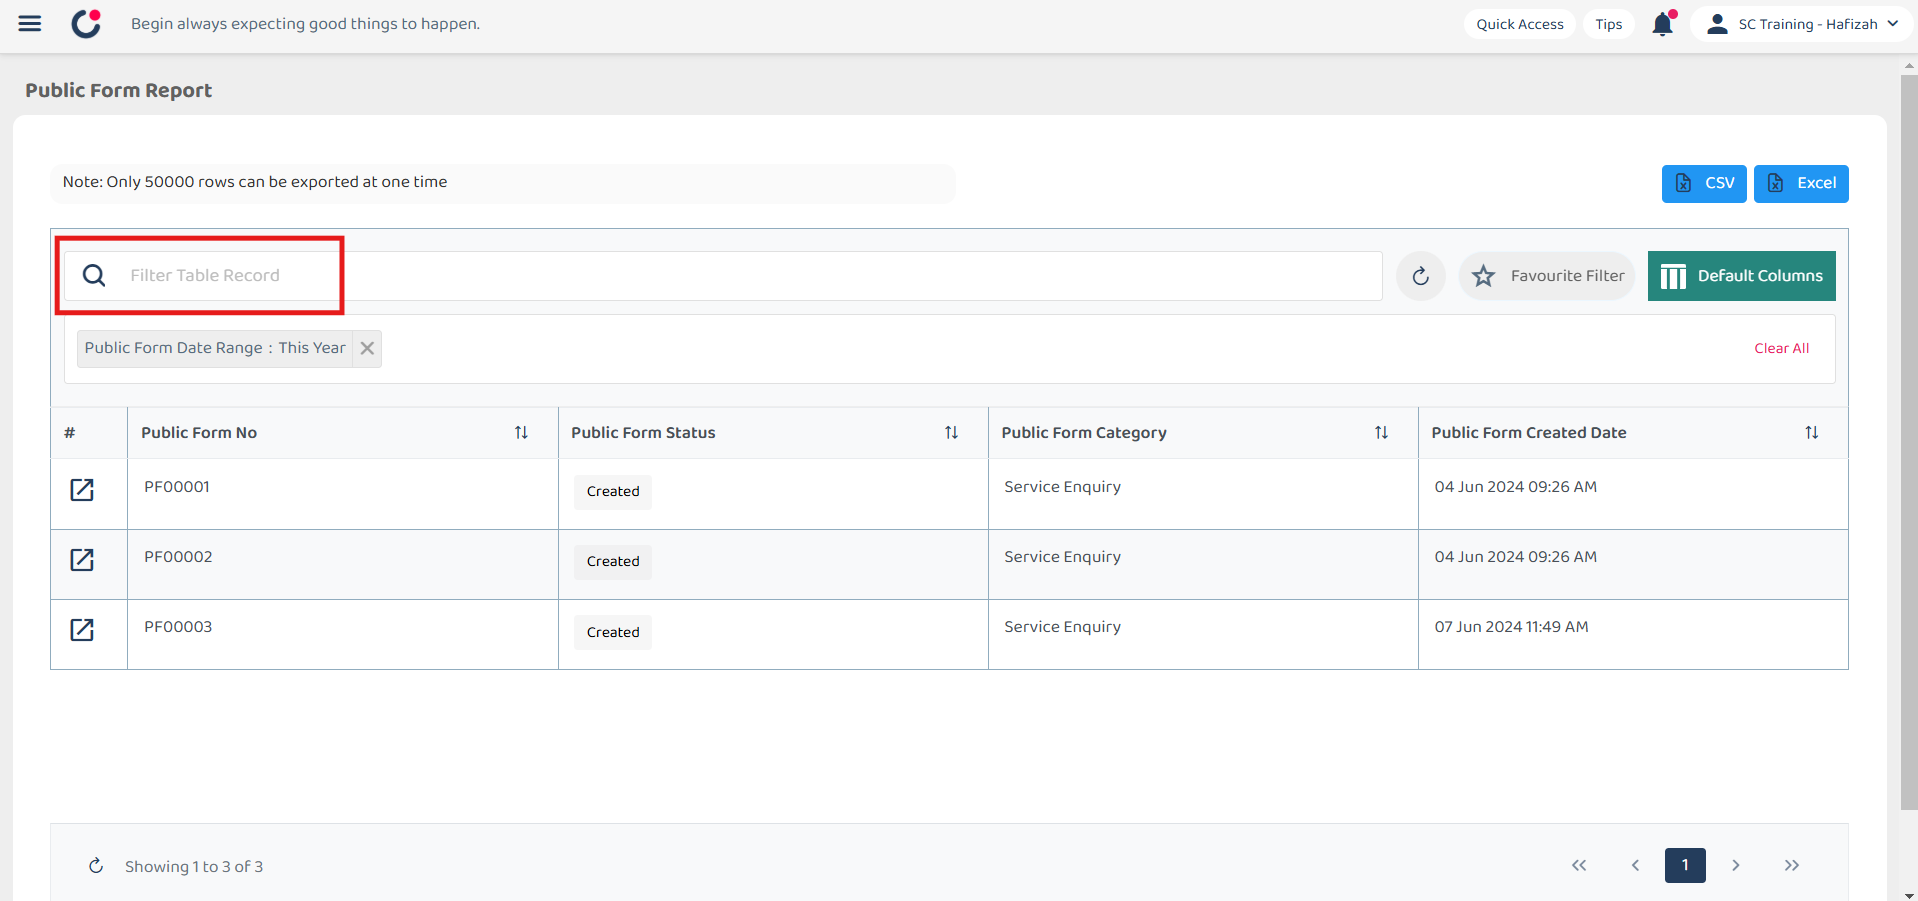
Use filter to search the Public Form you want.
-
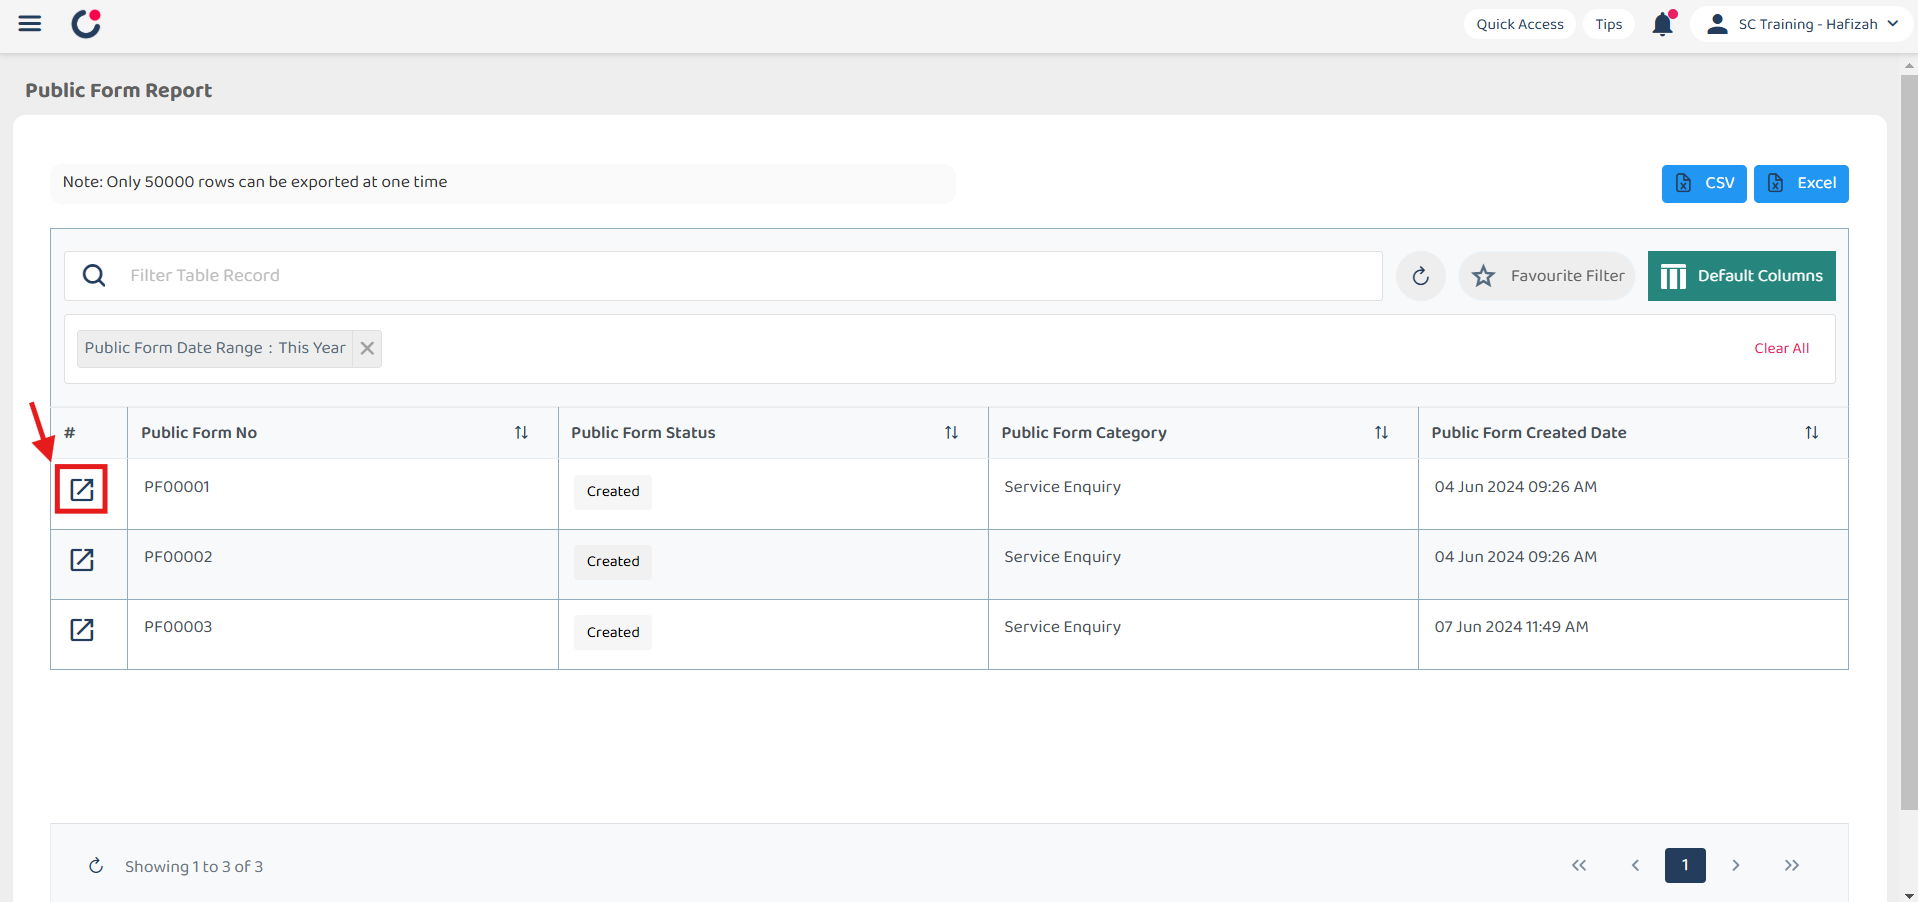
Click the expand icon to open the Public Form details page.
-
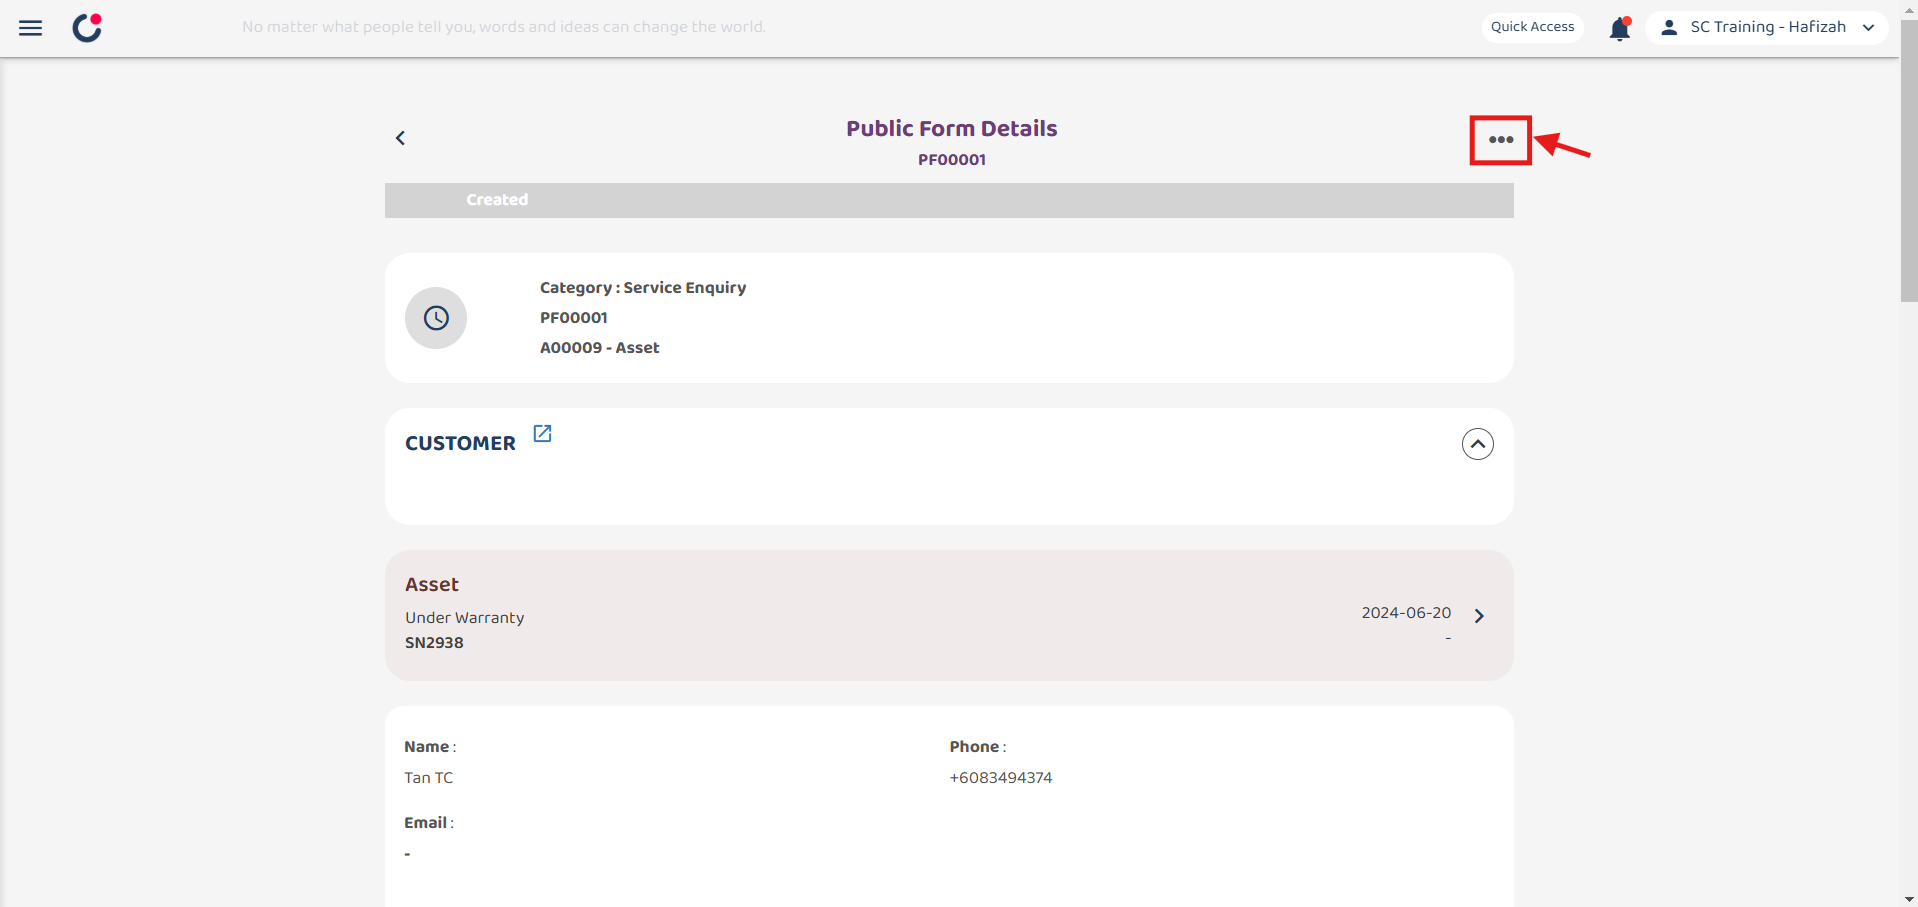
Click “three dots” icon on the top right corner.
-
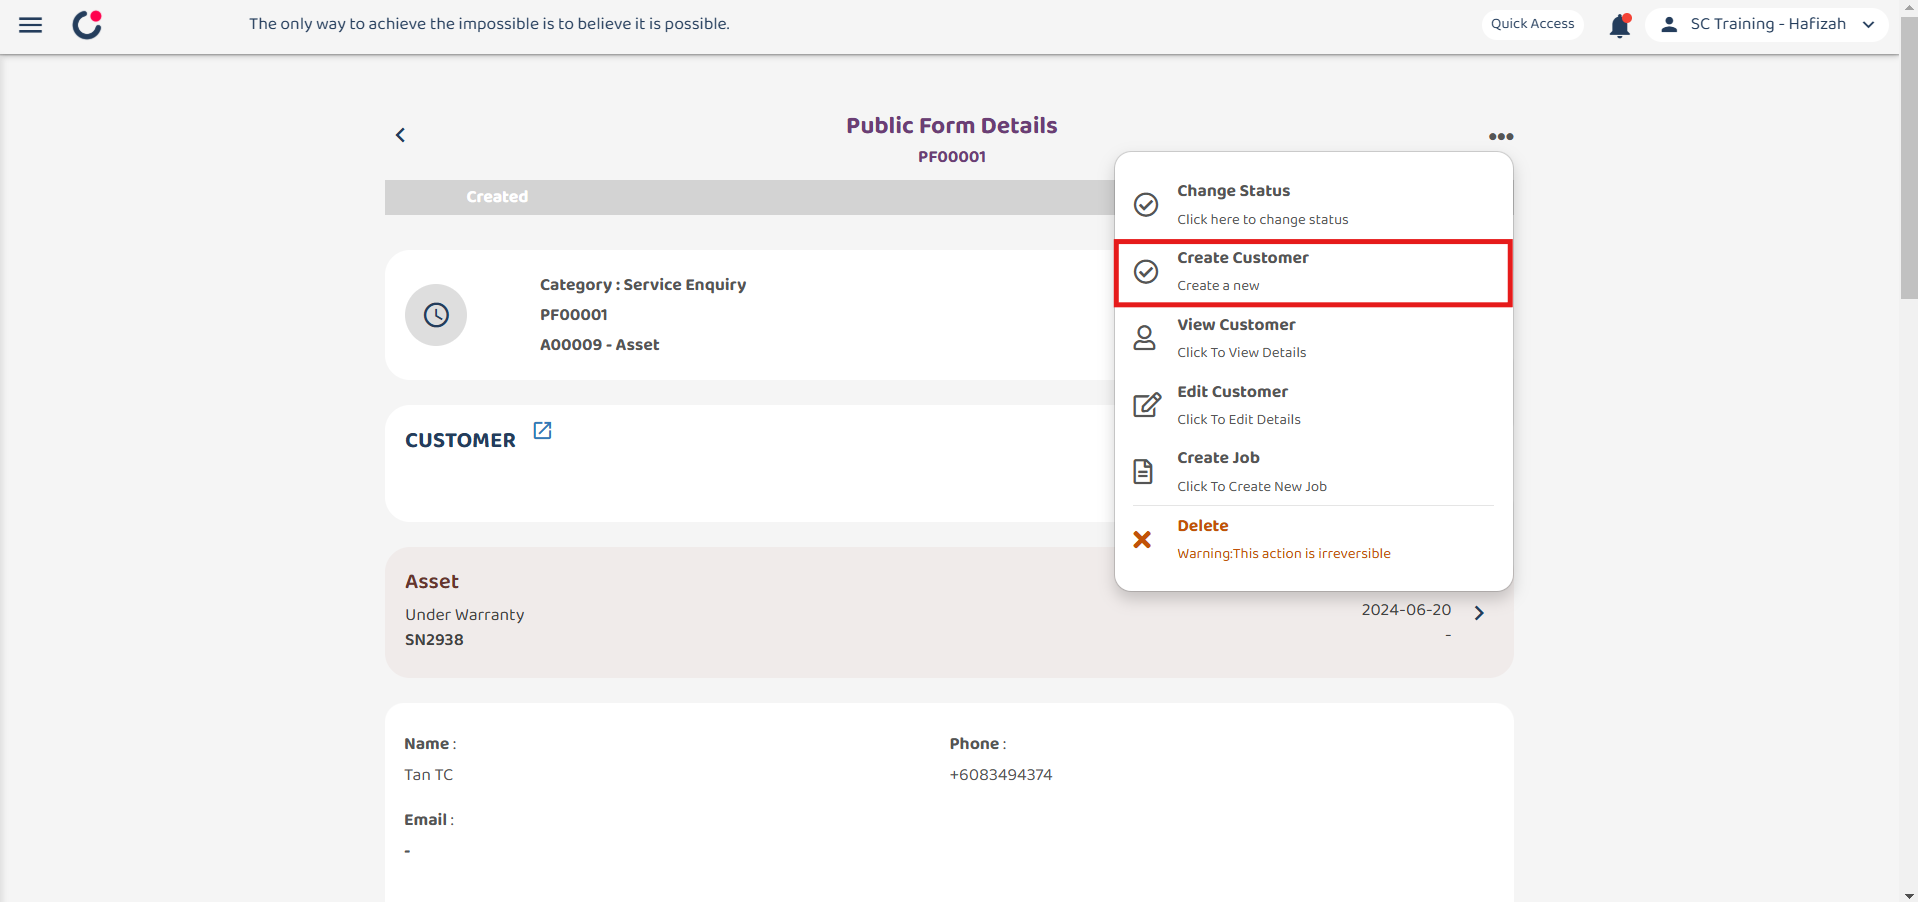
Click “Create Customer” to create a new customer.
-
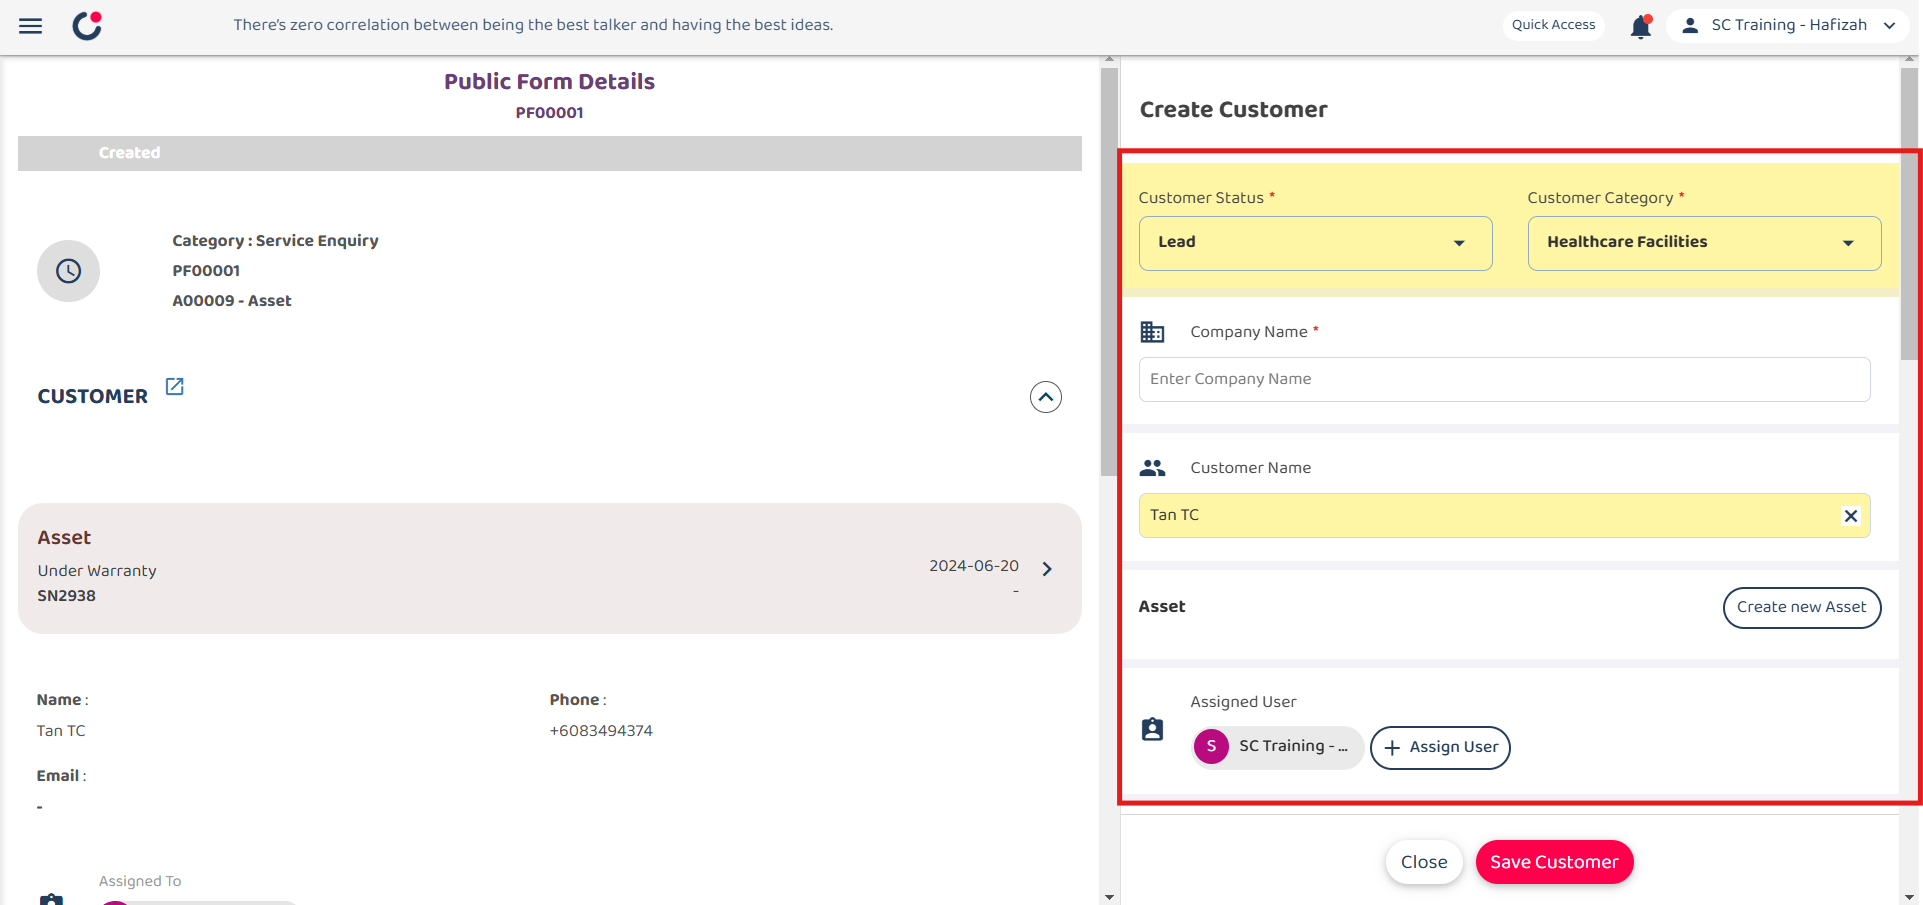
Fill out the details of the new Customer. Available fields may differ depending on your company’s system setup.
Field Name Description Customer Status* Indicates the current status of the customer. Customer Category* Classifies the customer based on their type. Company Name* The official name of the customer’s company. Customer Name The full name of the customer contact person. Asset Any asset registered in the system associated with the customer. Assigned User The user responsible for managing this customer. Customer Phone The customer’s contact phone number. Customer Email The customer’s email address. Customer Address The physical address of the customer. *Note: Fields marked with an asterisk ( * ) are required.
-
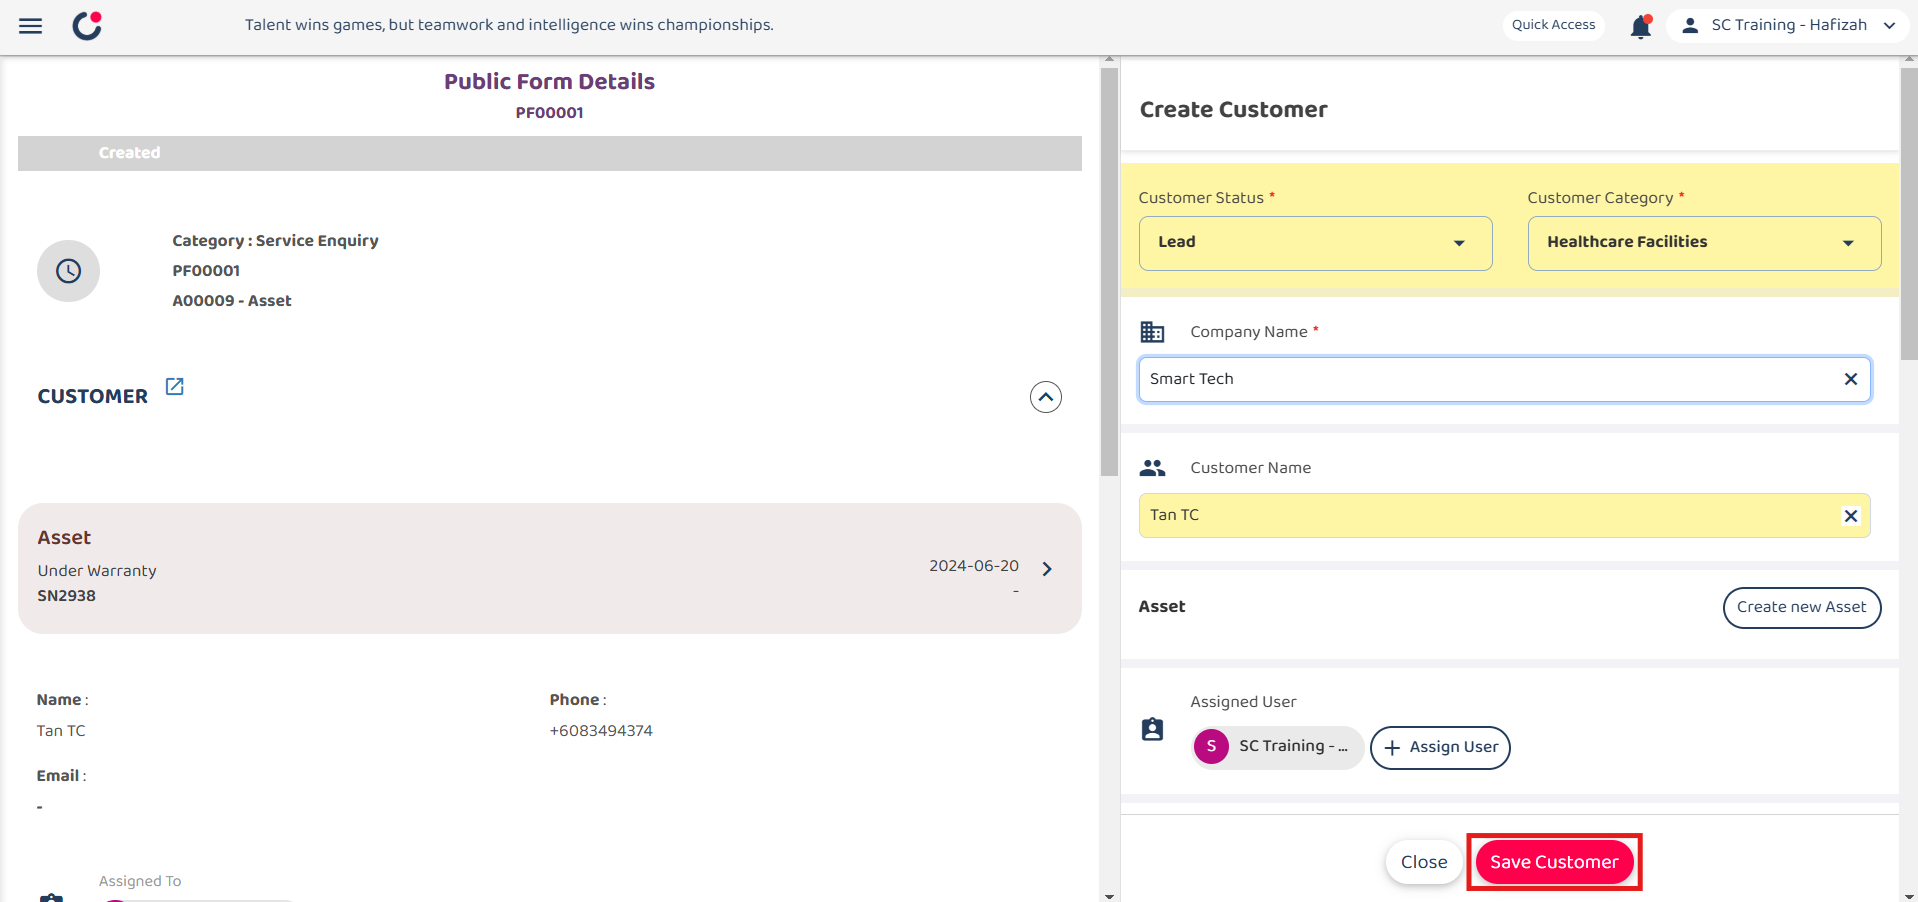
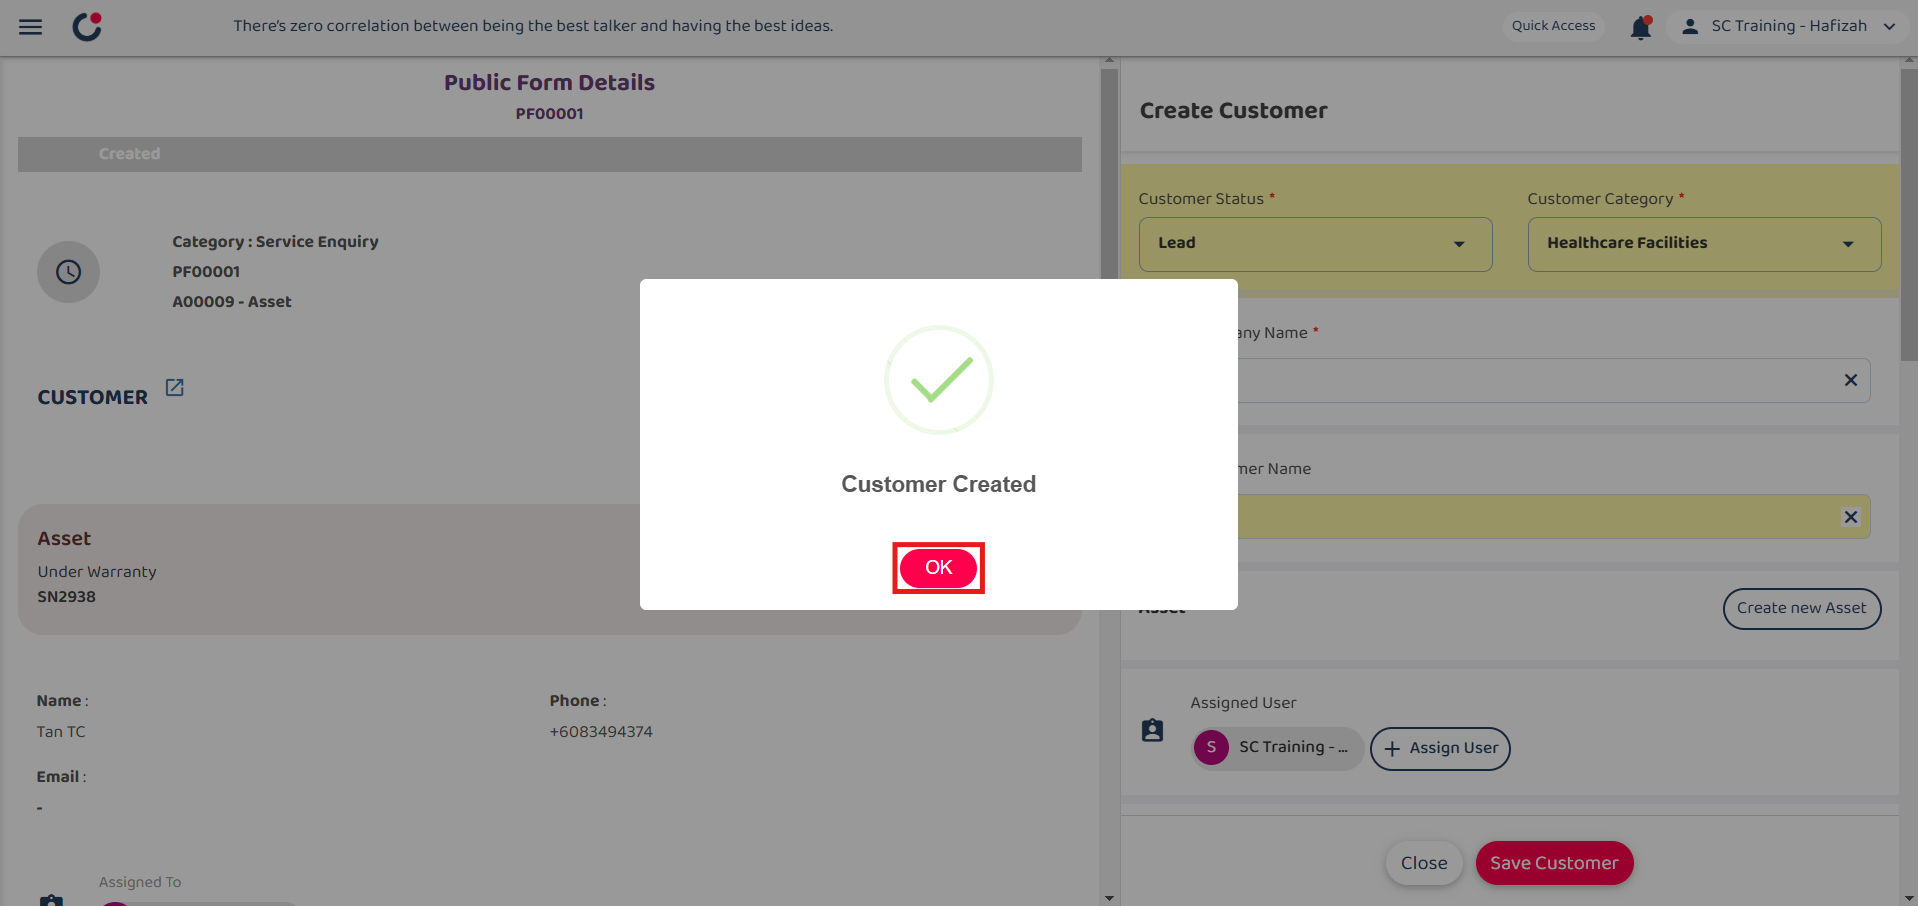
Click on the “Save Customer” button.
-
Click “OK” and the new customer is added successfully. You may continue with creating a new Job.
Using Mobile
From Customer List
-
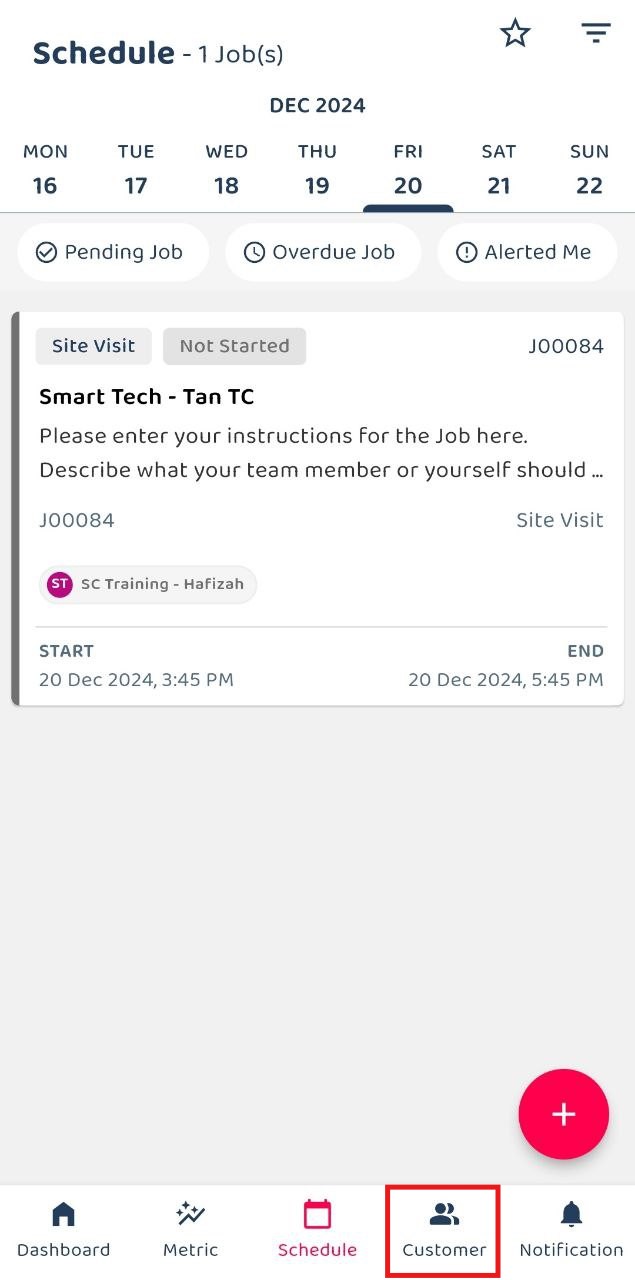
At the mobile app’s navigation bar, go to Customer.
-
Click on the “+” button to add new customer.
*Note: If you do not see the “+” button, you may need to request permission or help from your Admin to register new Customer.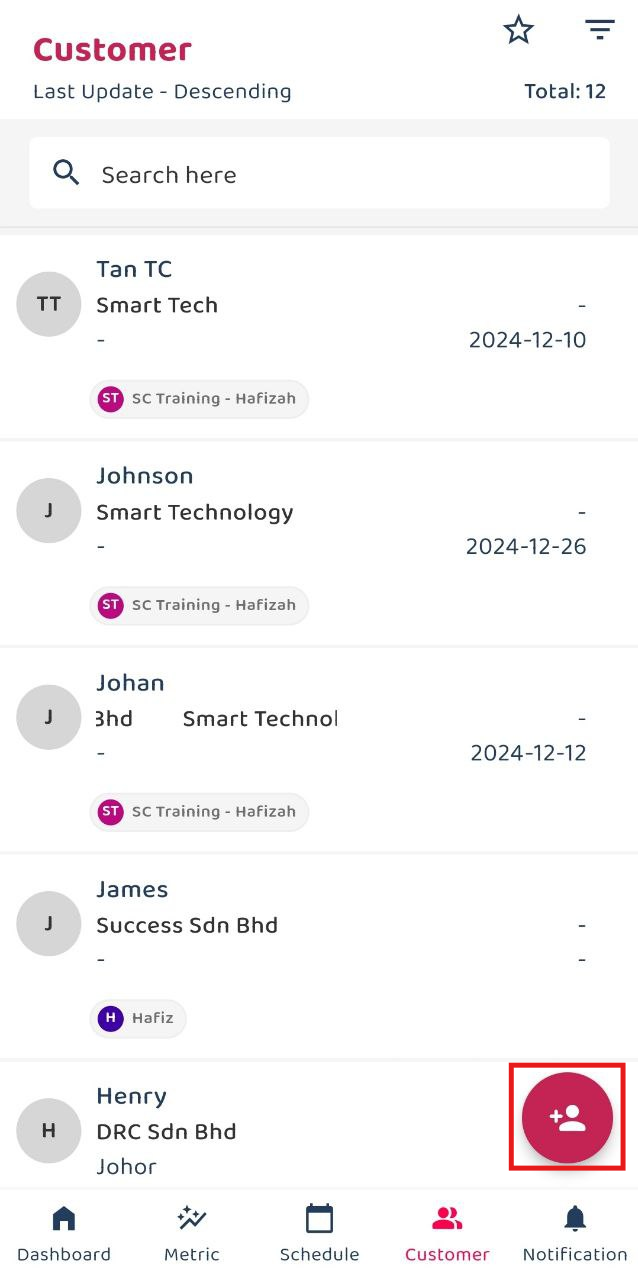
-
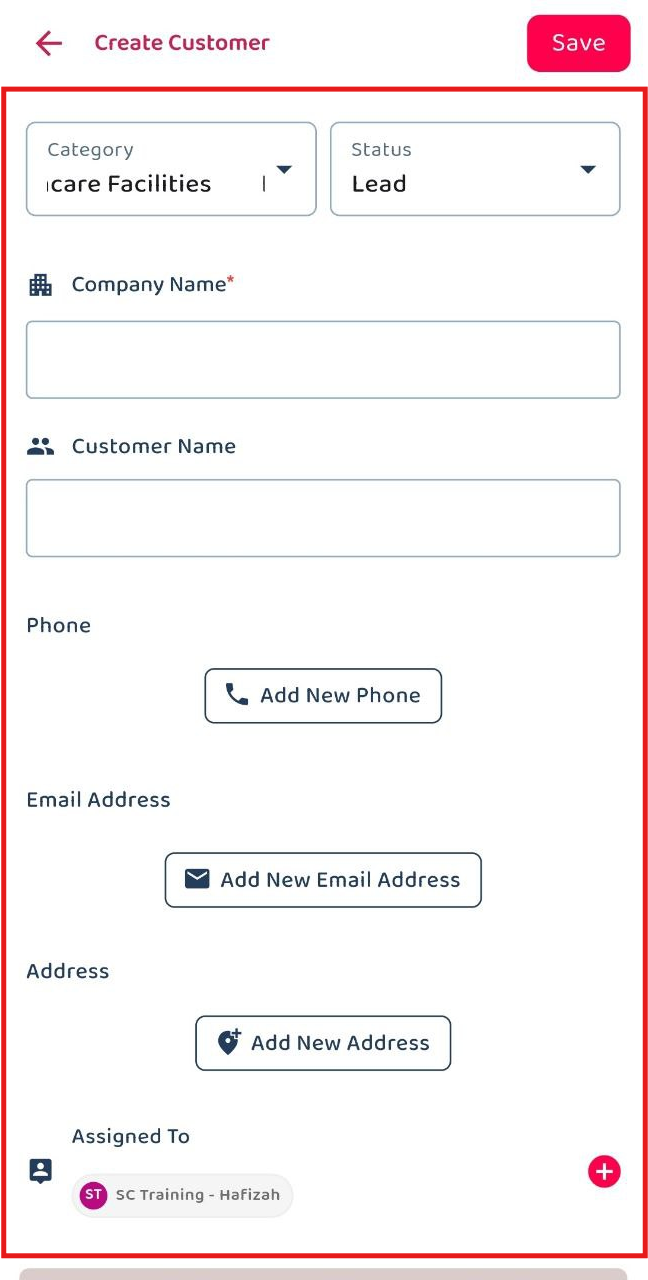
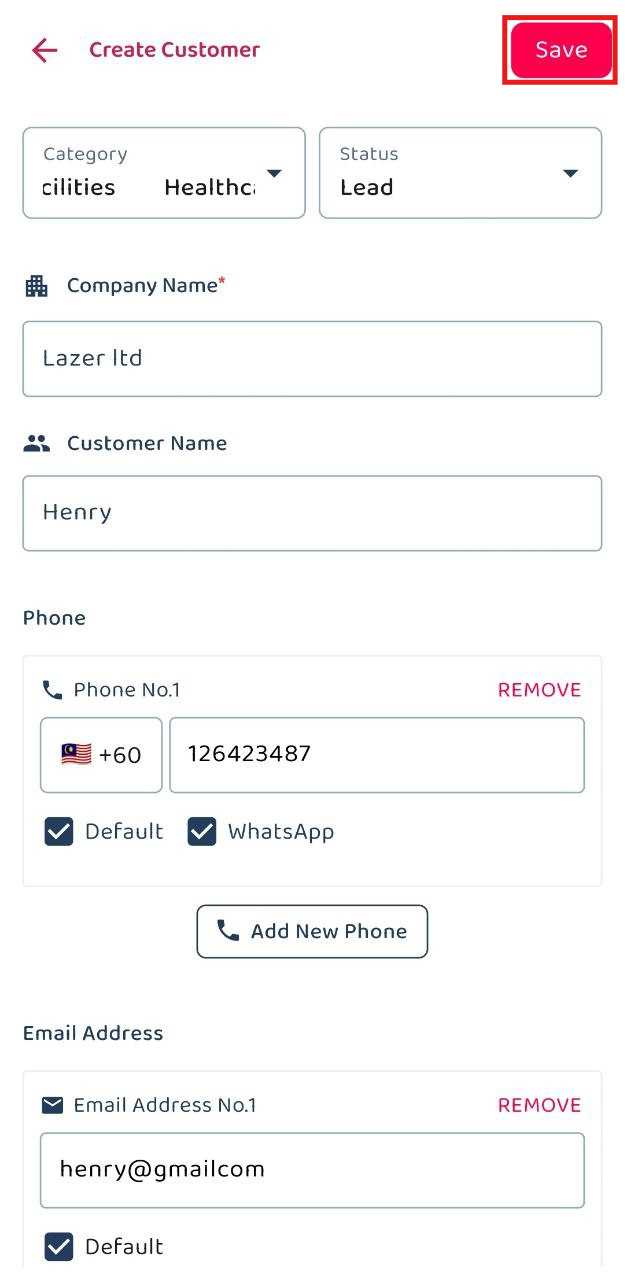
Fill out the details of the new Customer. Available fields may differ depending on your company’s system setup.
Field Name Description Category* Classifies the customer based on their type. Status* Indicates the current status of the customer. Company Name* The official name of the customer’s company. Customer Name The full name of the customer contact person. Phone The customer’s contact phone number. Email Address The customer’s email address. Address The physical address of the customer. Assigned User The user responsible for managing this customer. Asset Any asset registered in the system associated with the customer. *Note: Fields marked with an asterisk ( * ) are required.
-
Click on the “Save” button to save the customer.
-
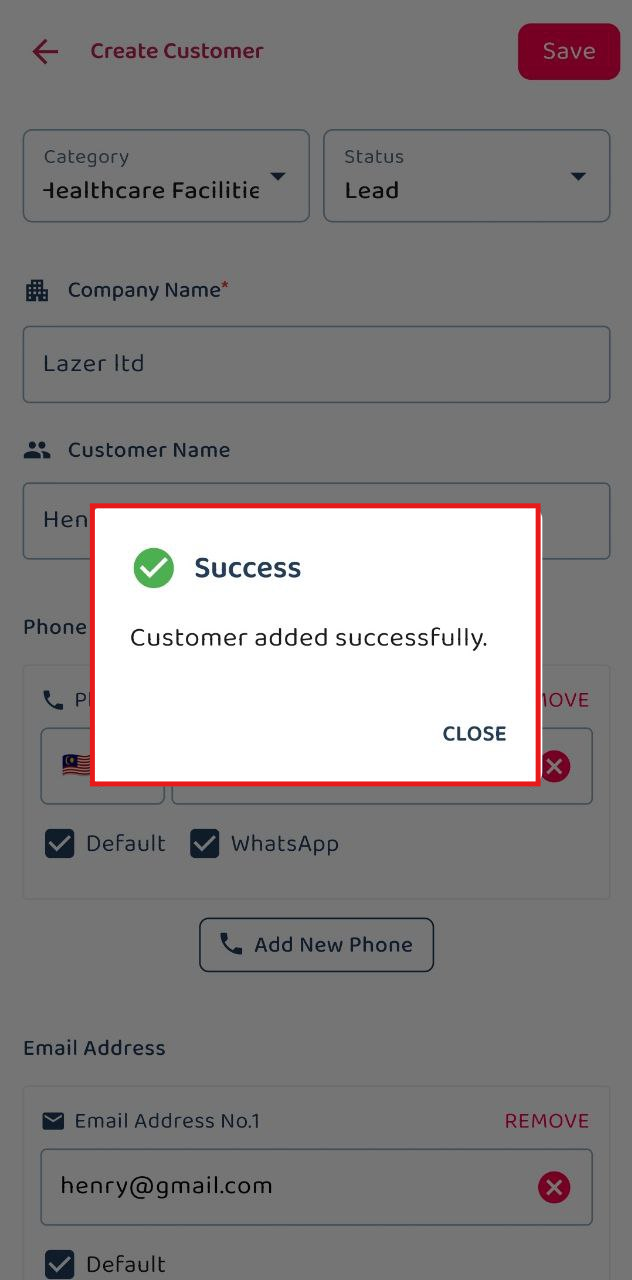
The new customer is added successfully when this prompt appears.
From Job Creation Page
-
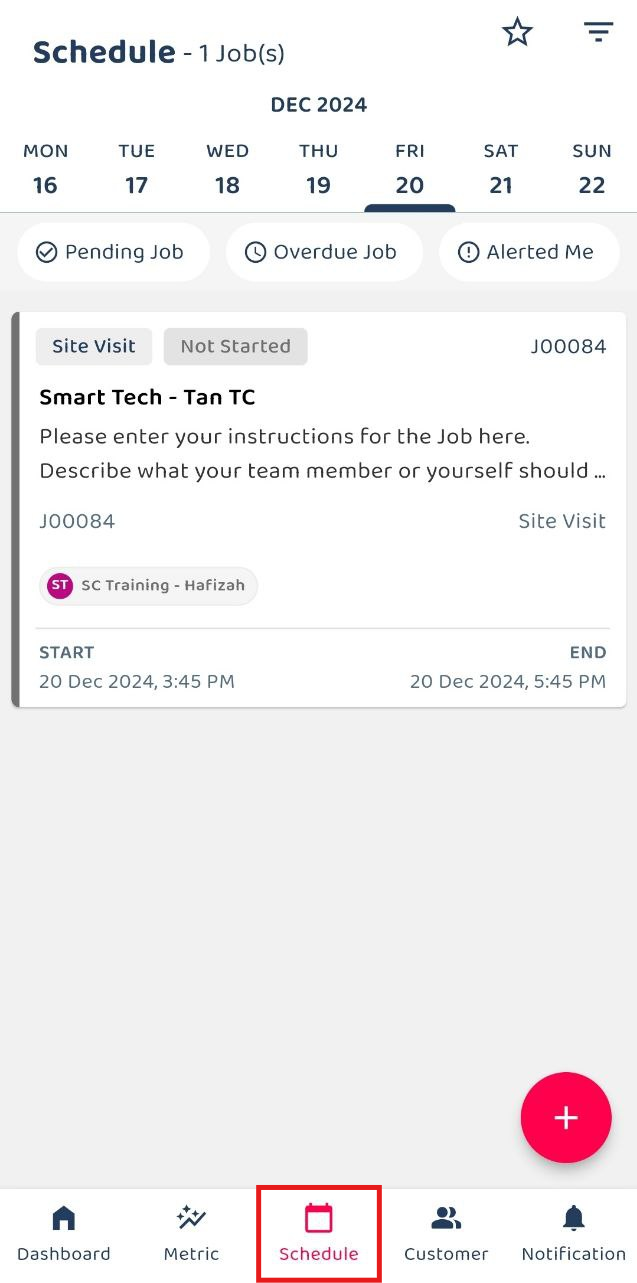
At the mobile app’s navigation bar, go to Schedule.
-
Click on the “+” button to create new job.
*Note: If you do not see the “+” button, you may need to request permission or help from your Admin to register new job.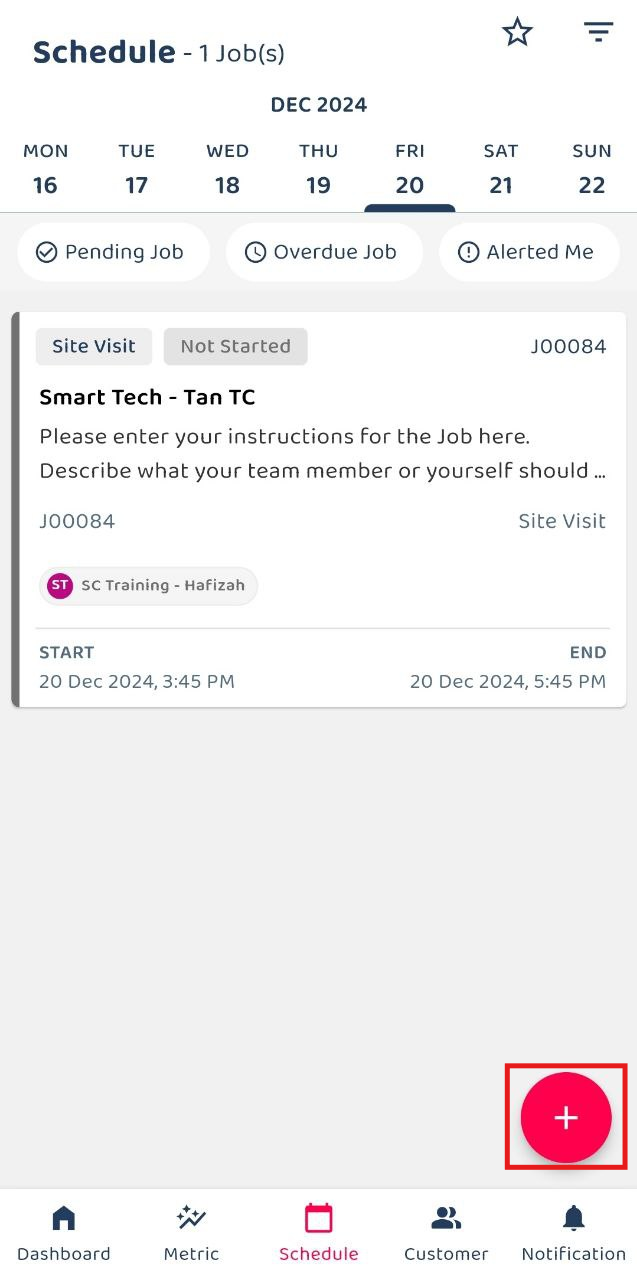
-
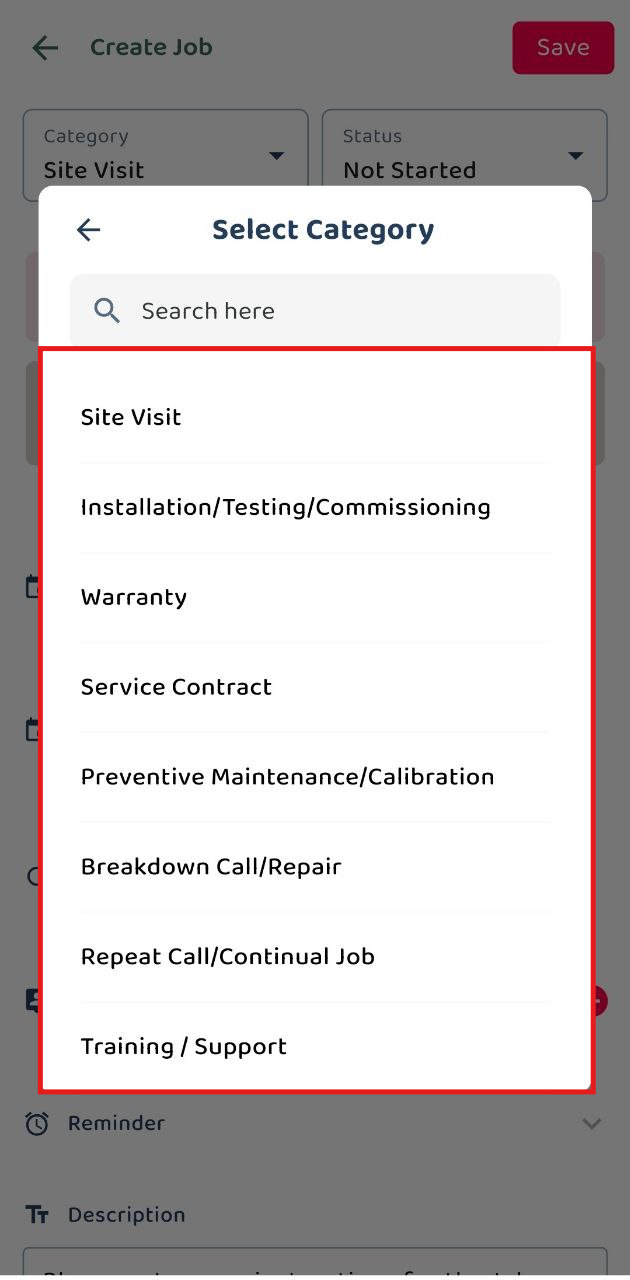
Select the job category.
-
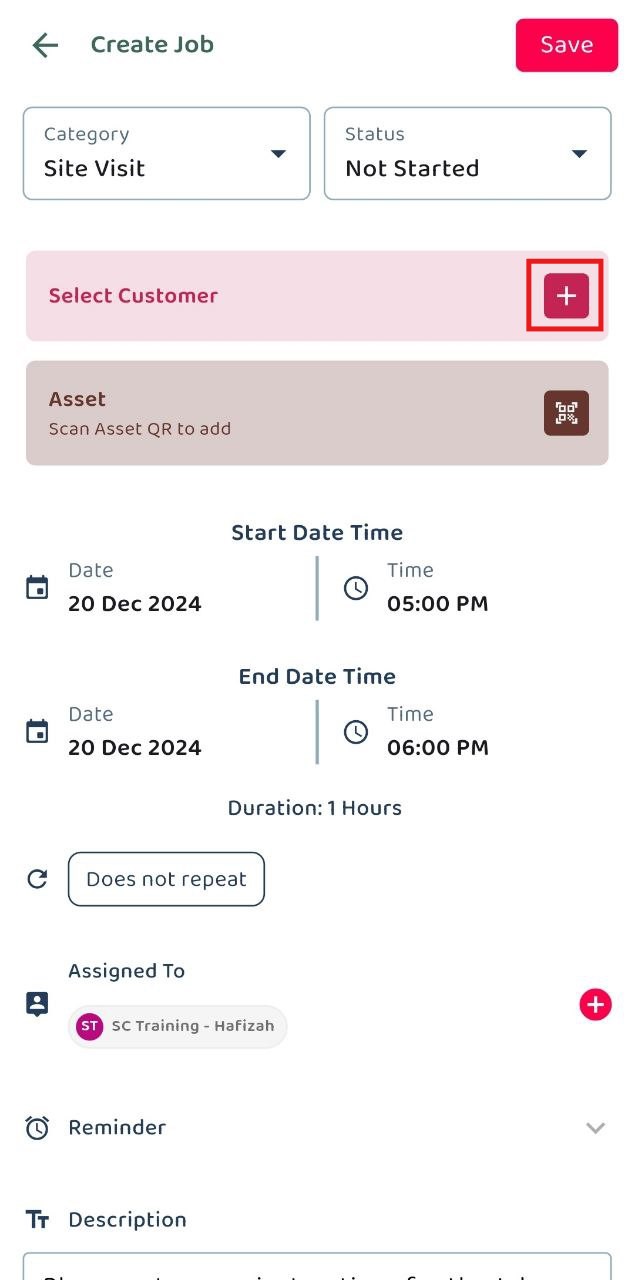
Click on the “+” button to select customer for the job.
-
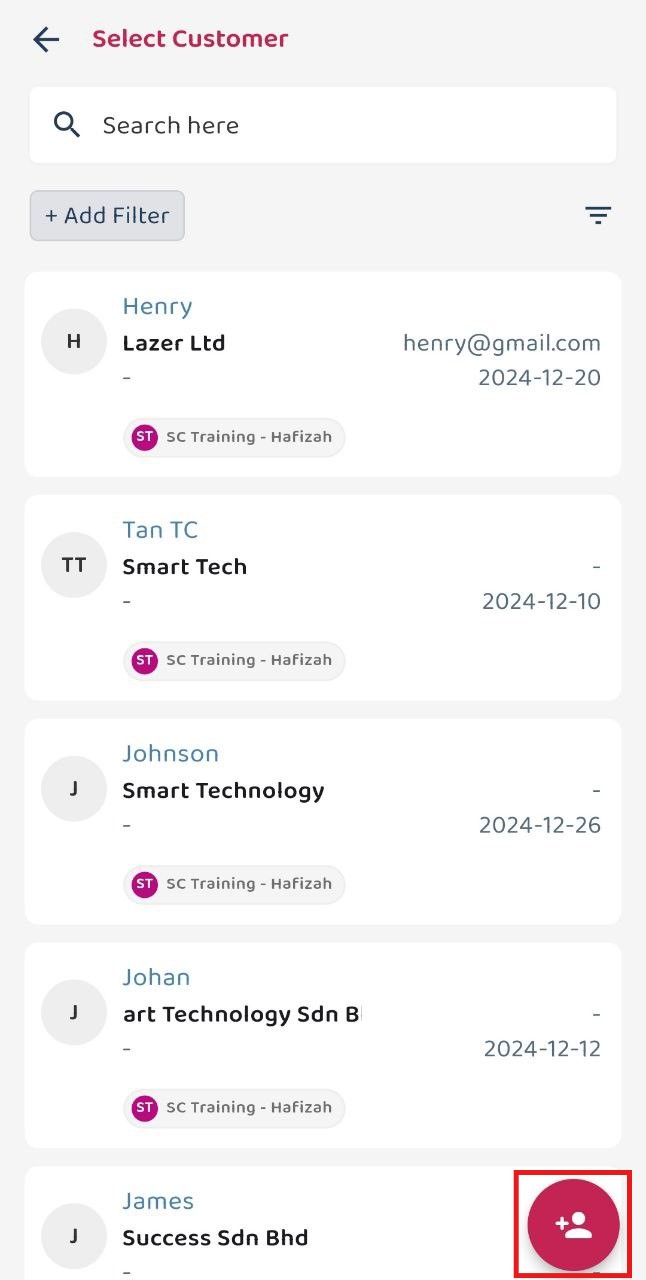
Click “+” to add new customer.
-
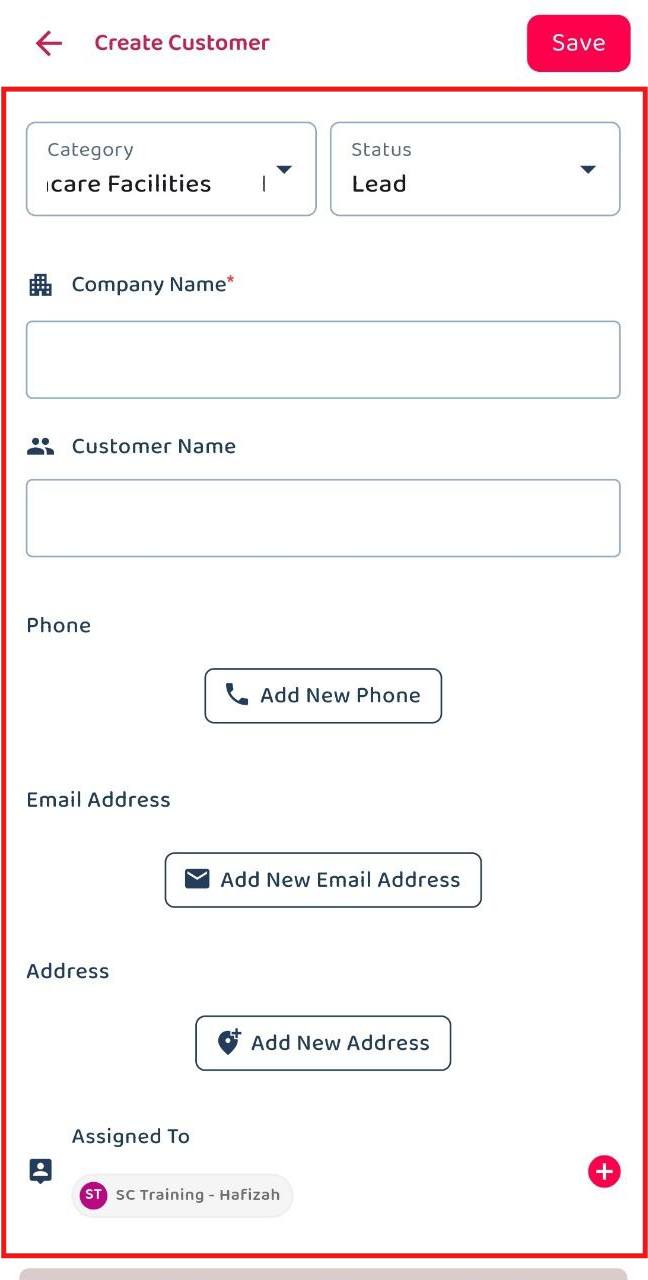
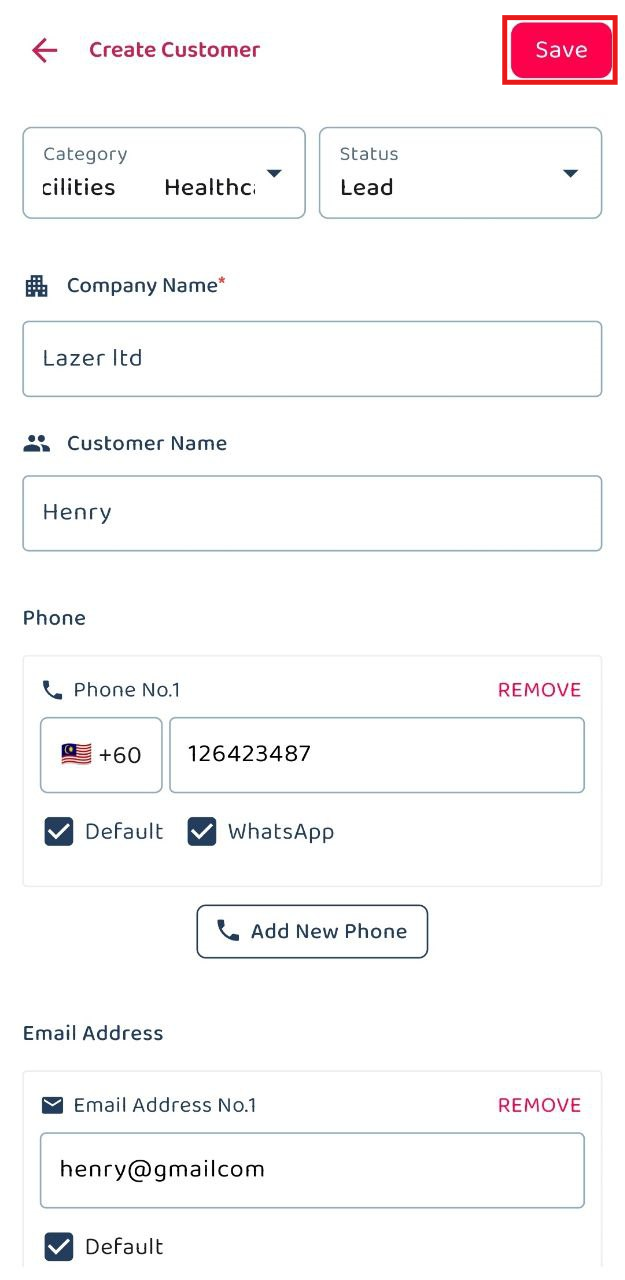
Fill out the details of the new Customer. Available fields may differ depending on your company’s system setup.
Field Name Description Category* Classifies the customer based on their type. Status* Indicates the current status of the customer. Company Name* The official name of the customer’s company. Customer Name The full name of the customer contact person. Phone The customer’s contact phone number. Email Address The customer’s email address. Address The physical address of the customer. Assigned User The user responsible for managing this customer. Asset Any asset registered in the system associated with the customer. *Note: Fields marked with an asterisk ( * ) are required.
-
Click on the “Save” button to save the customer.
-
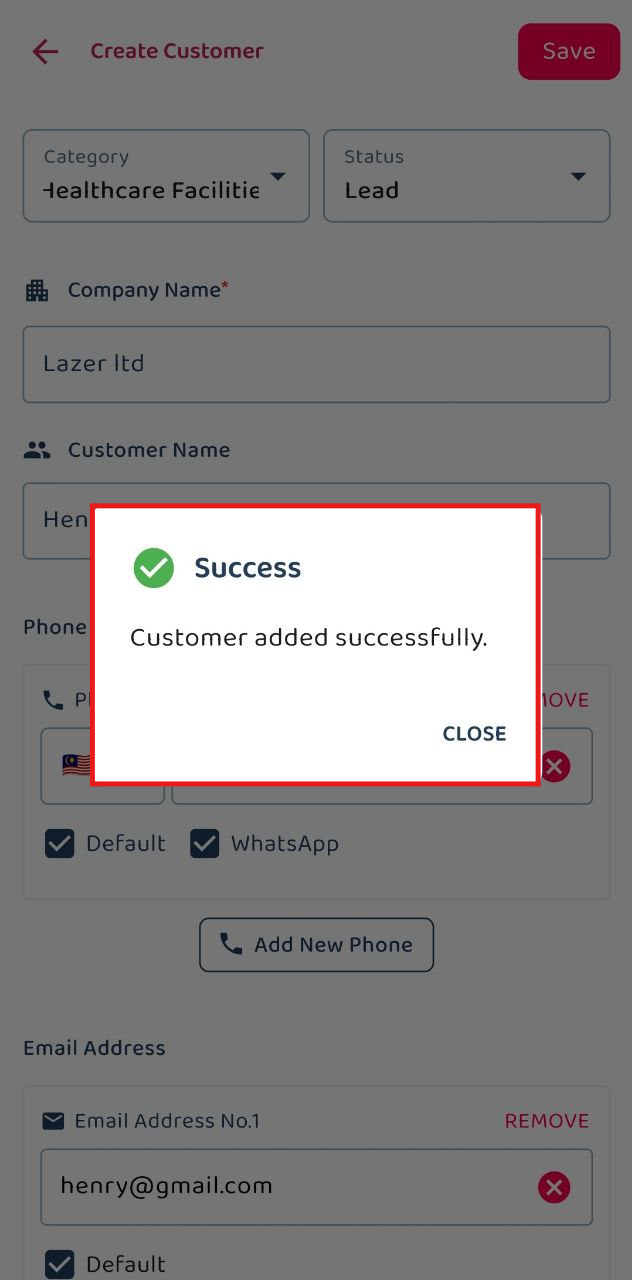
The new customer is added successfully when this prompt appears. You may continue with creating a new Job
Related Articles