Version 1.0
Created: 15 July 2024
Updated: 3 February 2025
Overtime Management
Overtime Management tracks employee overtime claims, including the date, time, user, customer, notes, category, description, and start/end times. It ensures accurate recording and monitoring of overtime hours for compensation and compliance.
Navigate to the section by clicking it.
- Default Columns
- Filter
- Favourite Filter
- Default Filter
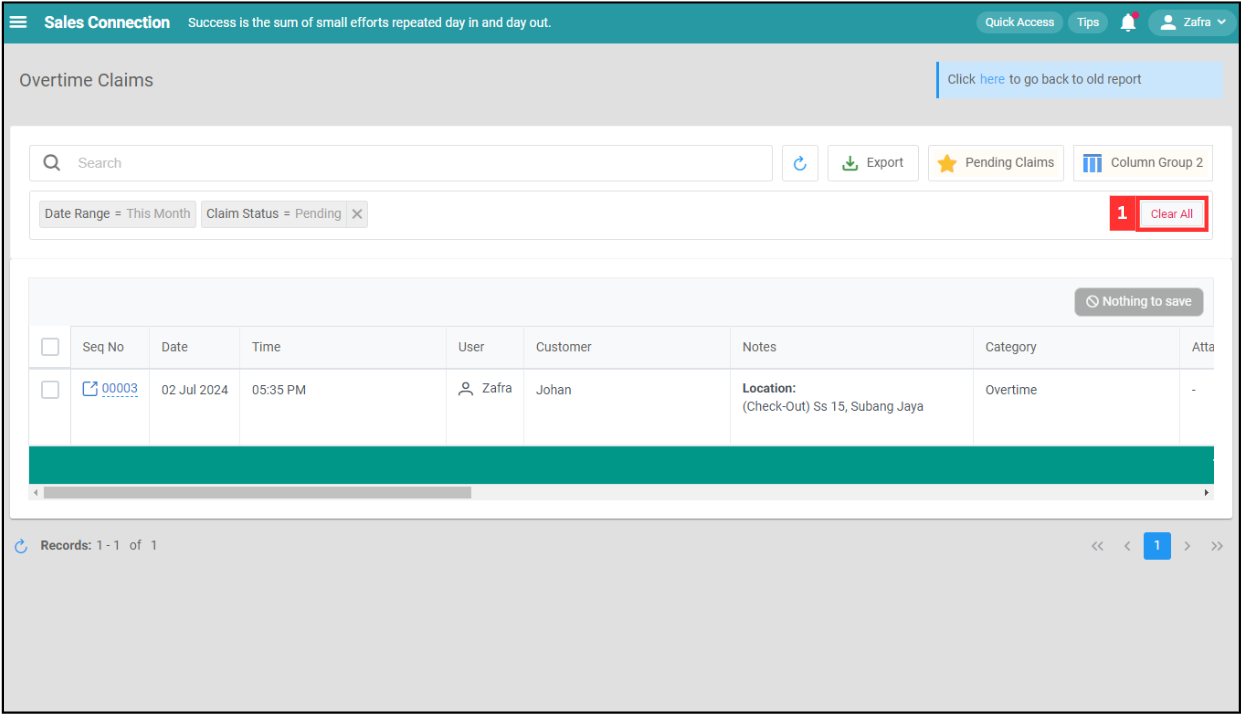
- Clear All Filter
- Change Claim Status
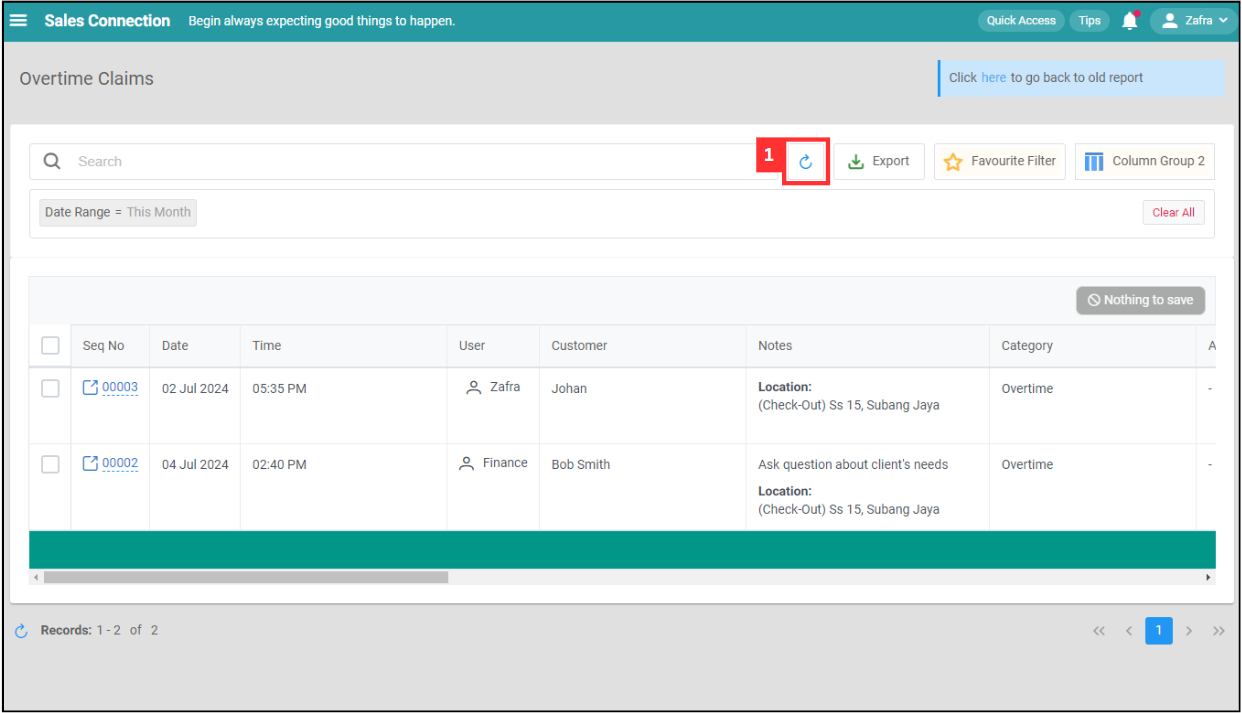
- Refresh
- Export
-
At the desktop site navigation bar, go to HR Suite and select Overtime Management.
Open Overtime Management Here: https://system.caction.com/claim/overtime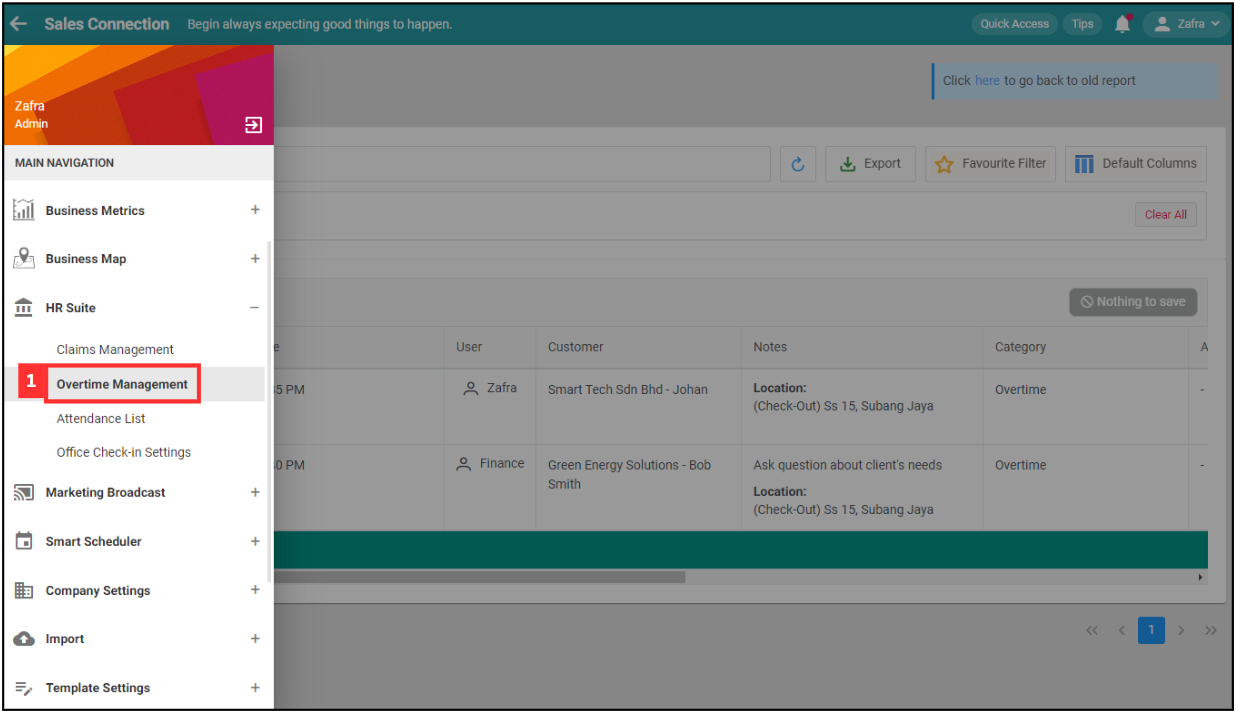
*Note: You must have access to HR Suite menu to perform this action. Please request permission or help from your admin if you do not have access to the menu.
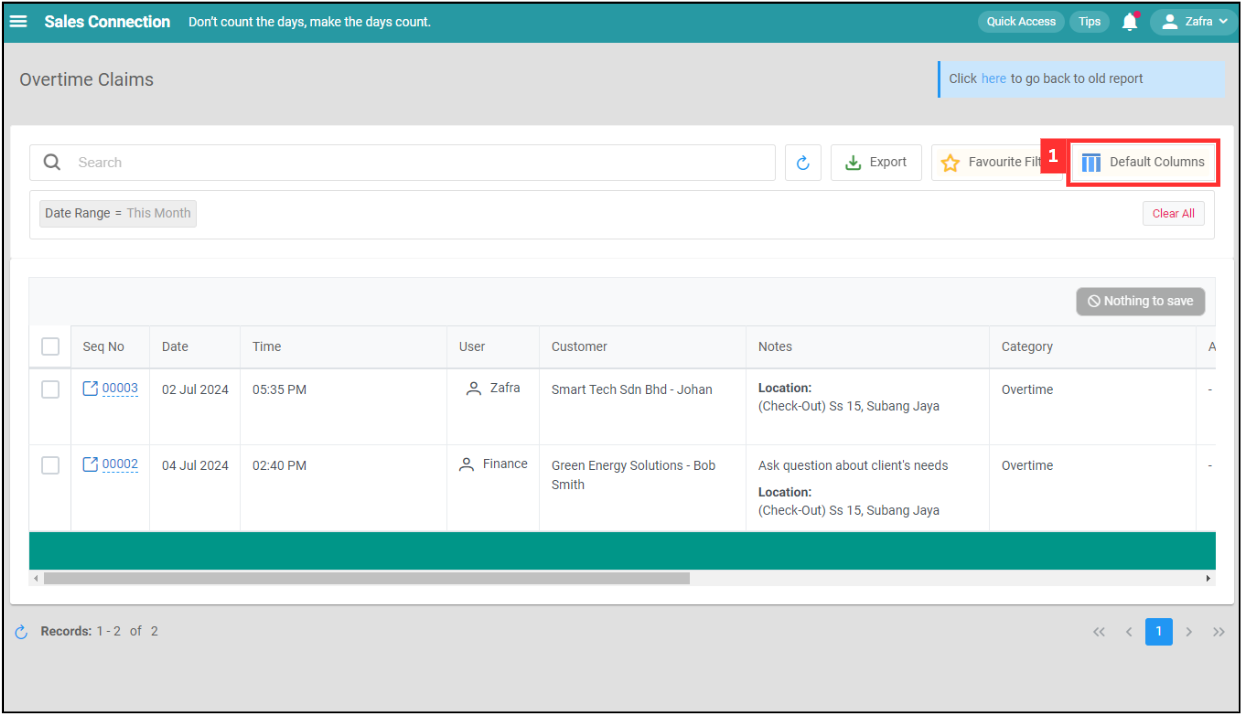
Default Columns
-
Click “Default Columns”.
-
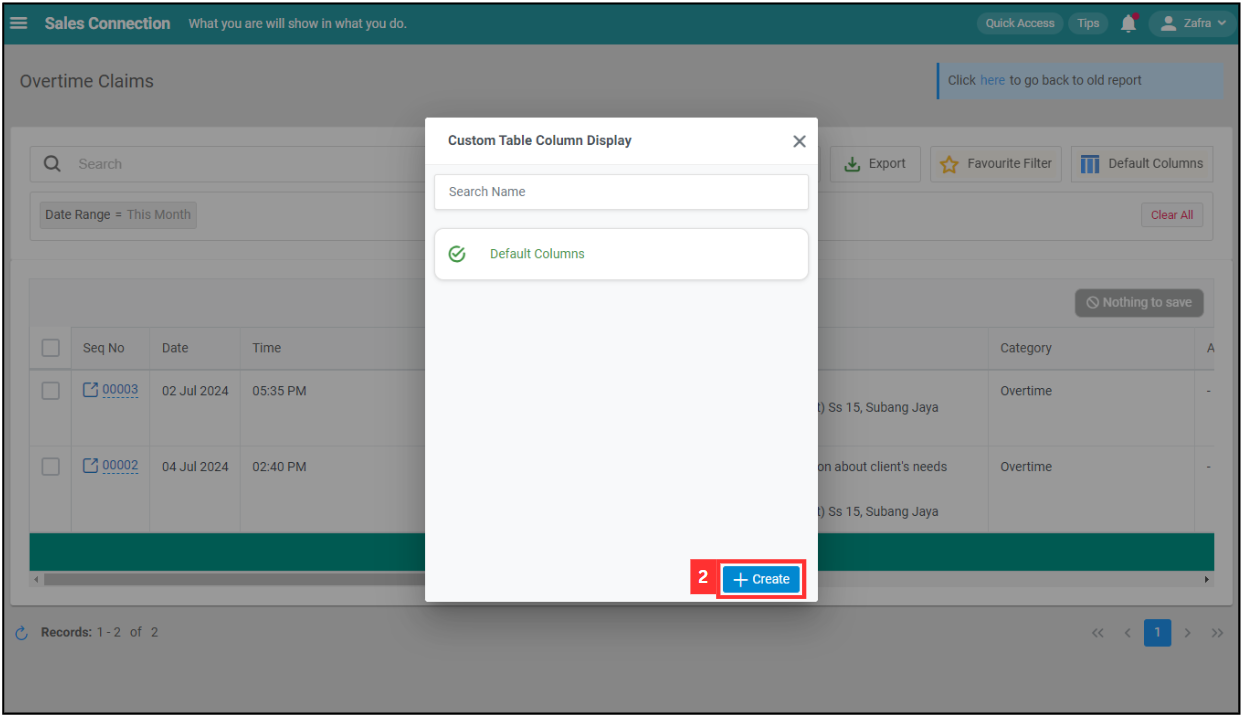
Click “+ Create”.
-
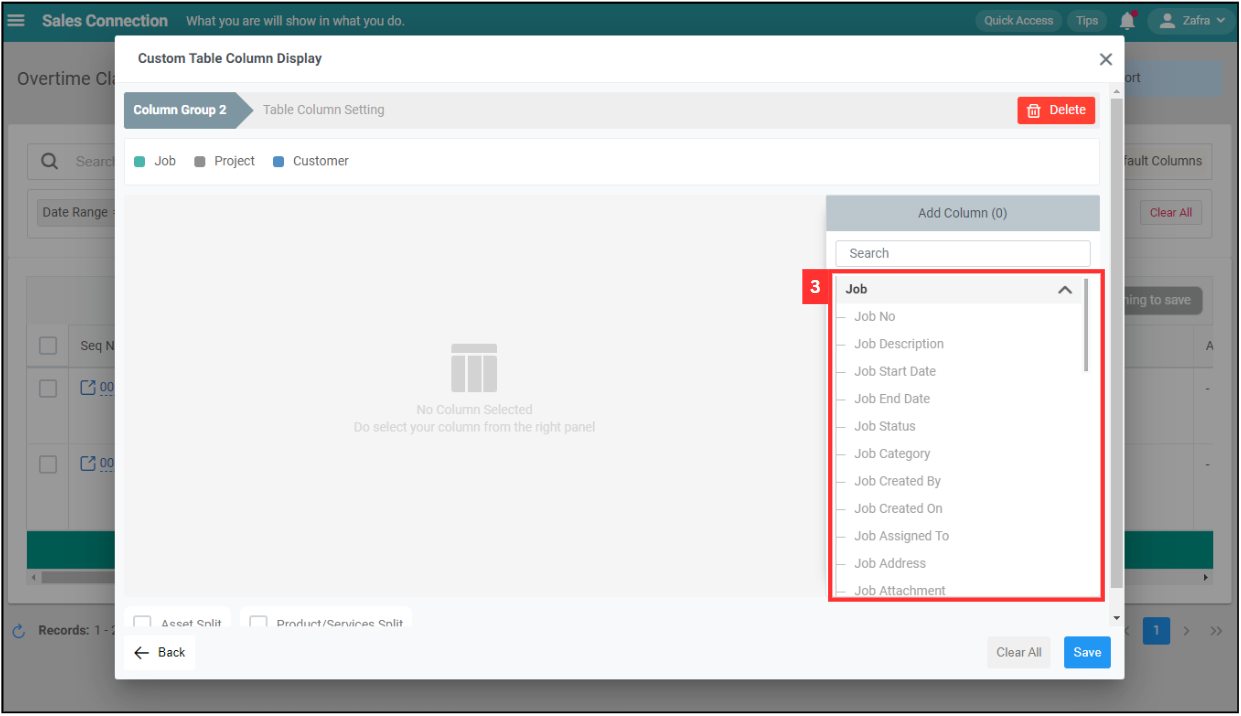
Select the columns you want to display.
-
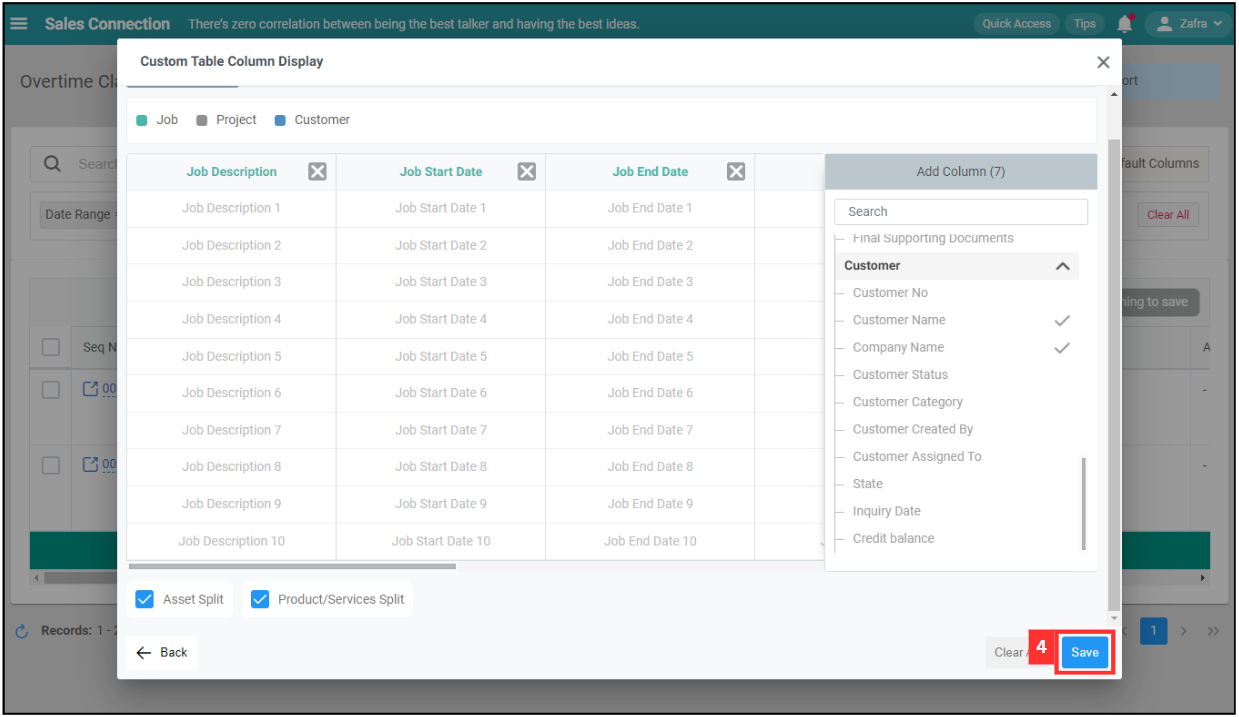
Click on the “Save” button.
-
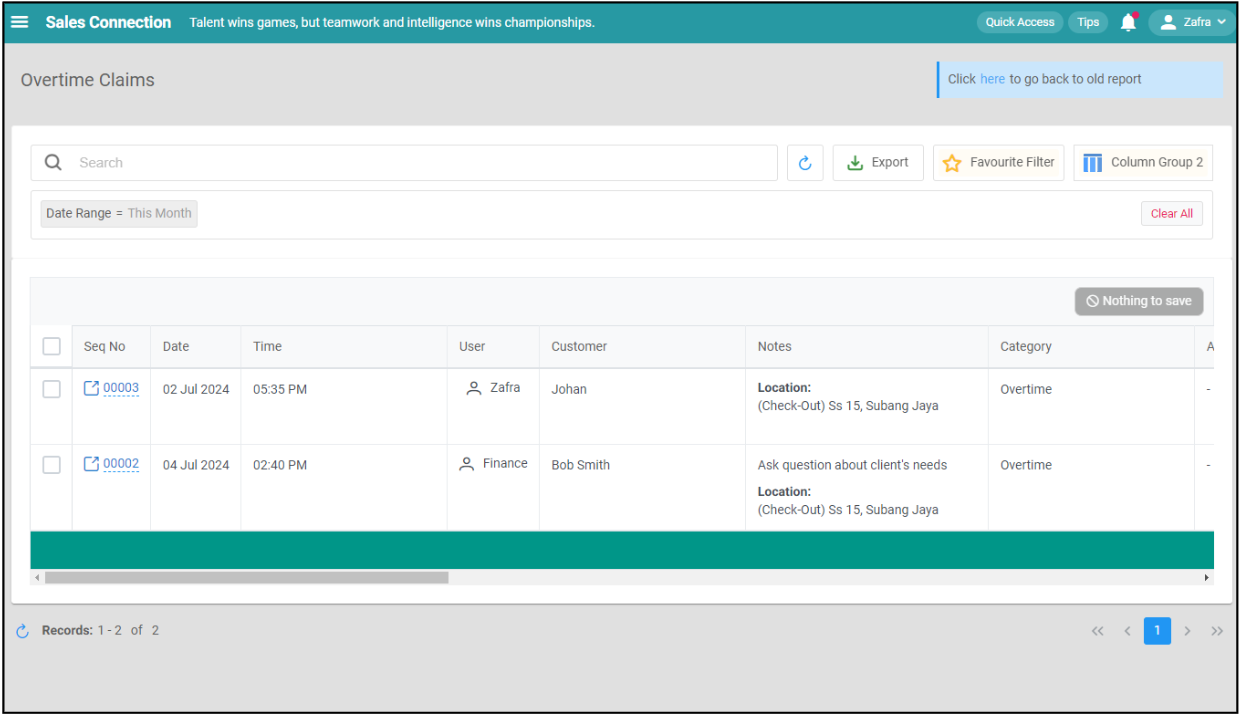
The customize columns will be displayed as below and you can apply it next time.
Filter
-
Click “Search” to filter the list.
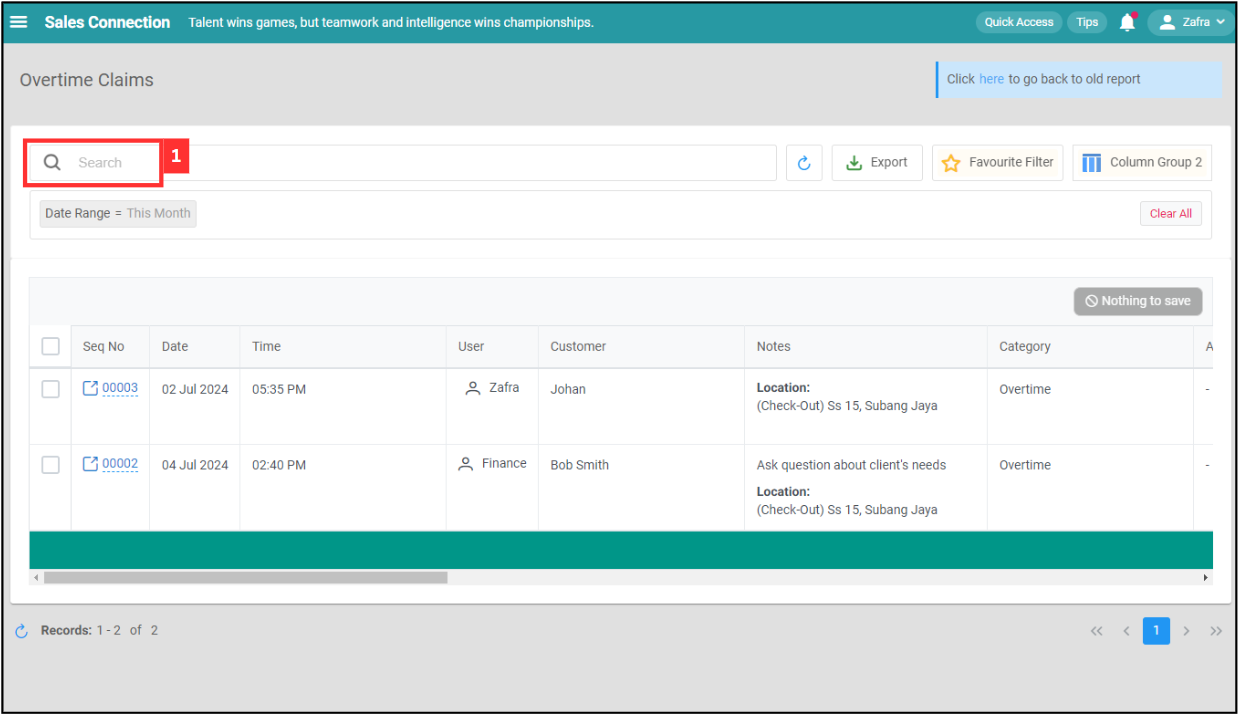
-
Click on the filter group you want.
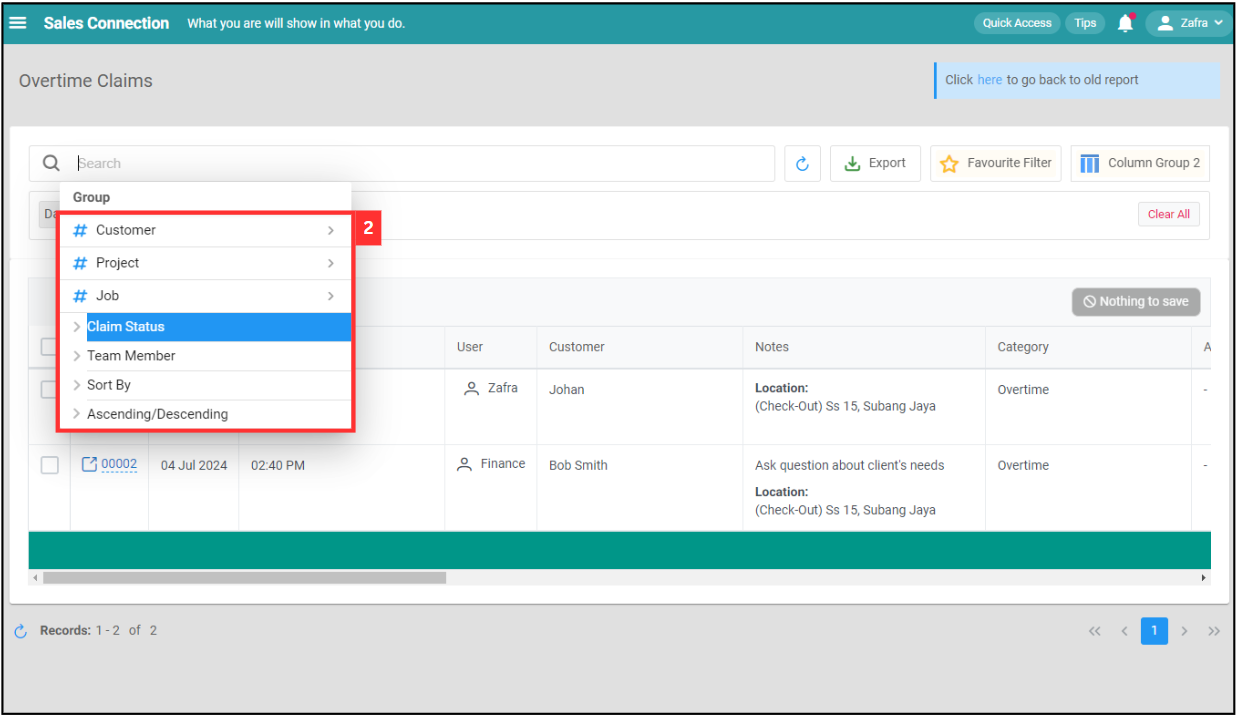
-
Click on the “Filter Value” you want.
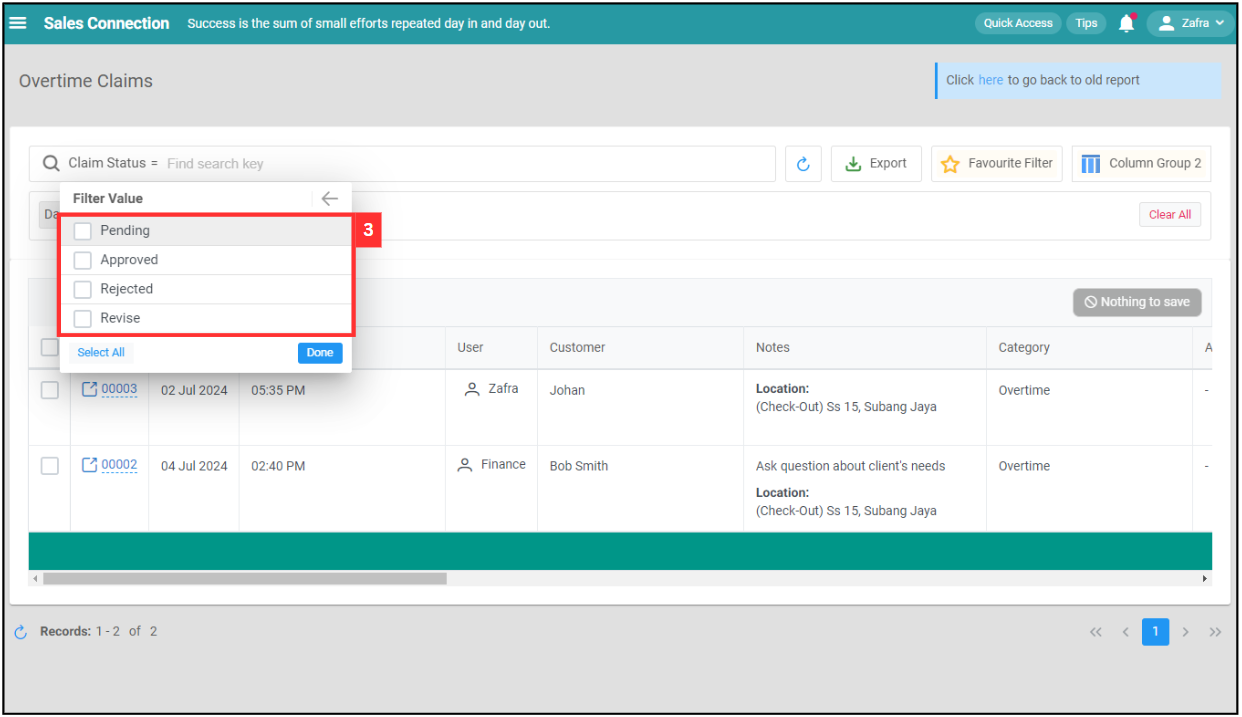
-
Click “Done”.
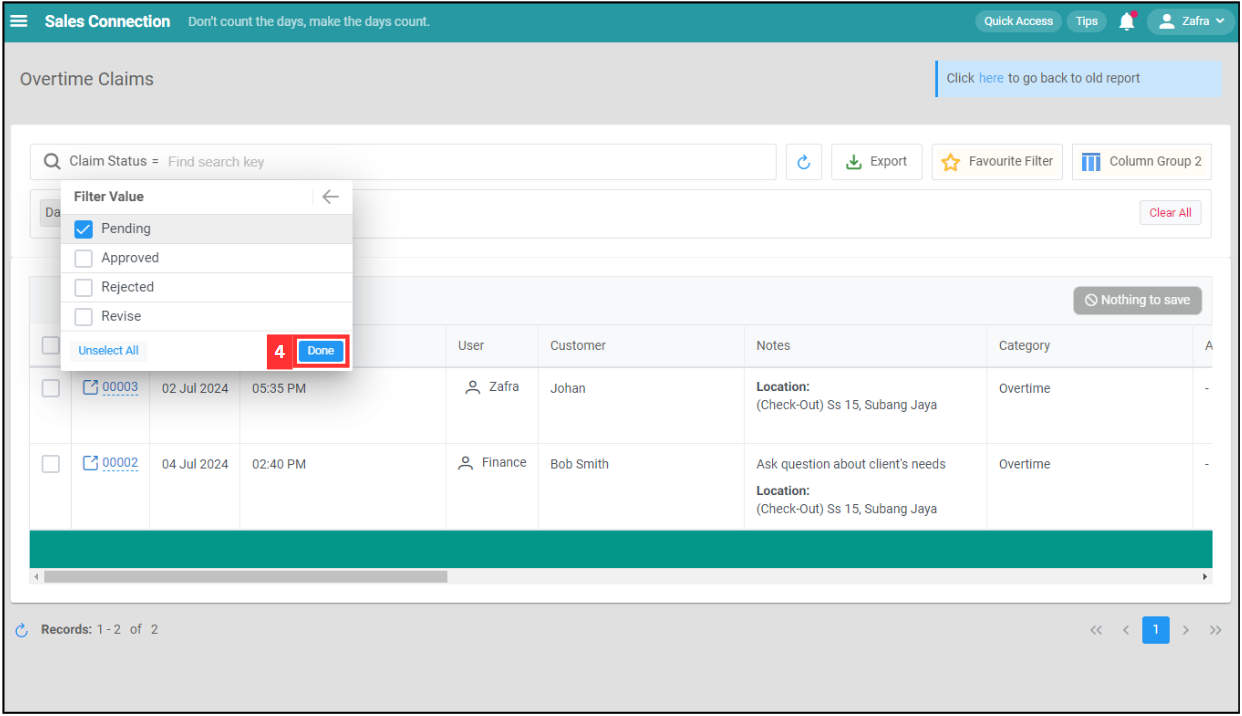
-
The list with filter will be shown as below.
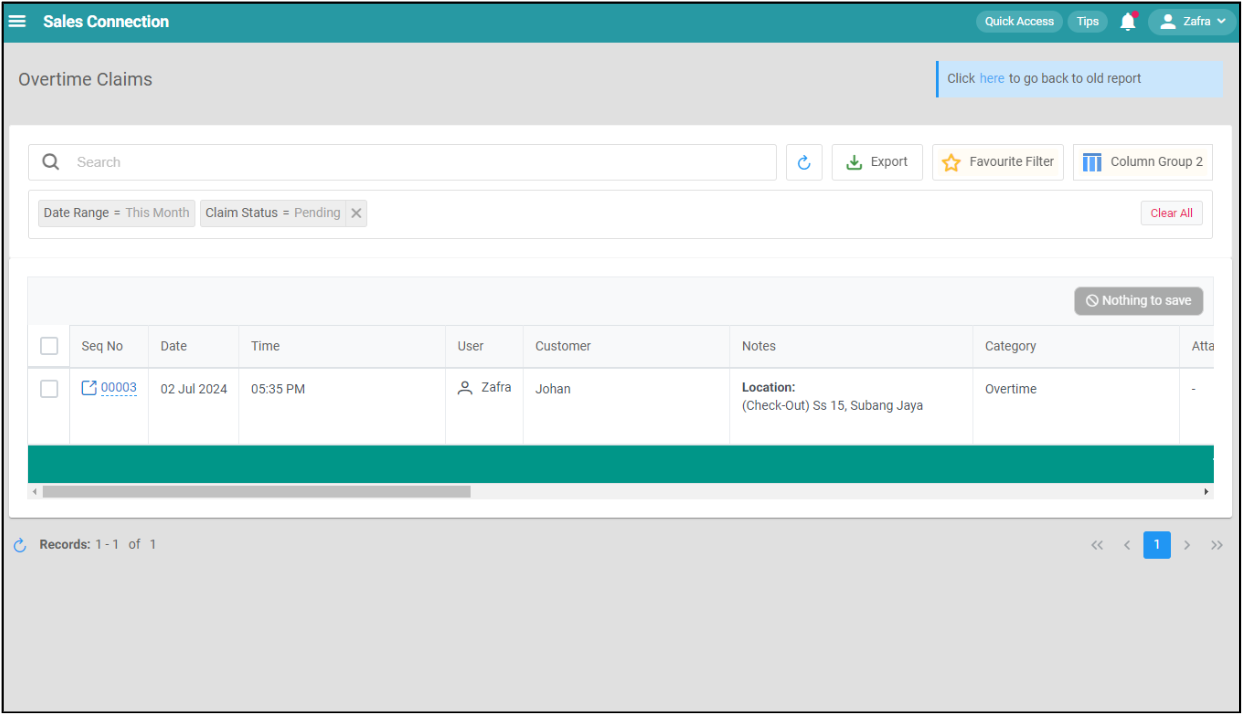
Favourite Filter
-
Click on “Favourite Filter”.
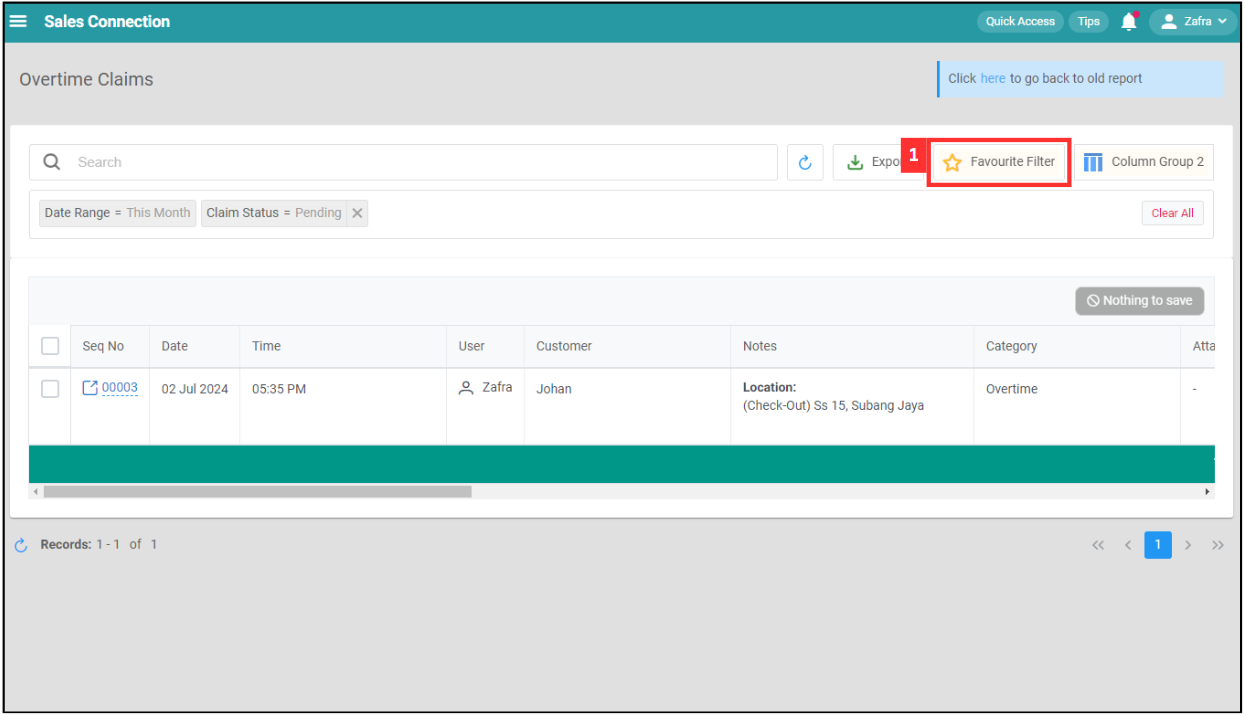
-
Click “+ Add”.
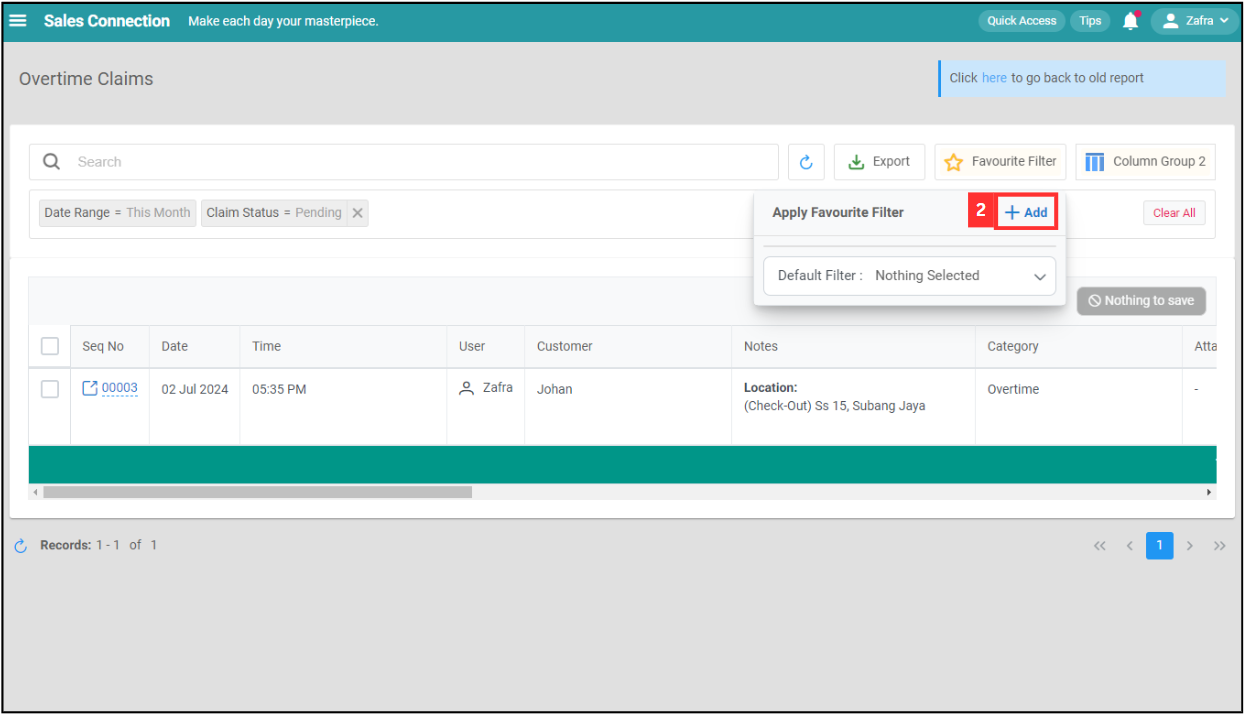
-
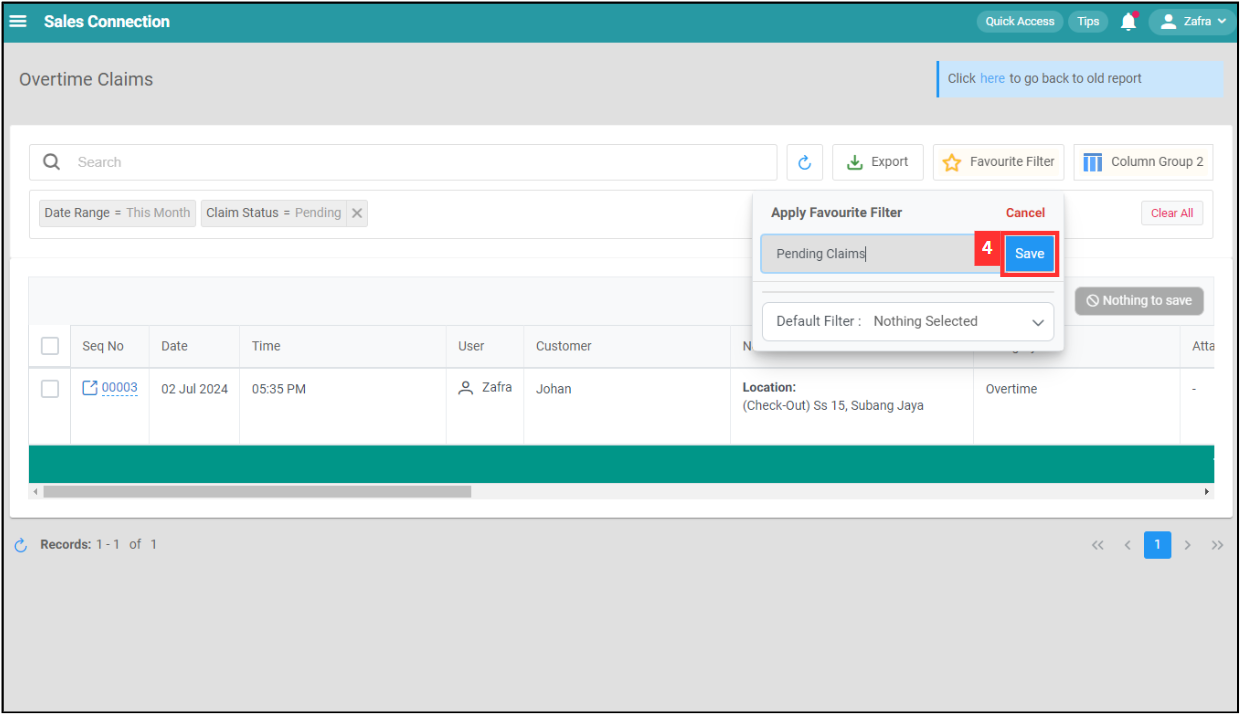
Enter the name of the favourite filter.
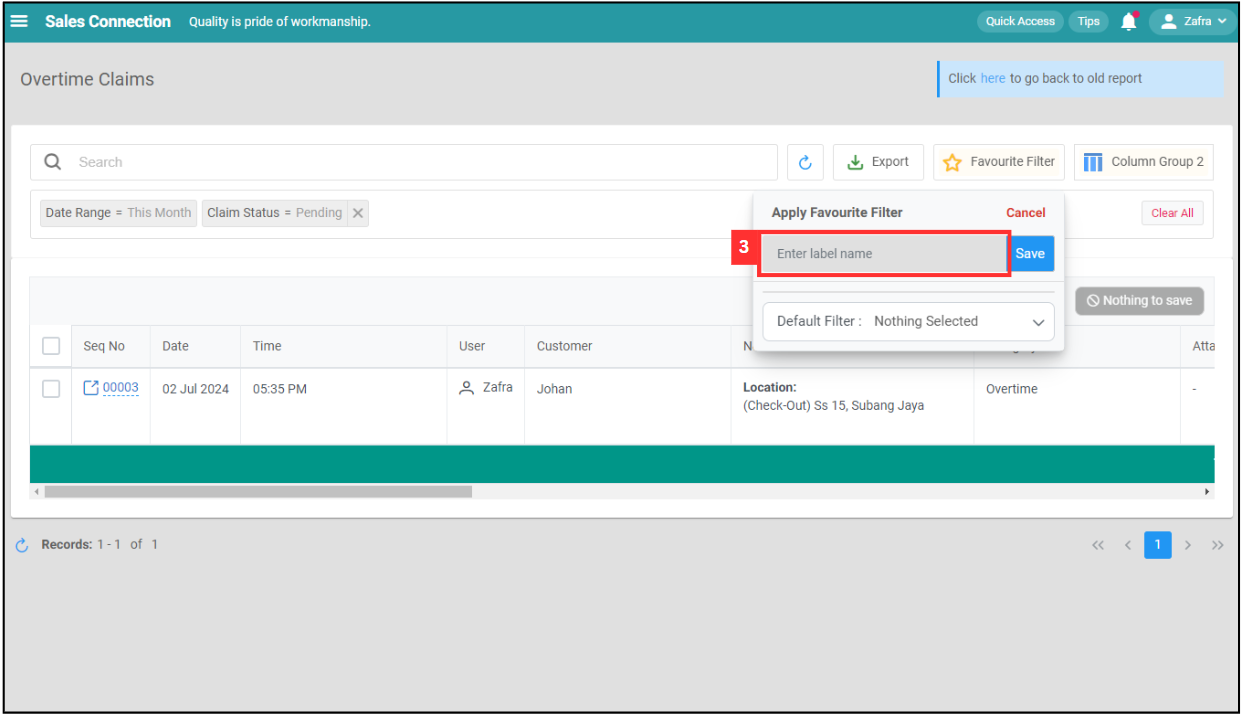
-
Click on the “Save” button.
-
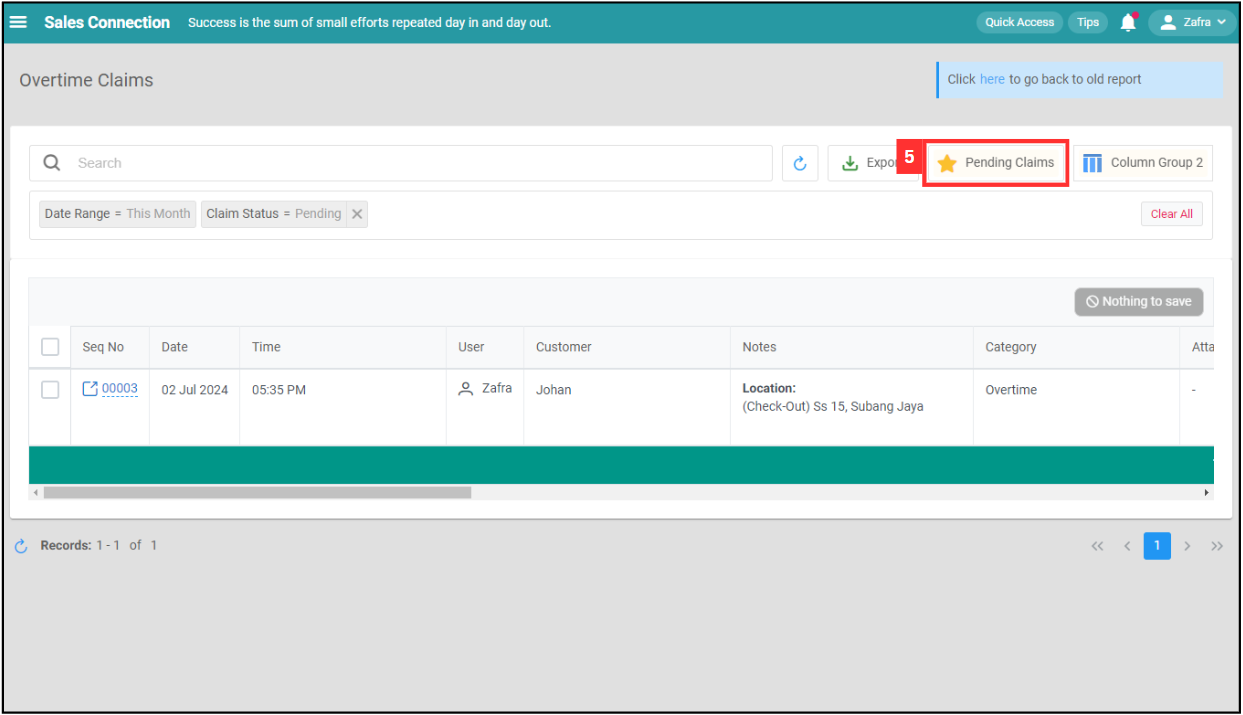
The favourite filter has been saved successfully.
Default Filter
-
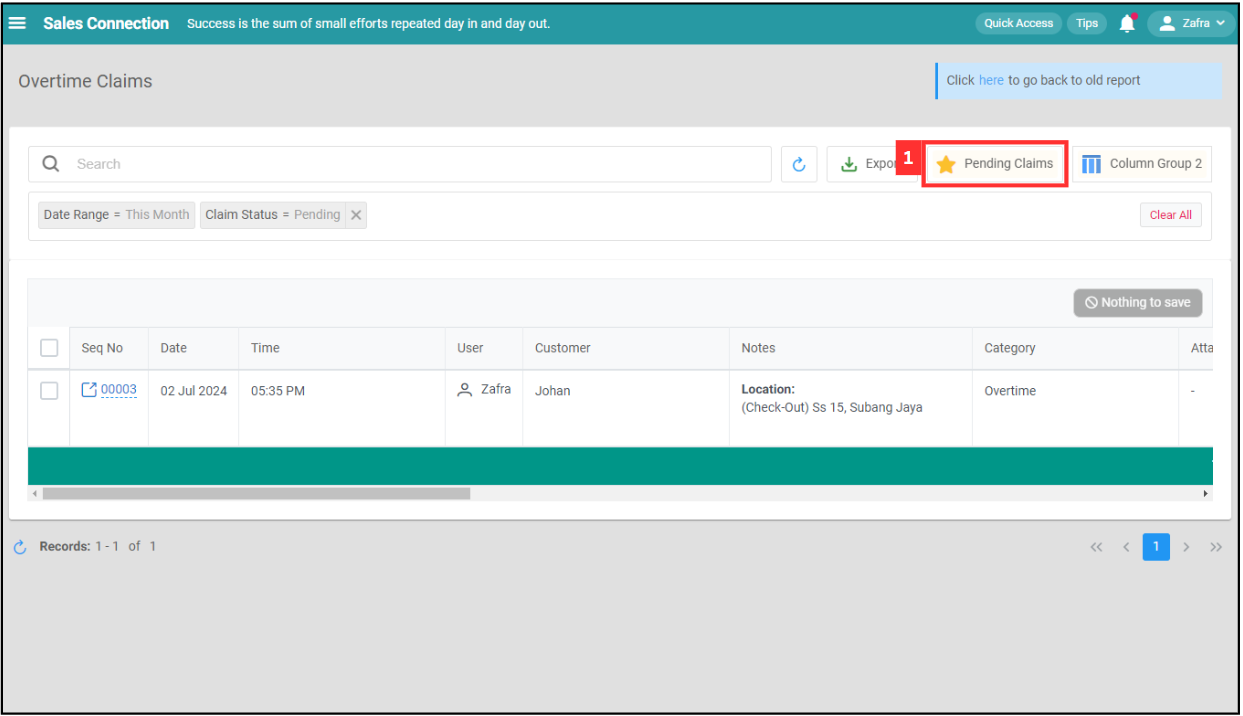
Click on “Favourite Filter”.
-
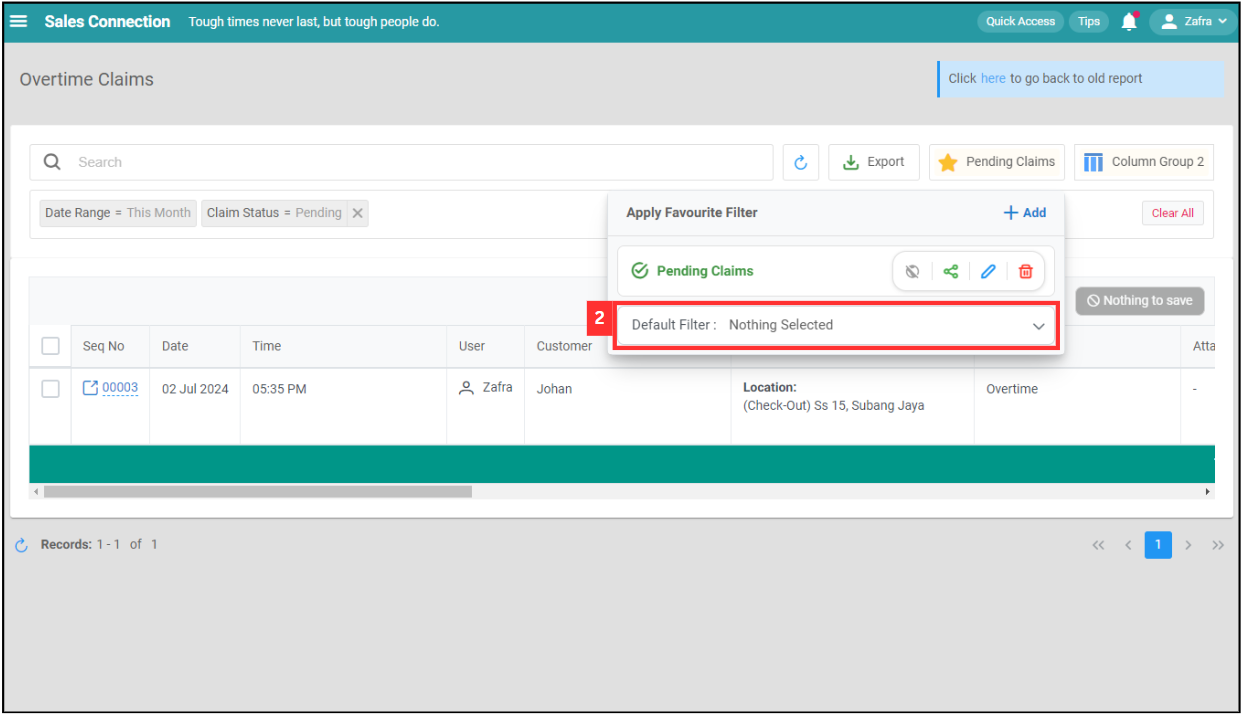
Click “Default Filter”.
-
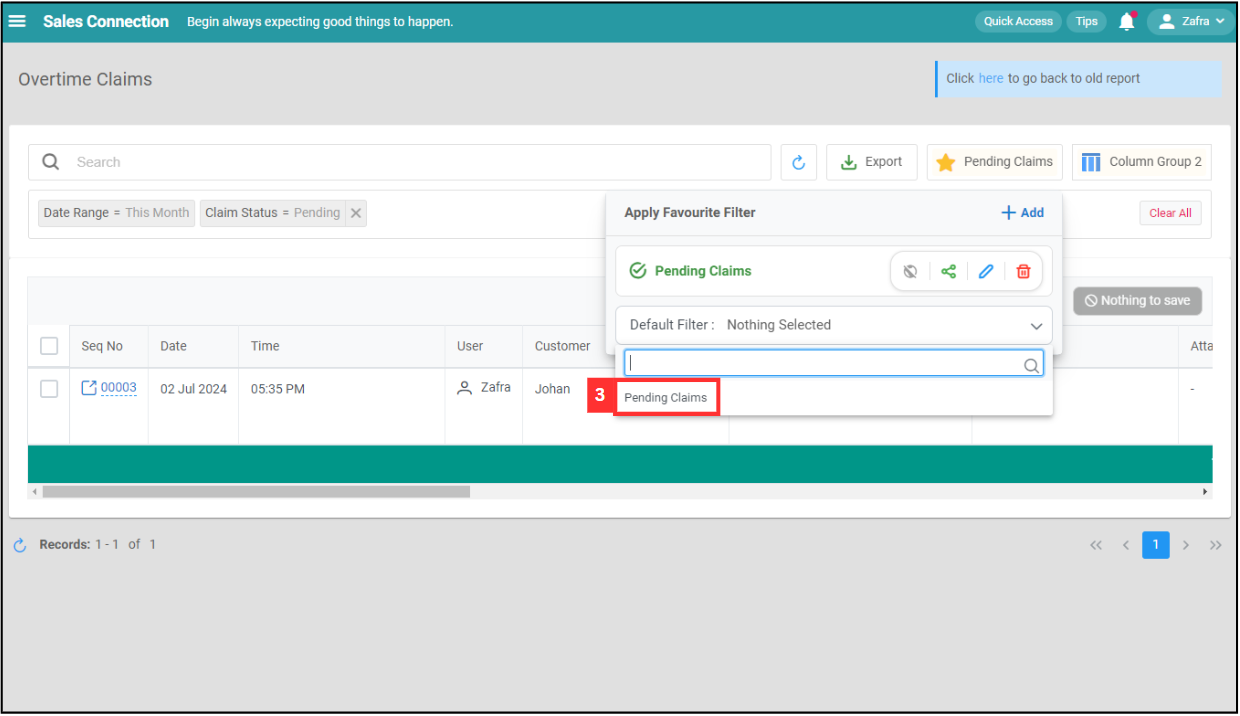
Select the favourite filter you want to set as default filter.
-
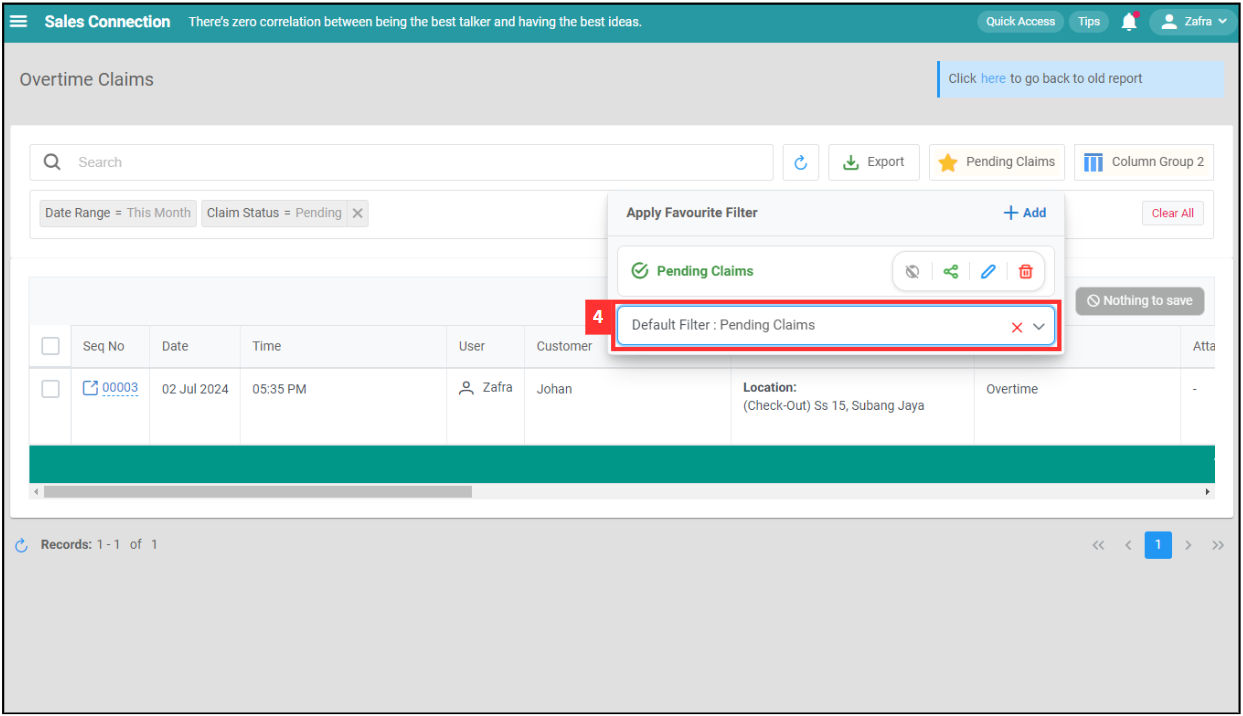
The default filter has been saved successfully.
Clear All Filter
Change Claim Status
-
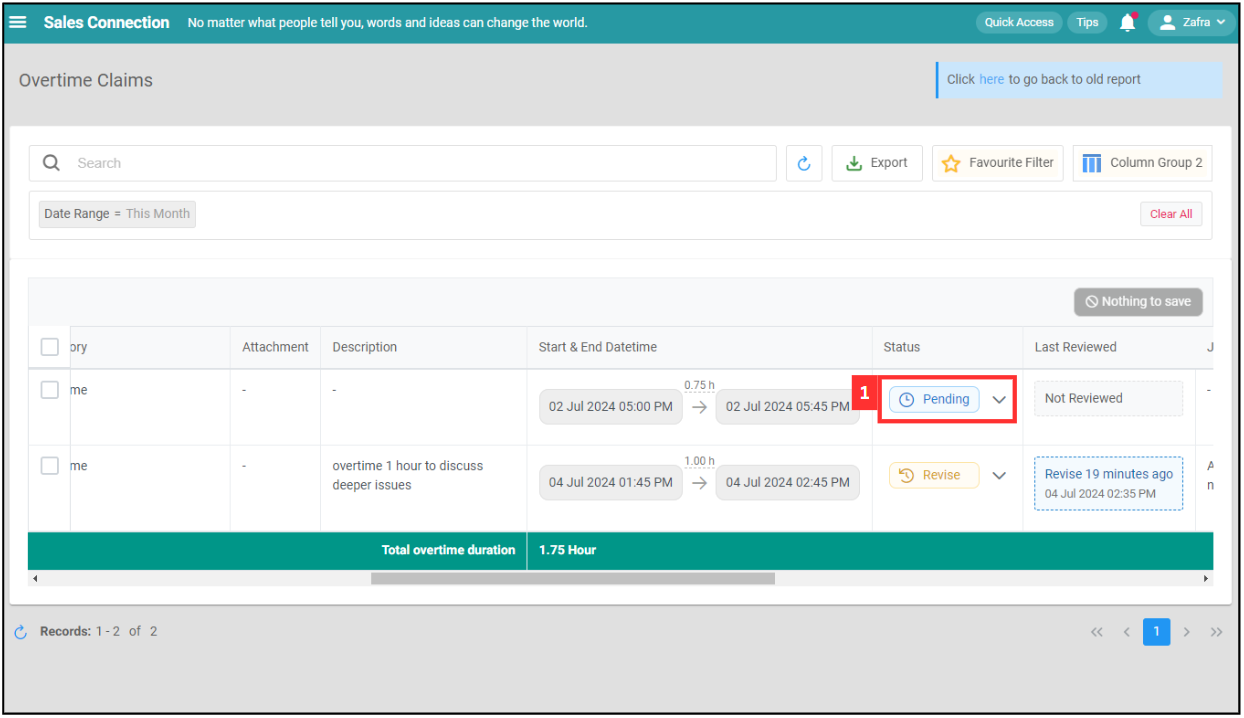
Scroll the list to “Status” and click on the status of the overtime claim you want to take action.
-
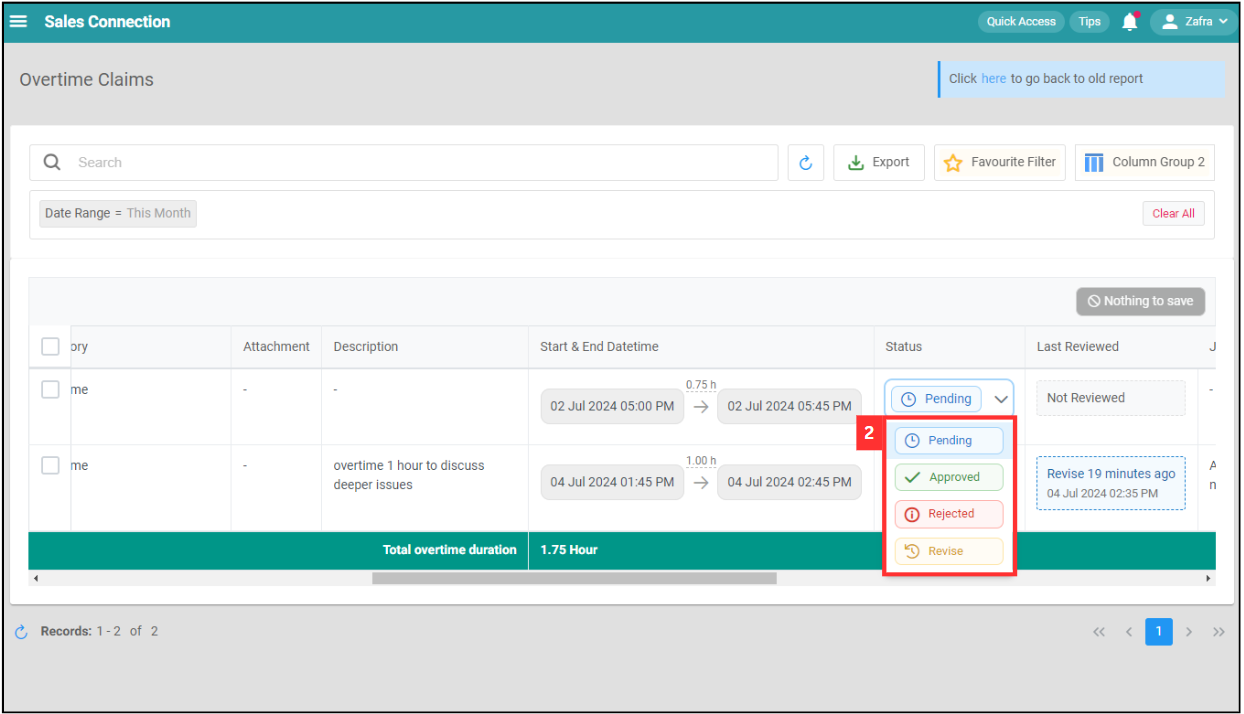
Click on the status you want for the overtime claim.
-
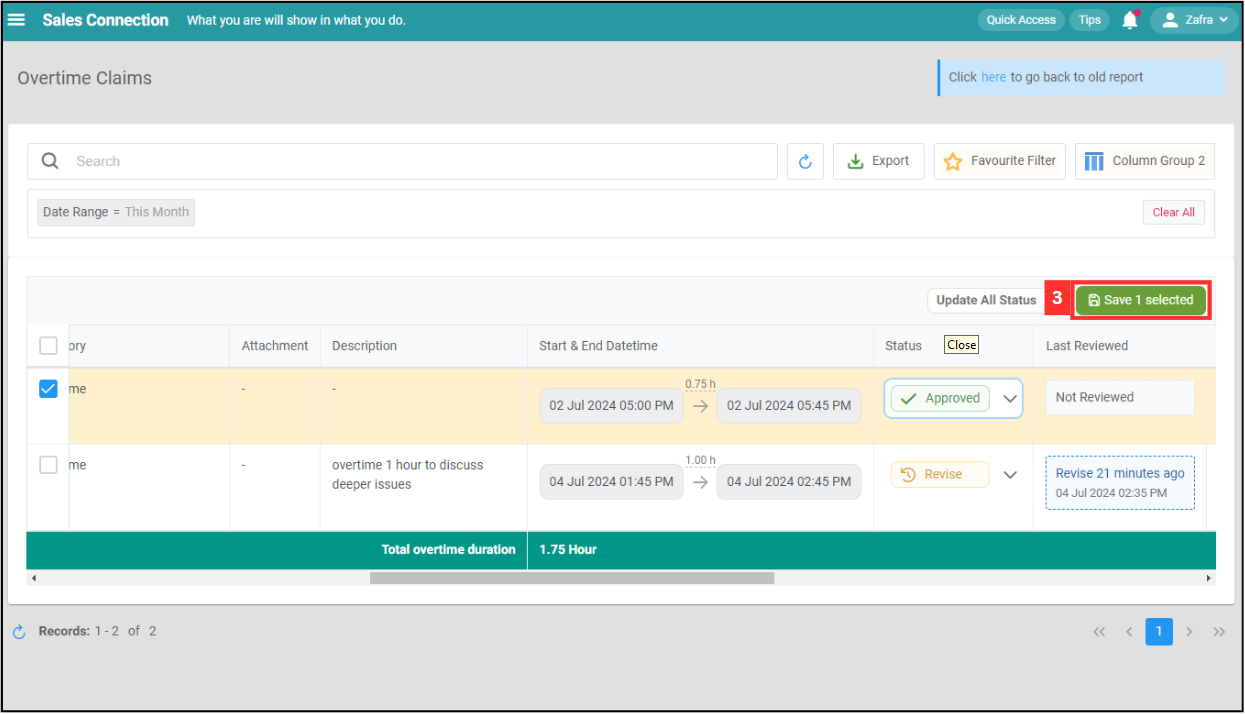
Click “Save 1 selected”.
-
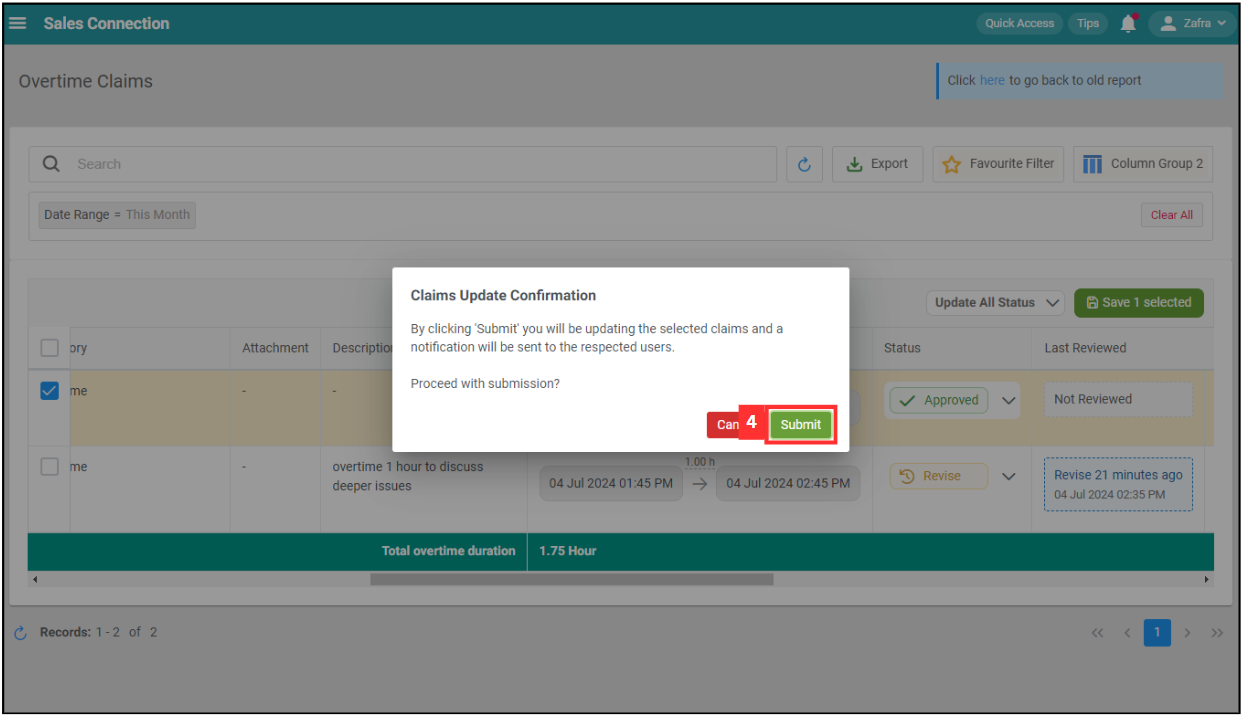
Click on the “Submit” button to update the claims.
-
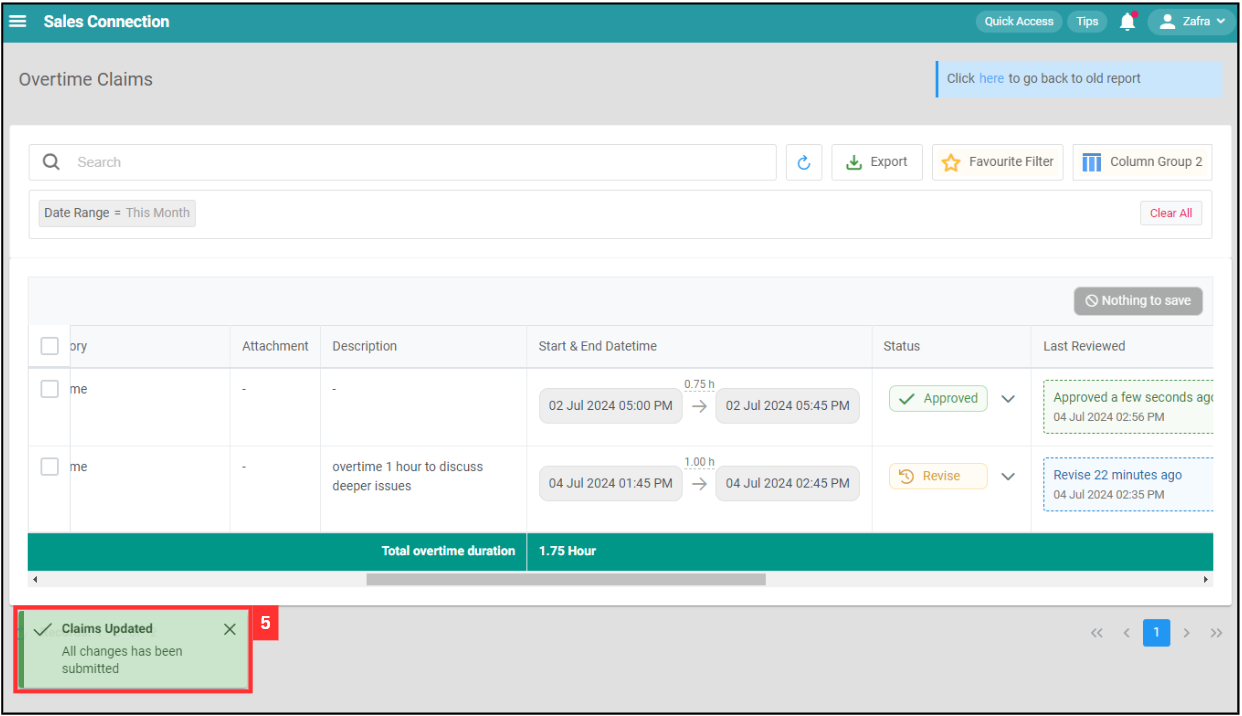
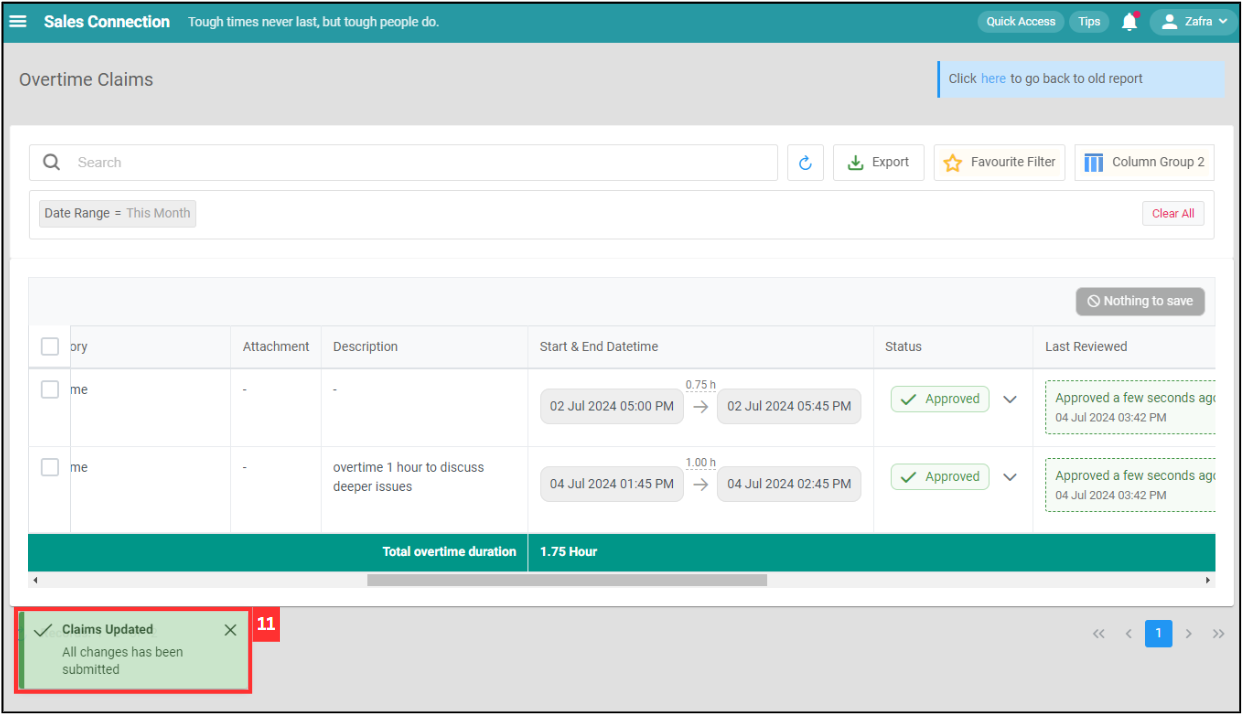
Your changes have been saved successfully when this prompt appears.
-
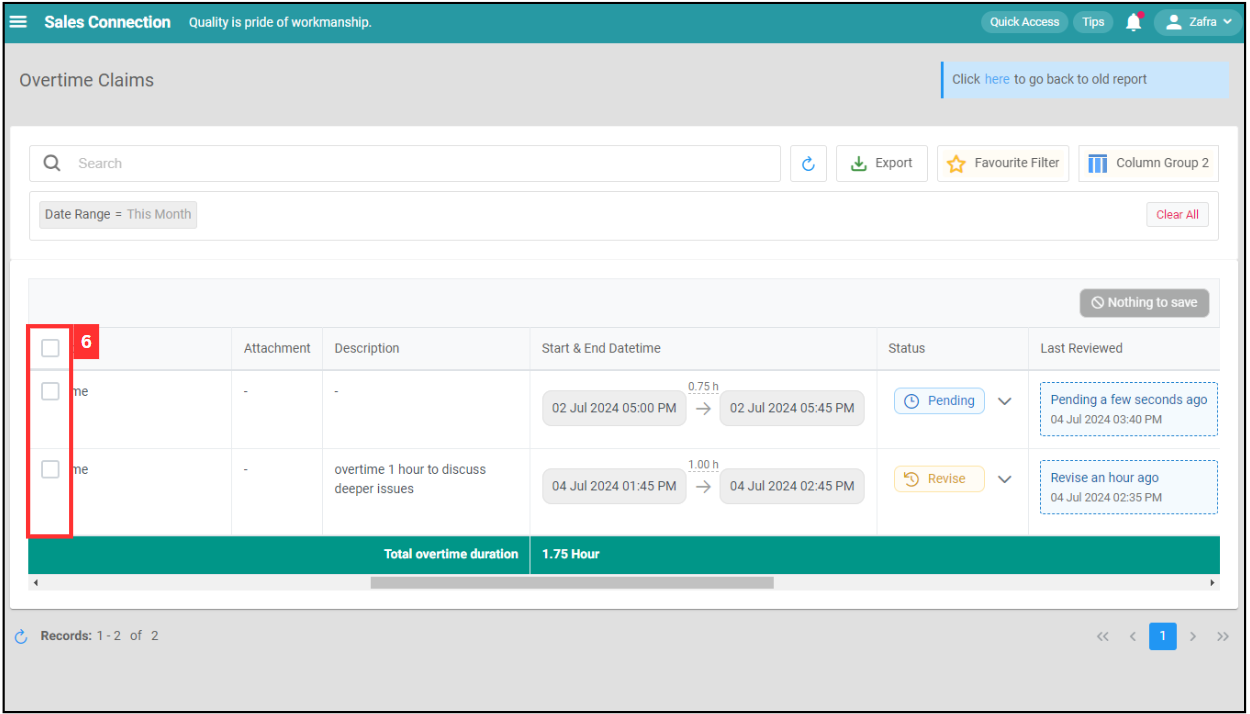
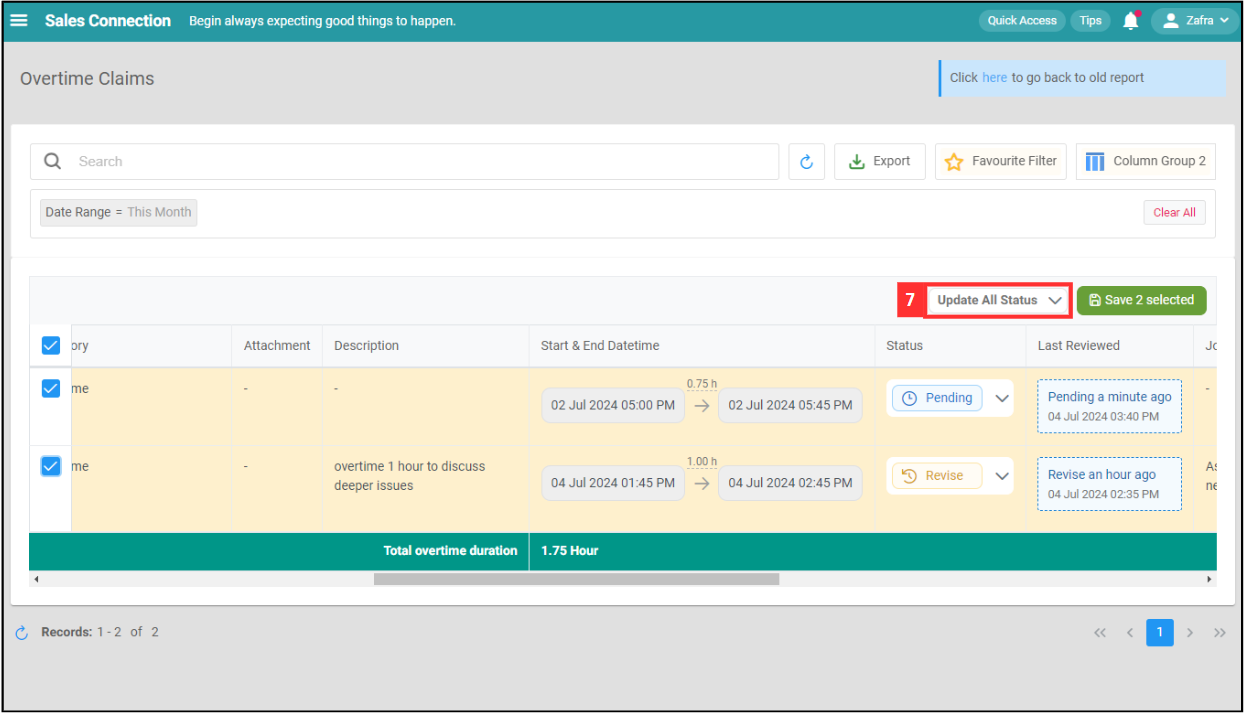
To update the status of multiple claims, tick the boxes on the left of the claims you want to update.
-
Click “Update All Status”.
-
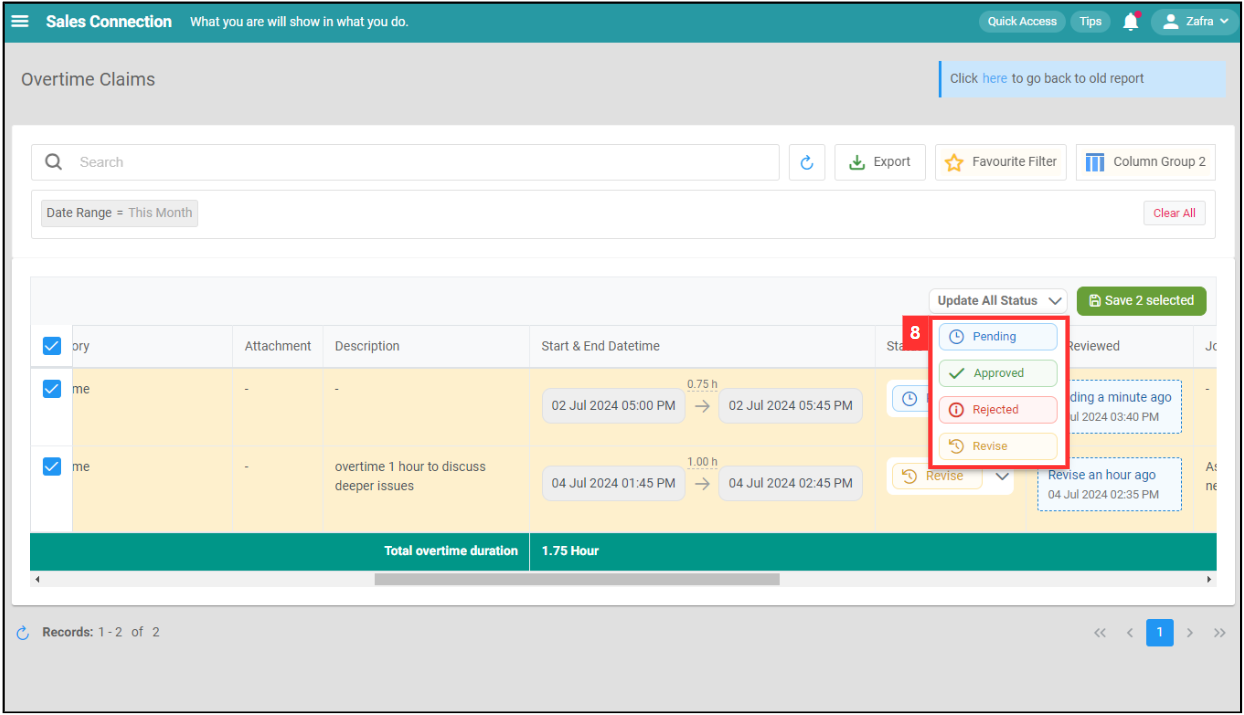
Select the status to update the chosen claim(s).
-
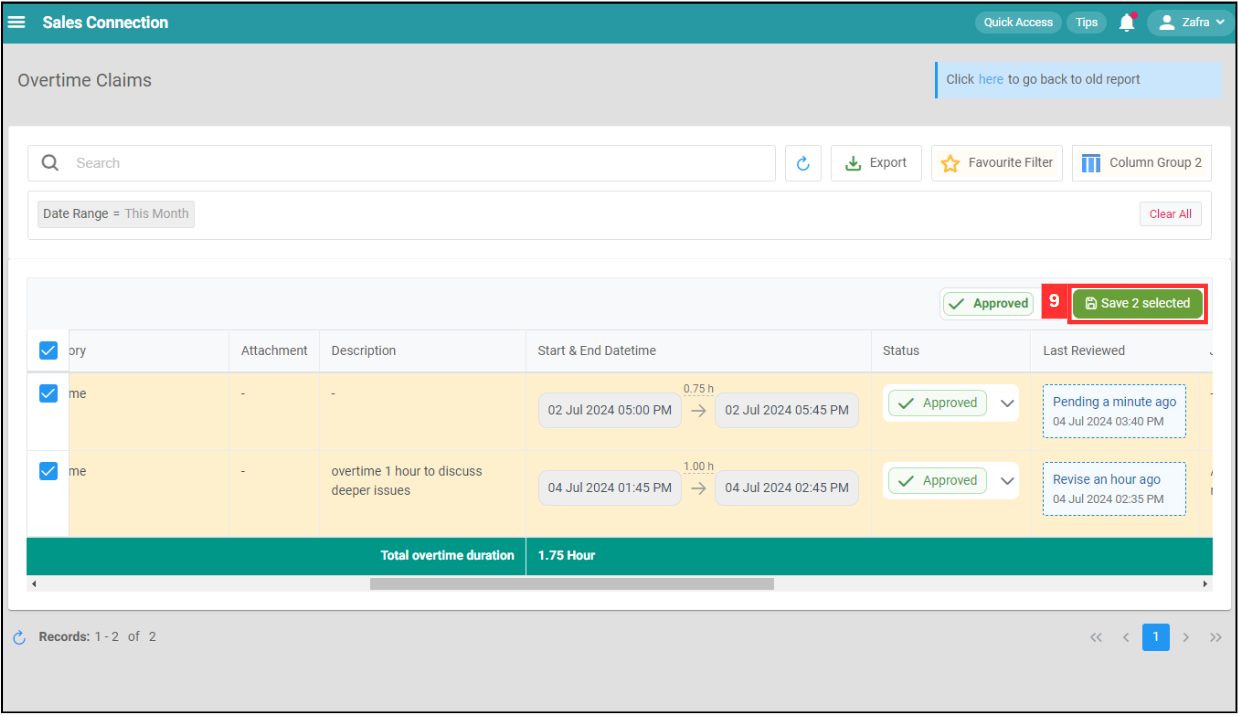
Click “Save X selected”.
-
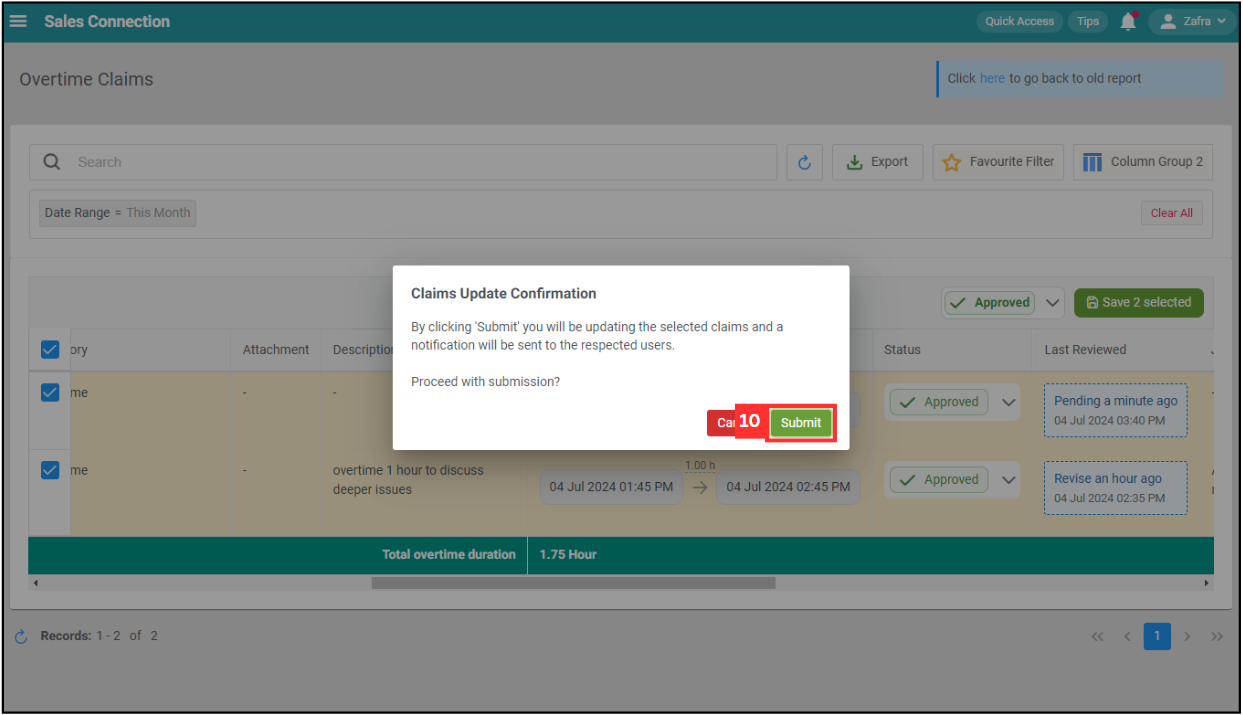
Click on the “Submit” button.
-
Your changes have been saved successfully when this prompt appears.
Refresh
Export
-
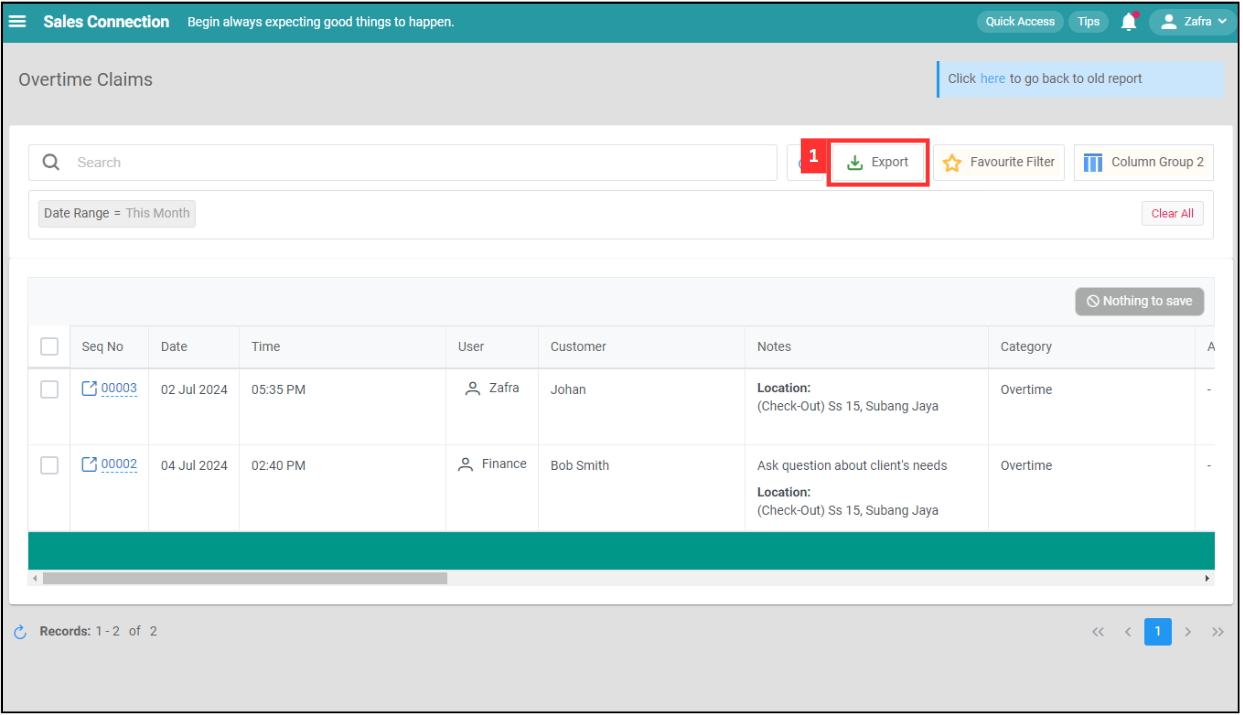
Click “Export” icon to download the overtime claims list.
Related Articles
