Version 1.0
Created: 8 August 2024
Updated: 8 August 2024
Attendance List
Attendance List helps to view the records of employee check-ins and check-outs for business travel. It includes details such as check-in dates, check-out dates, time, customer visits, total duration of check-ins, and non-check-in times, helping to monitor and manage employees’ travel and attendance records.
Navigate to the section by clicking it.
- Viewing Attendance List
- Adding New Group
- Editing Group
- Filtering Attendance List
- Saving Favourite Filter for Attendance List
- Returning to Default Filters
- Exporting Attendance List
View Attendance List
-
At the desktop site navigation bar, go to HR Suite > Attendance List.
Open Attendance List Here: https://system.caction.com/attendance/tablelist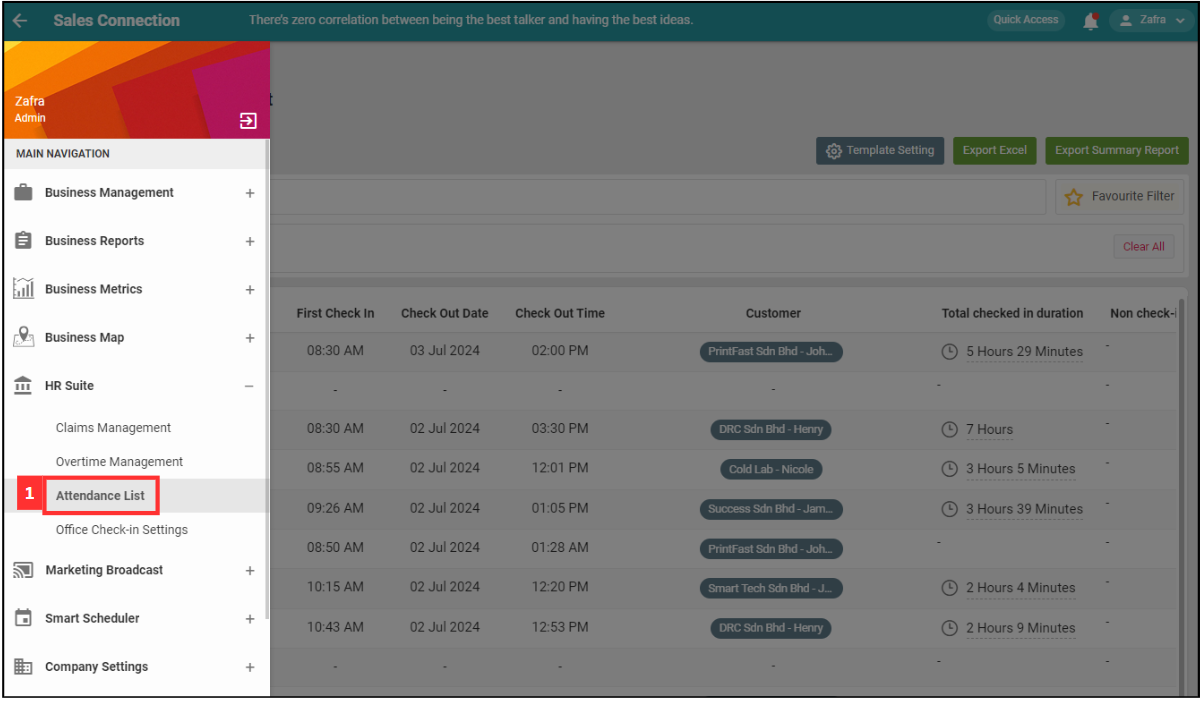
-
Click “Advance” to view more details of the attendance list.
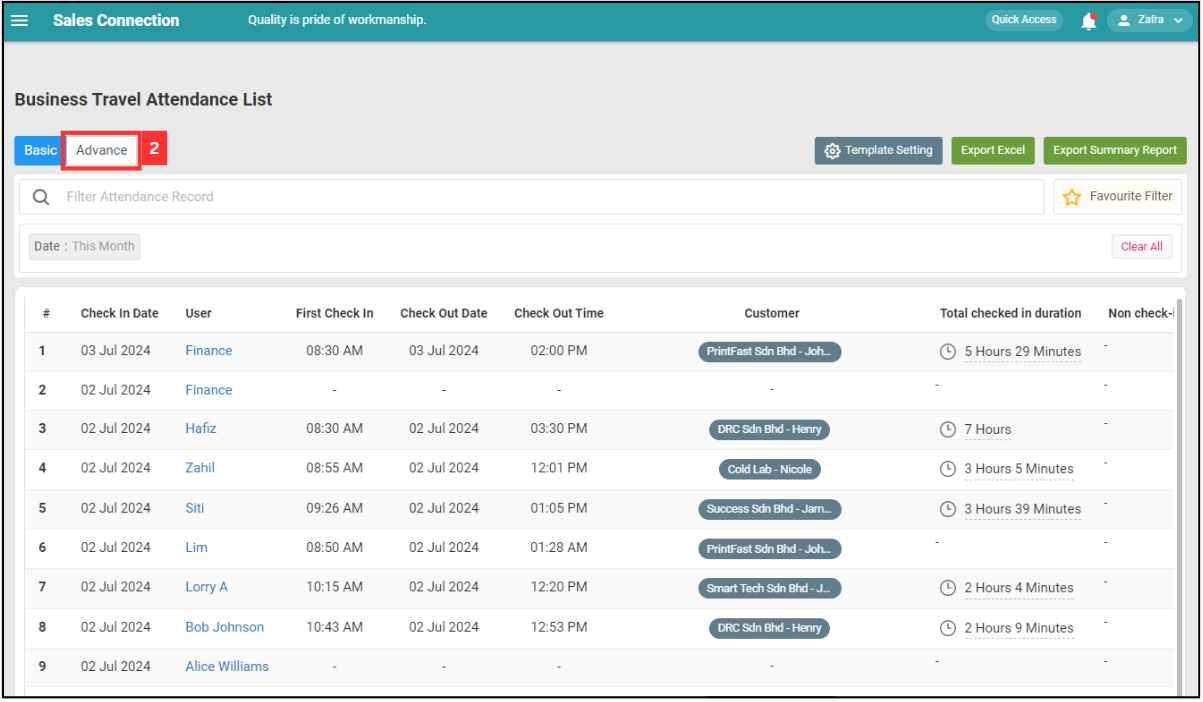
-
As can be seen below, the “Advance” view displays further details such as by First and Second shift to give you more attendance data to capture.
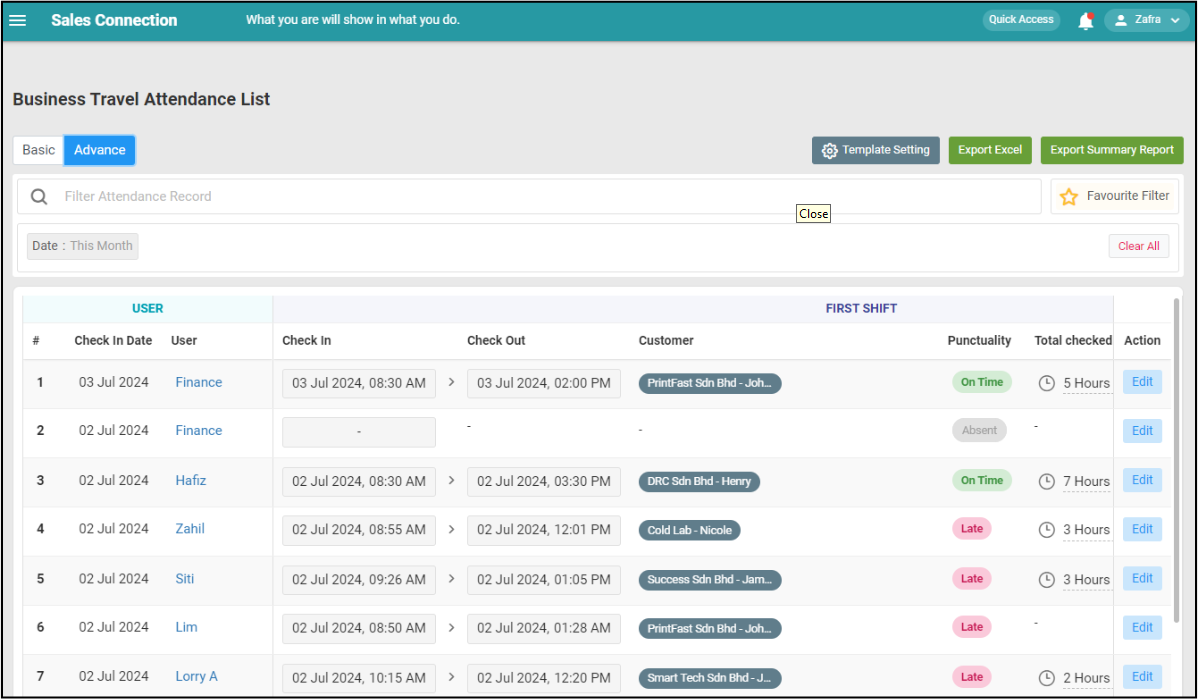
Adding New Group
-
Click “Template Setting” to access the “User Group Setting”. On this setting page, you would be able to set different staff groupings that has different shift timing applicable to them.
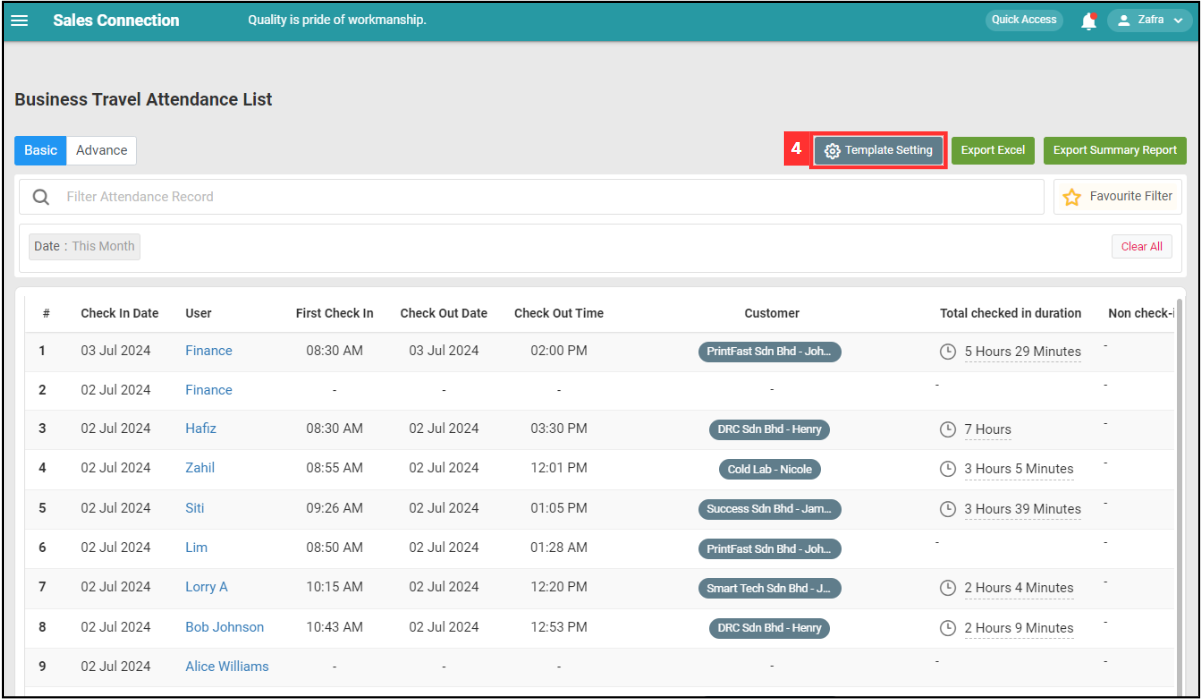
-
To add a new group, enter the group name of the new attendance settings.
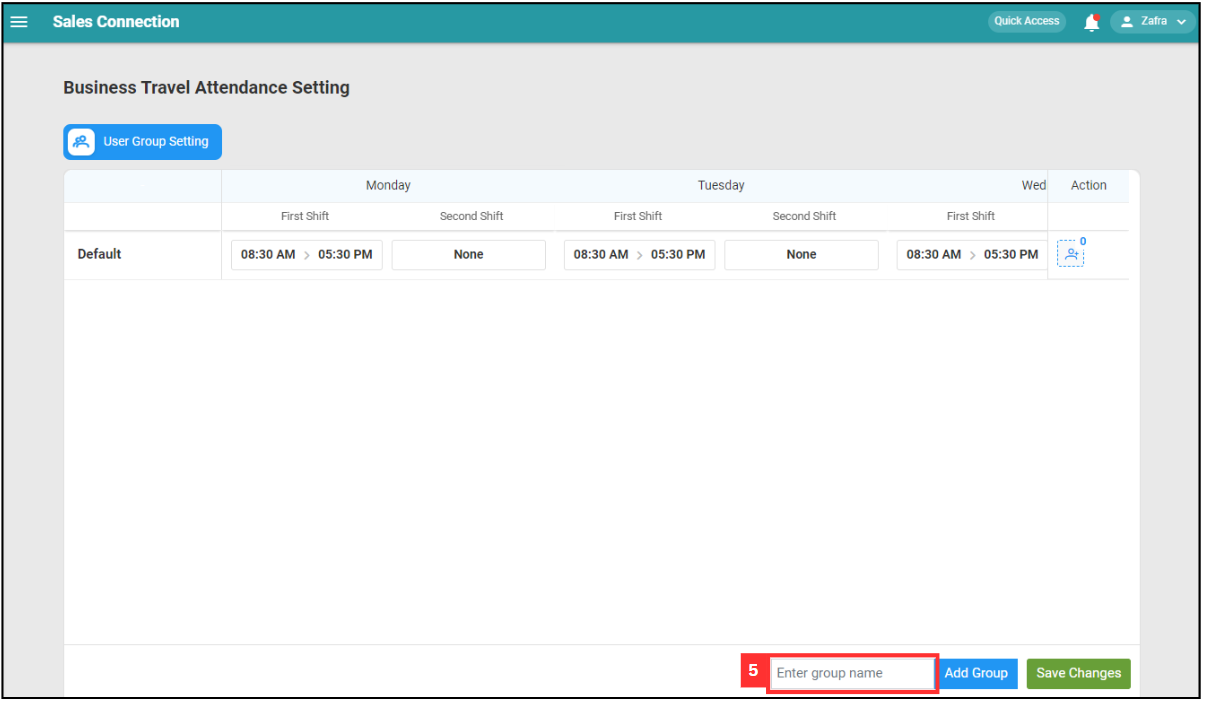
-
Click “Add Group”.
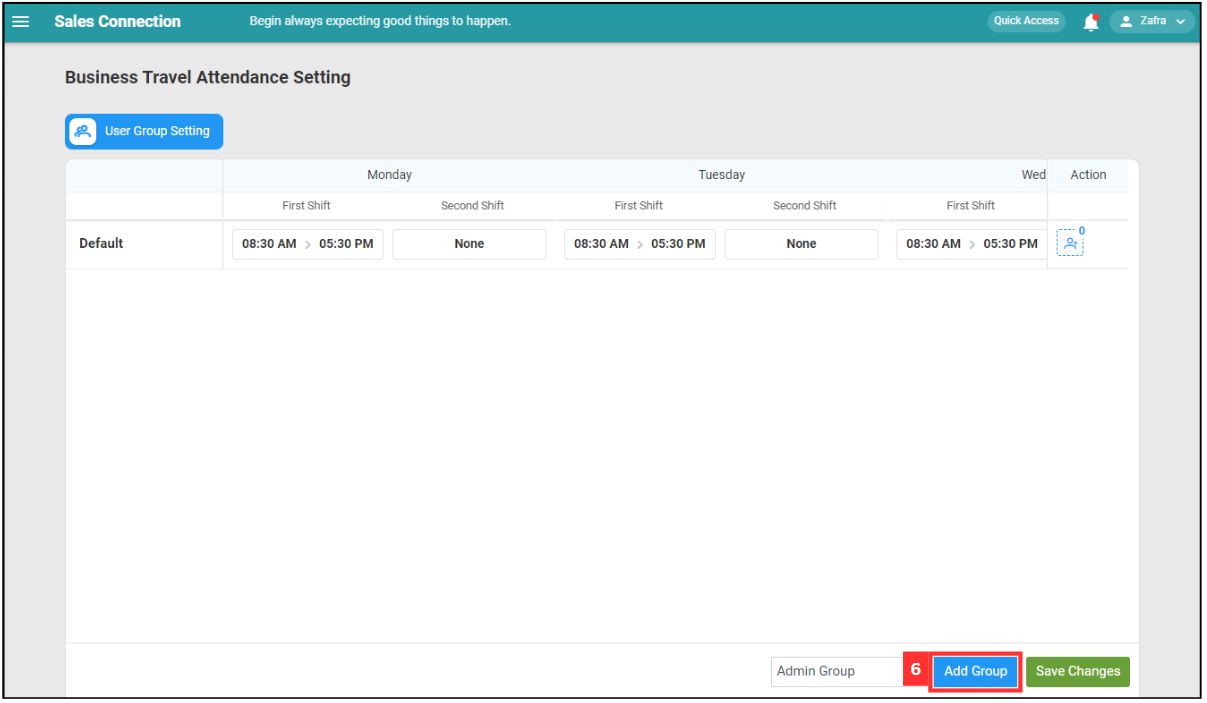
-
Click on the time of the day.
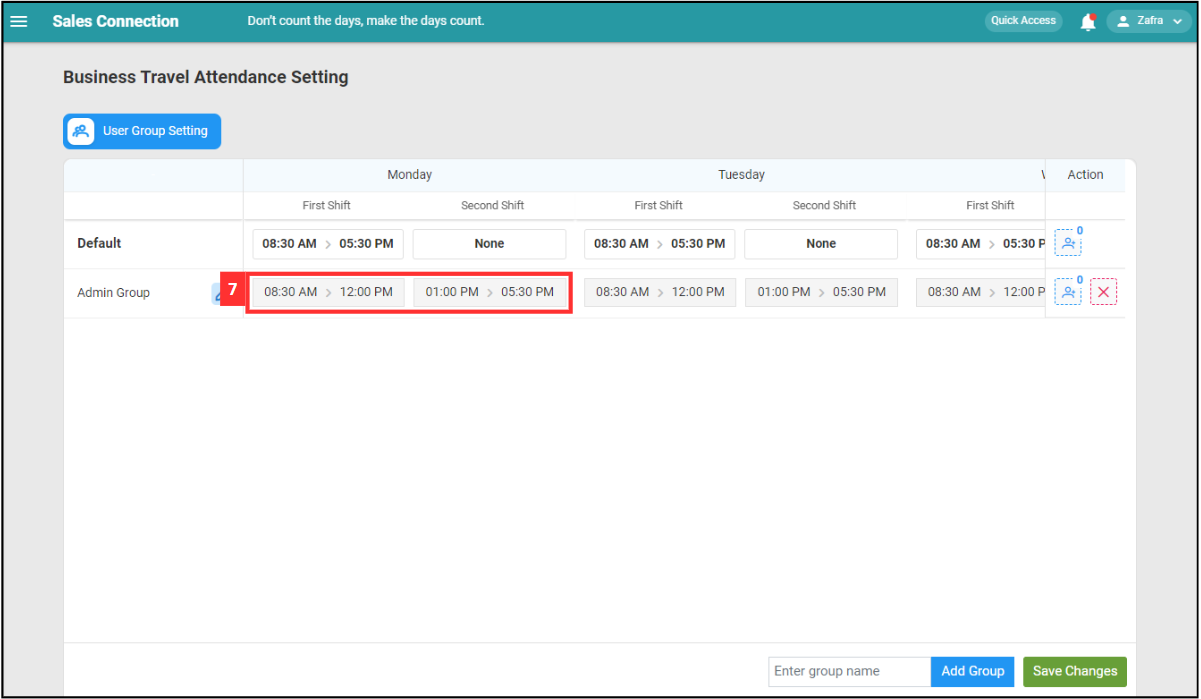
-
Update the shift time by clicking the arrow.
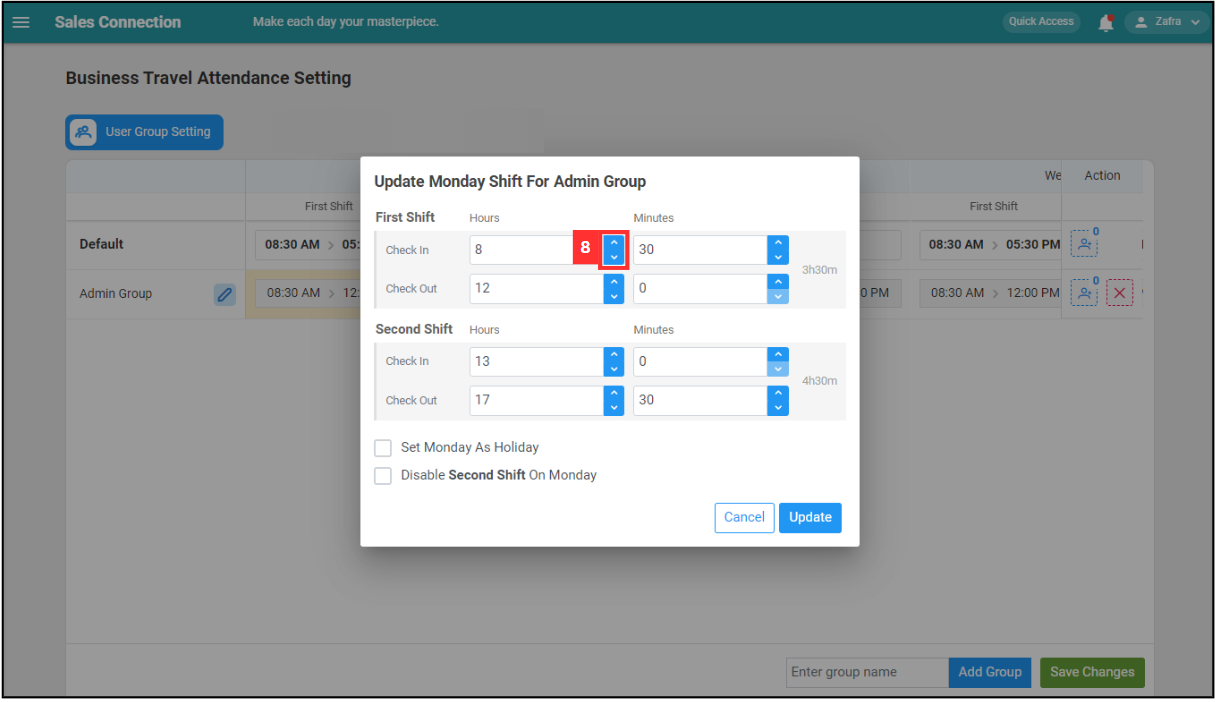
-
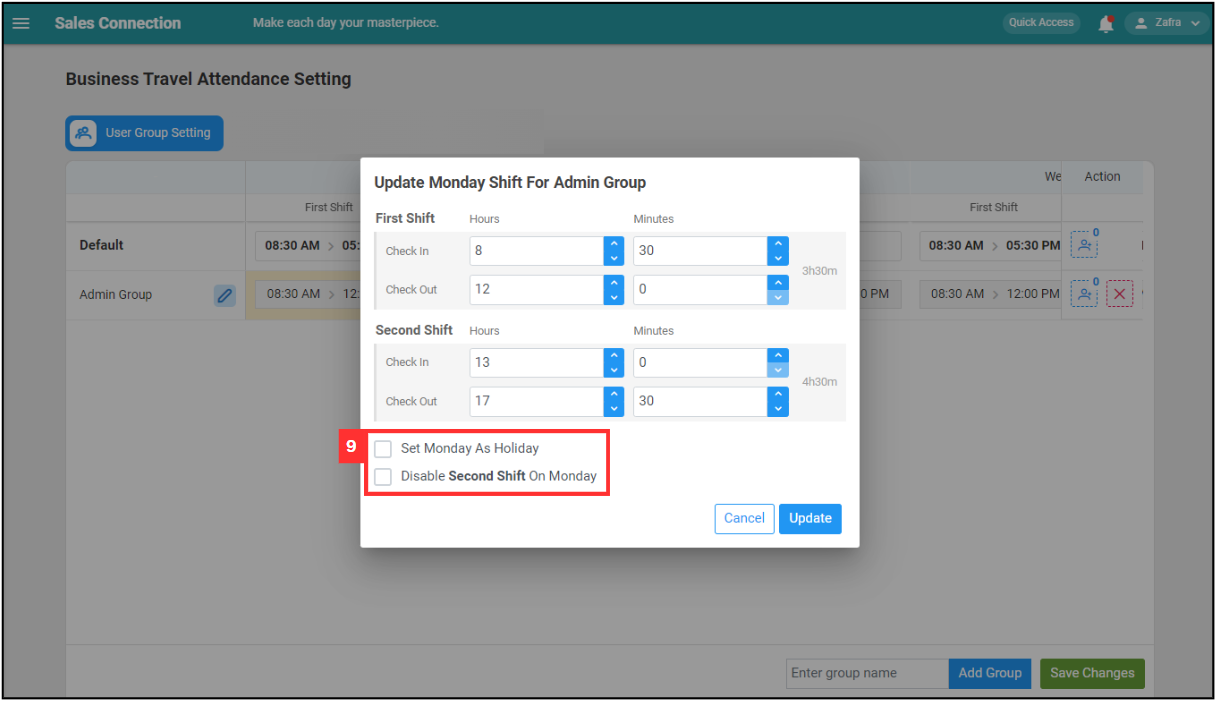
Tick the option based on your company preferences.
-
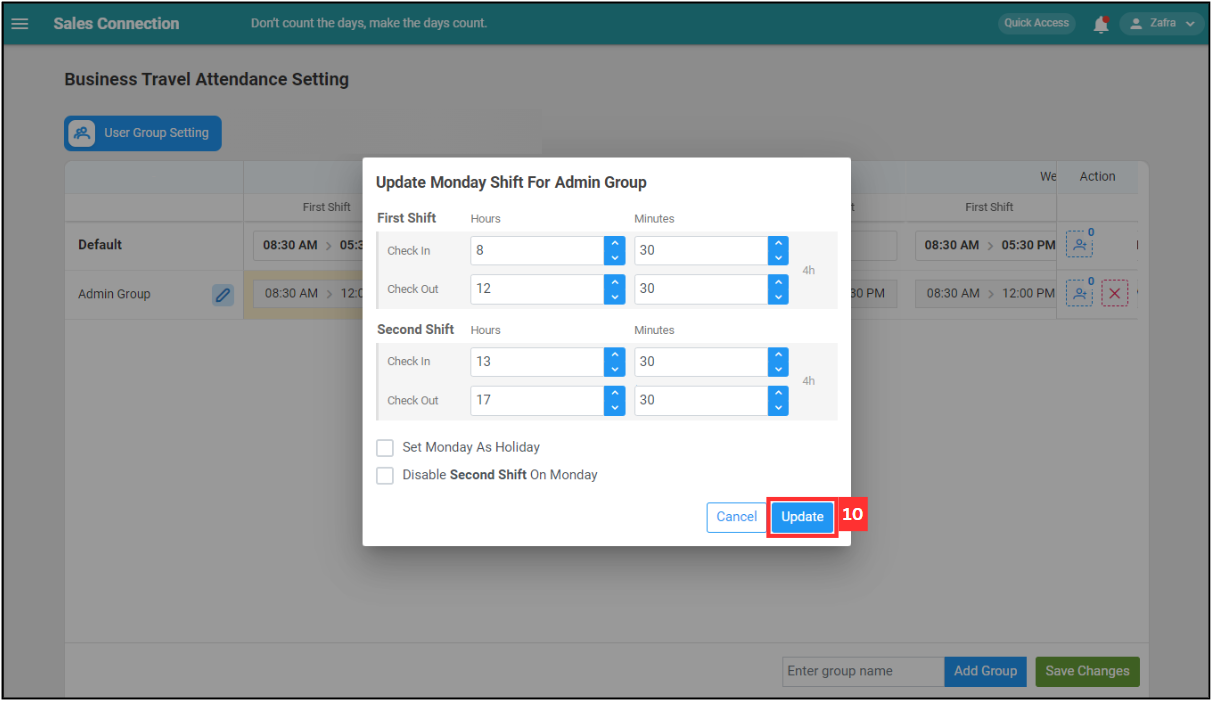
Click on the “Update” button.
-
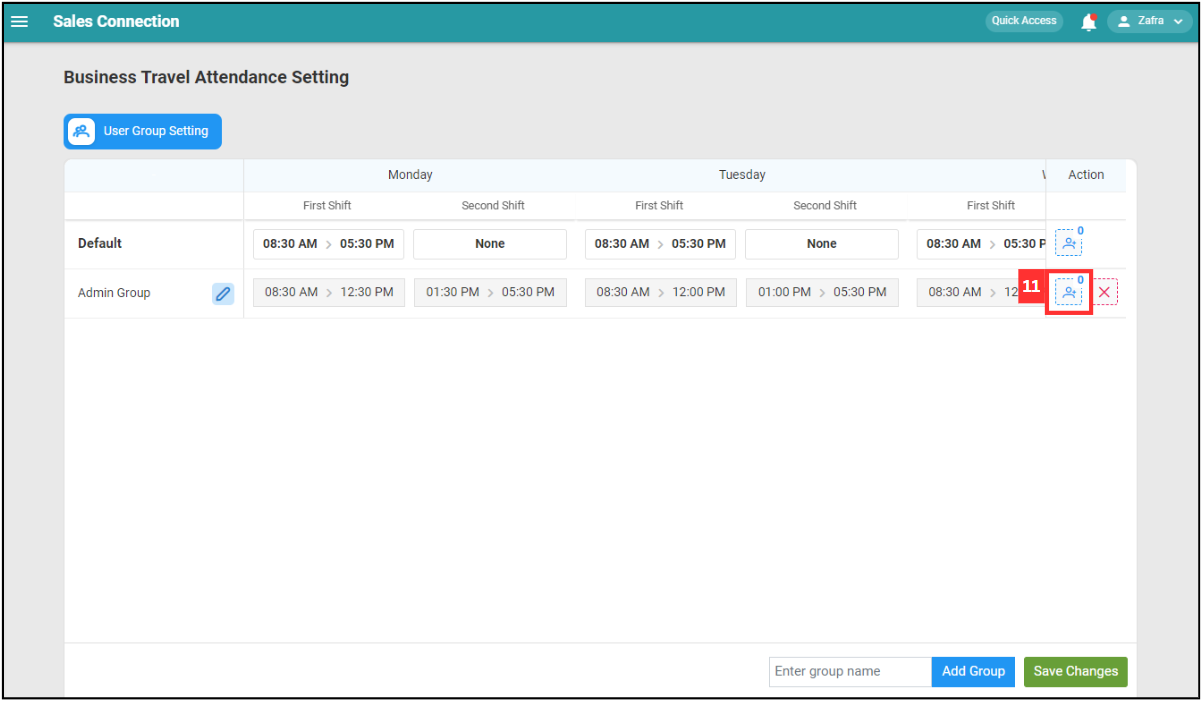
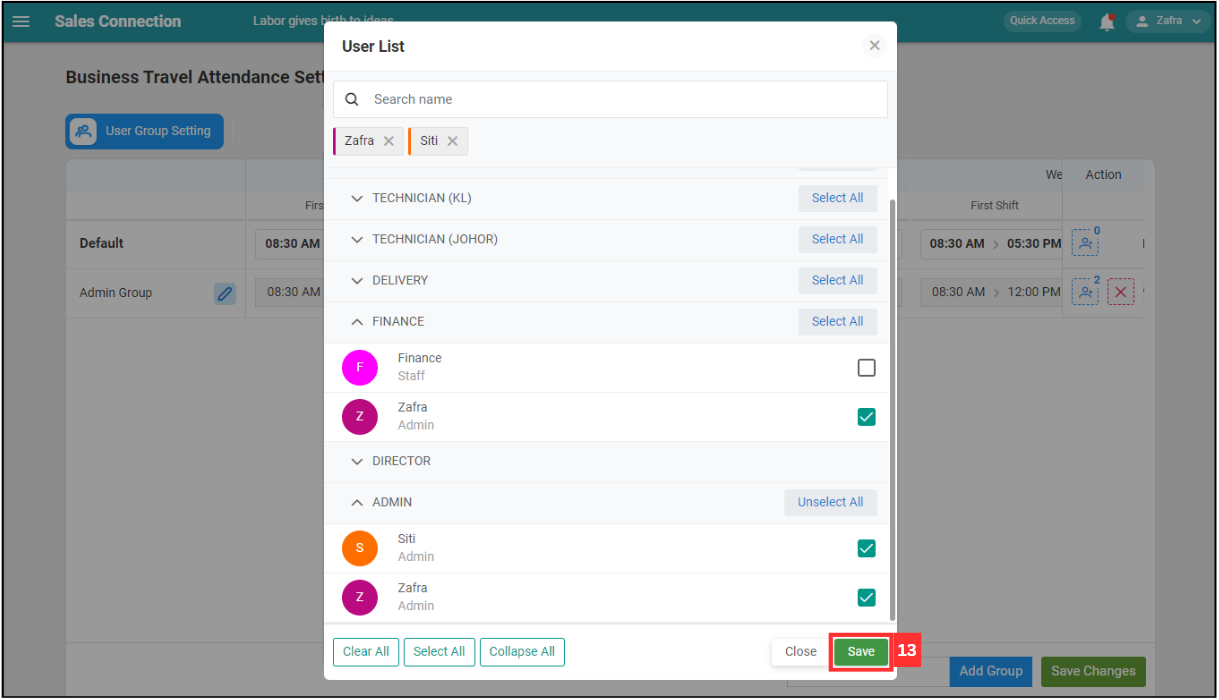
Click the “User” icon to assign users to the group.
-
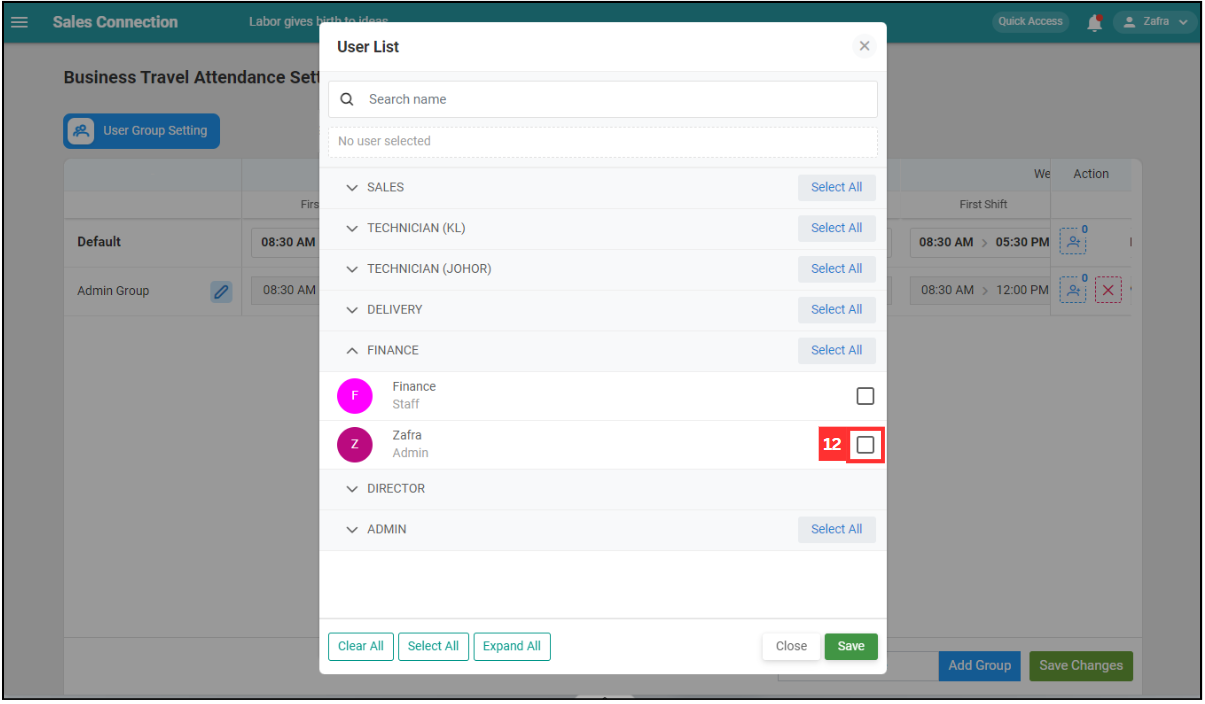
Select the users you want to assign to the group.
-
Click on the “Save” button.
-
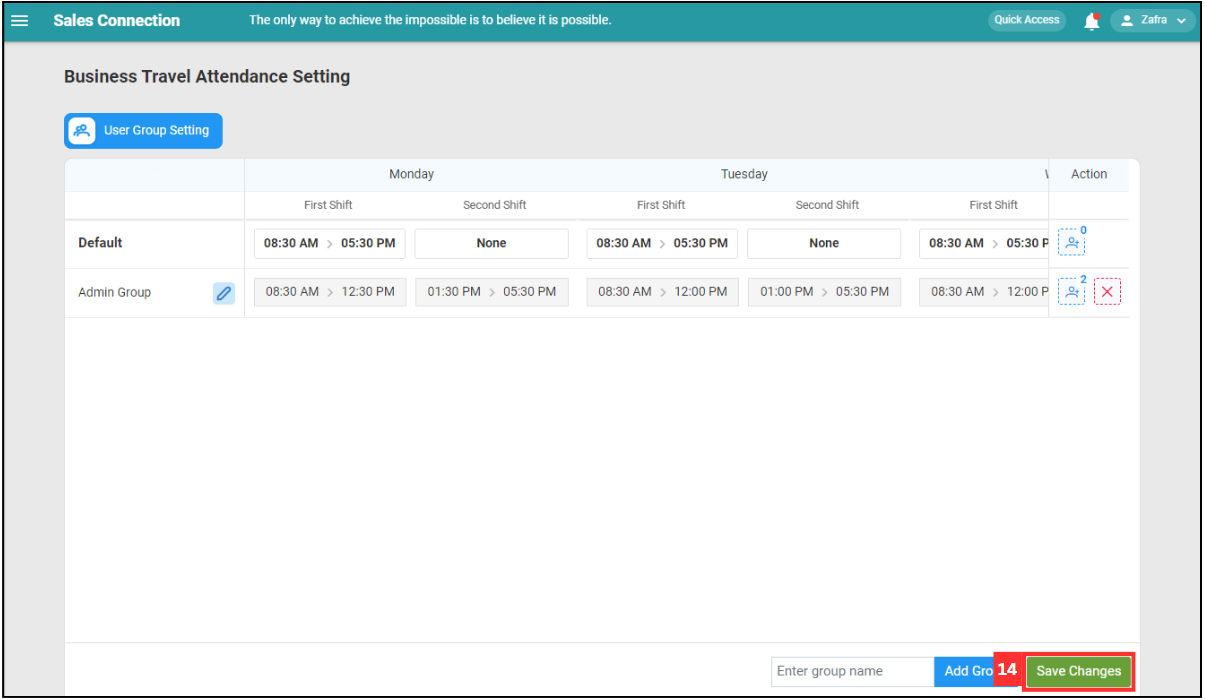
Click “Save Changes” to save the attendance settings.
-
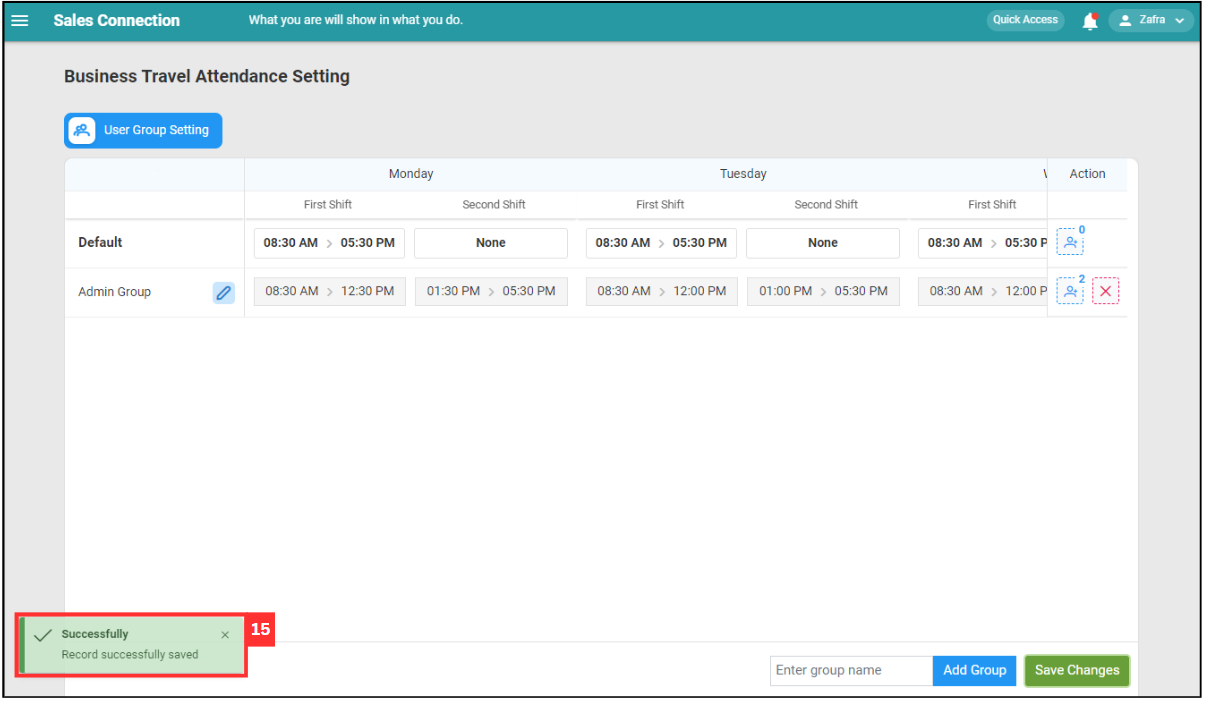
Your changes have been saved successfully when this prompt appears.
Editing Group
-
Click on the icon below to modify the attendance settings.
No Terms Description a Edit Click to edit the name of the group. b Delete Click to delete the group. 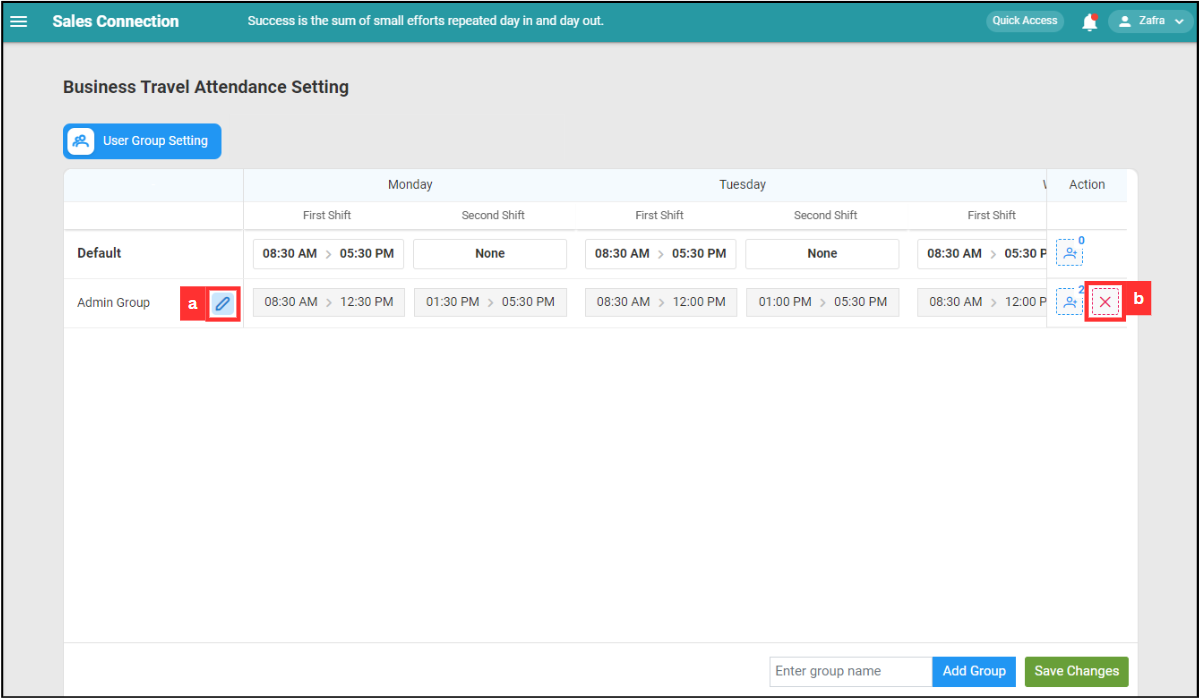
Filtering Attendance List
-
Click “Filter Attendance Record”.
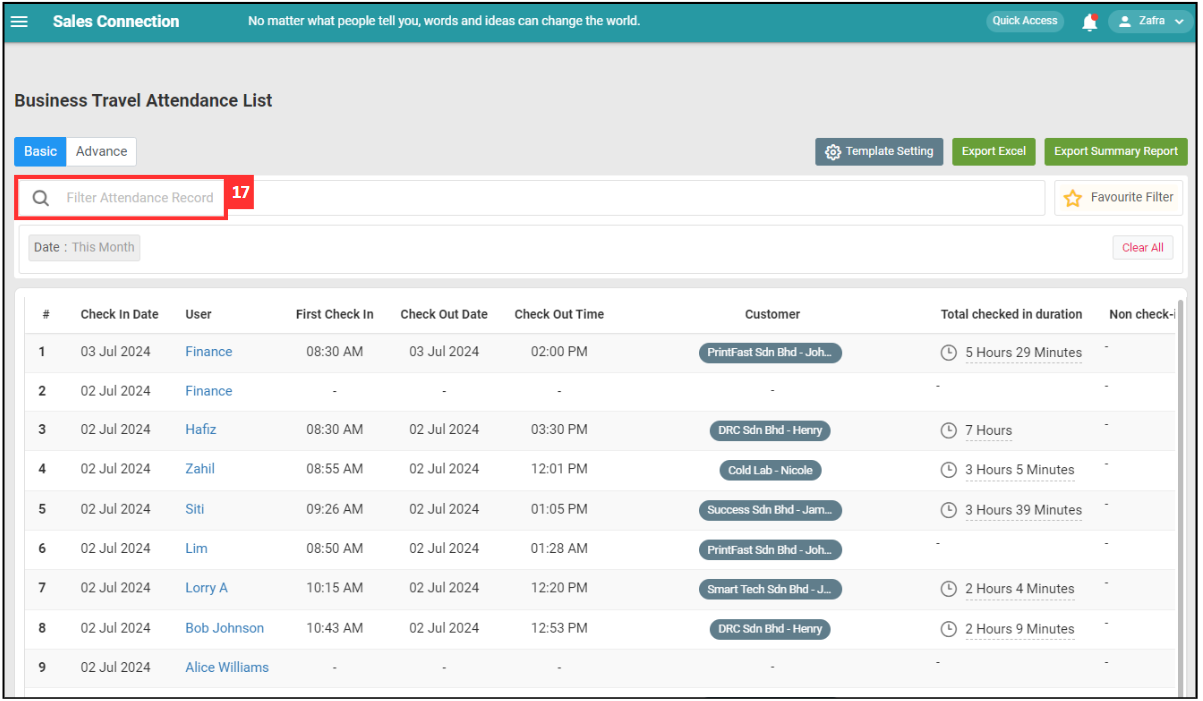
-
Click on the “Filter Variable” you want.
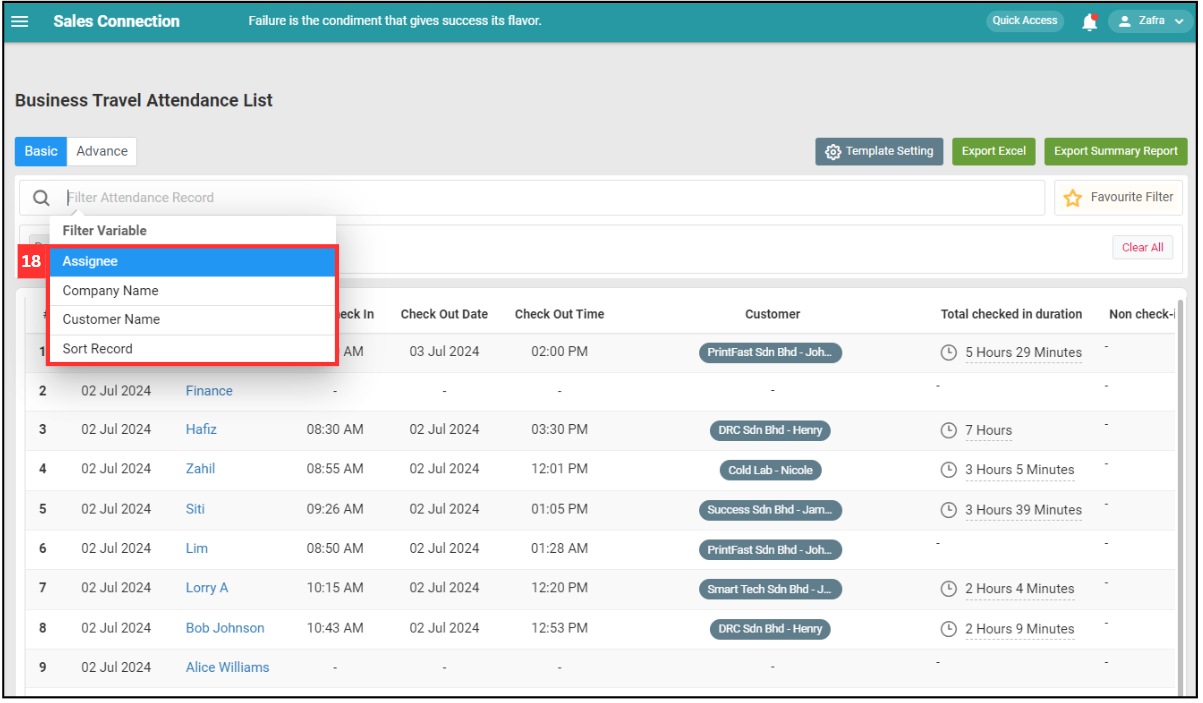
-
Enter the “Filter Value” you want.
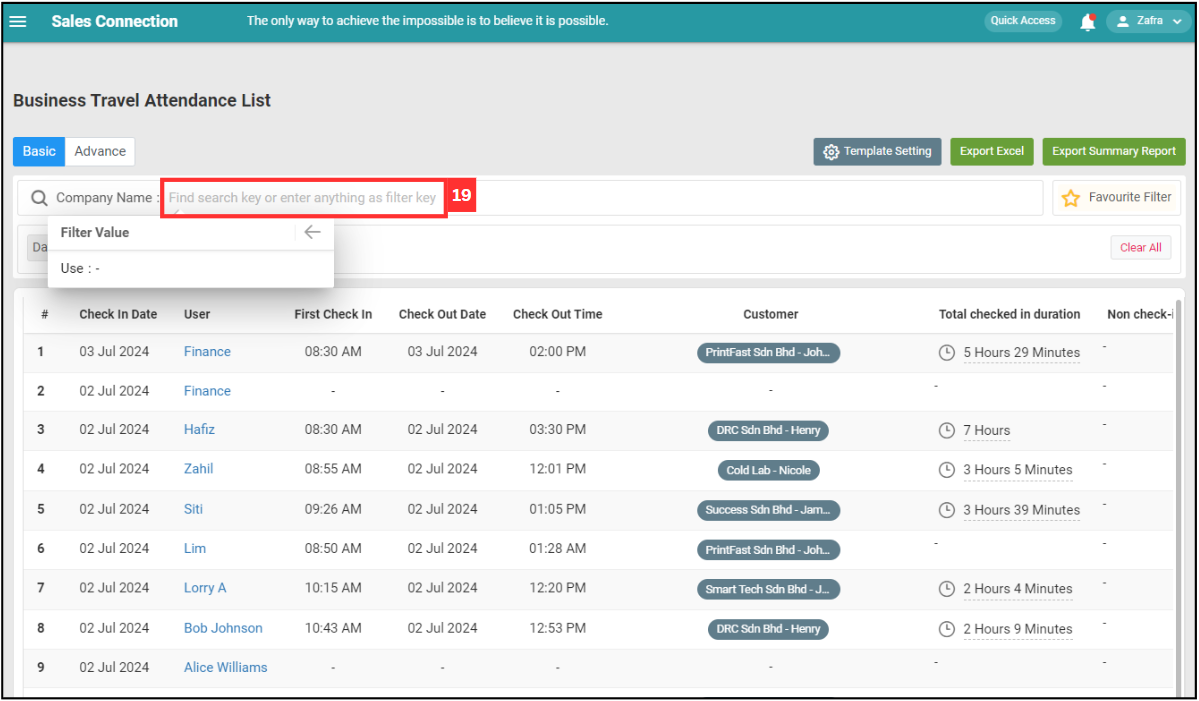
-
Press the “Enter” key to filter.
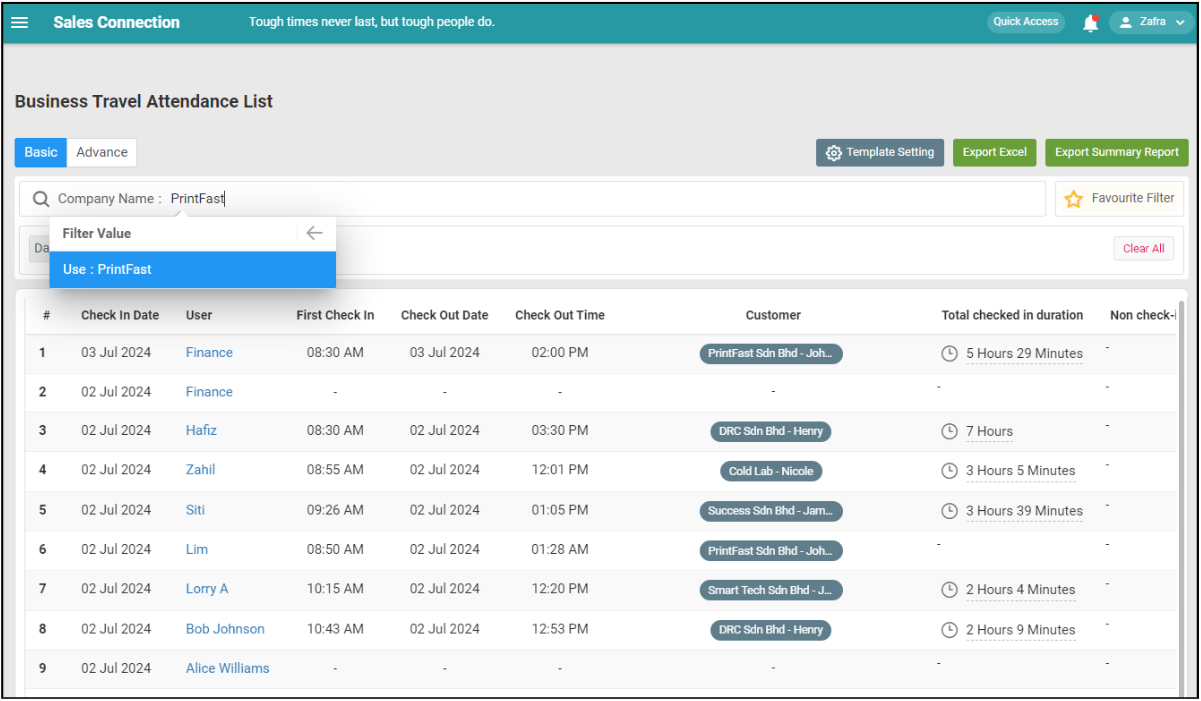
-
The attendance list with the filter will be shown as below.
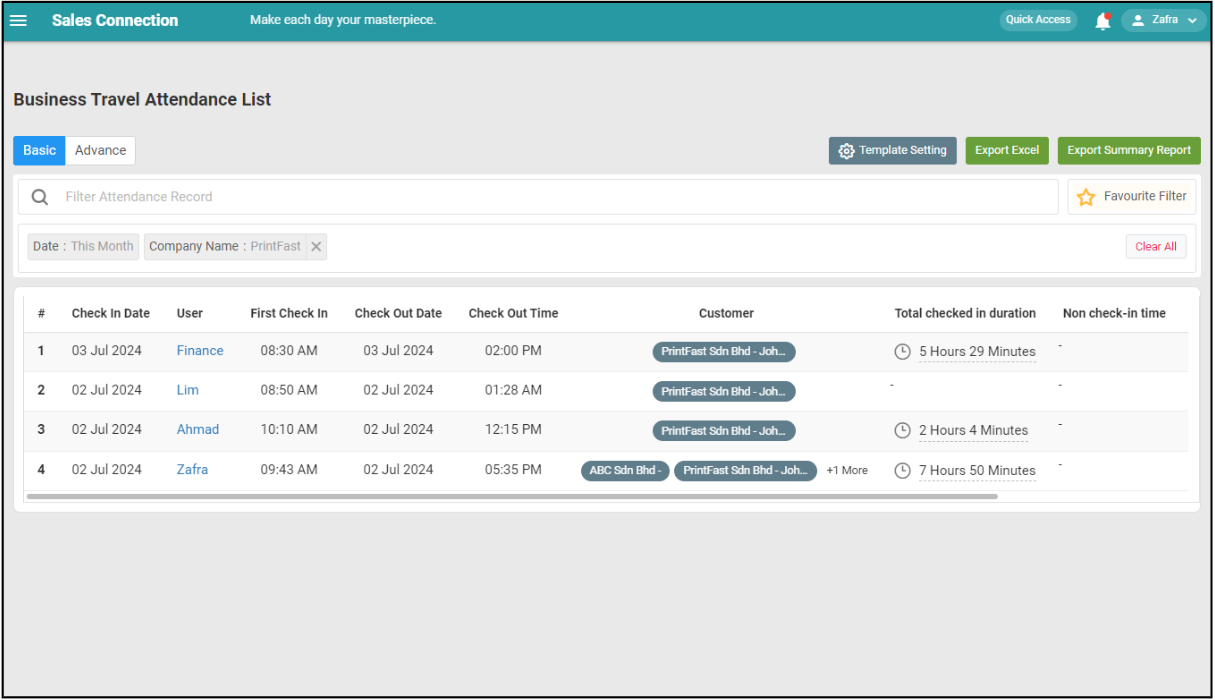
Saving Favourite Filter for Attendance List
-
Click “Favourite Filter’ to save the filter as favourite filter.
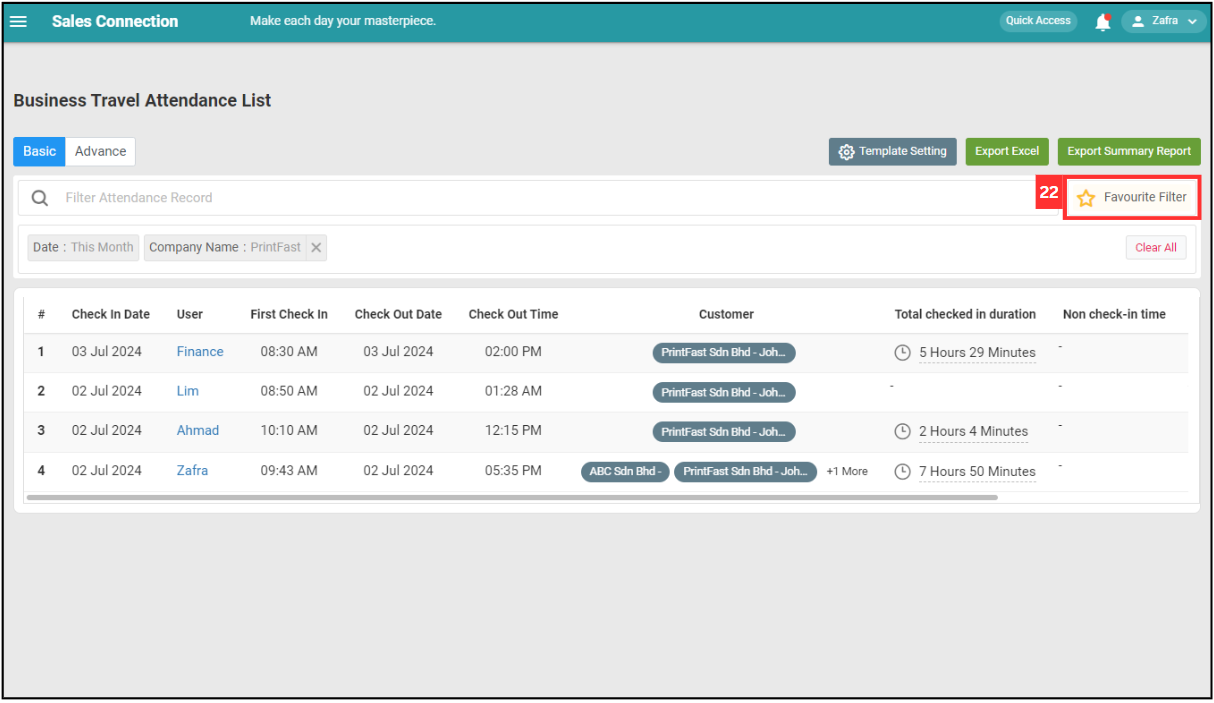
-
Click “+ Add”.
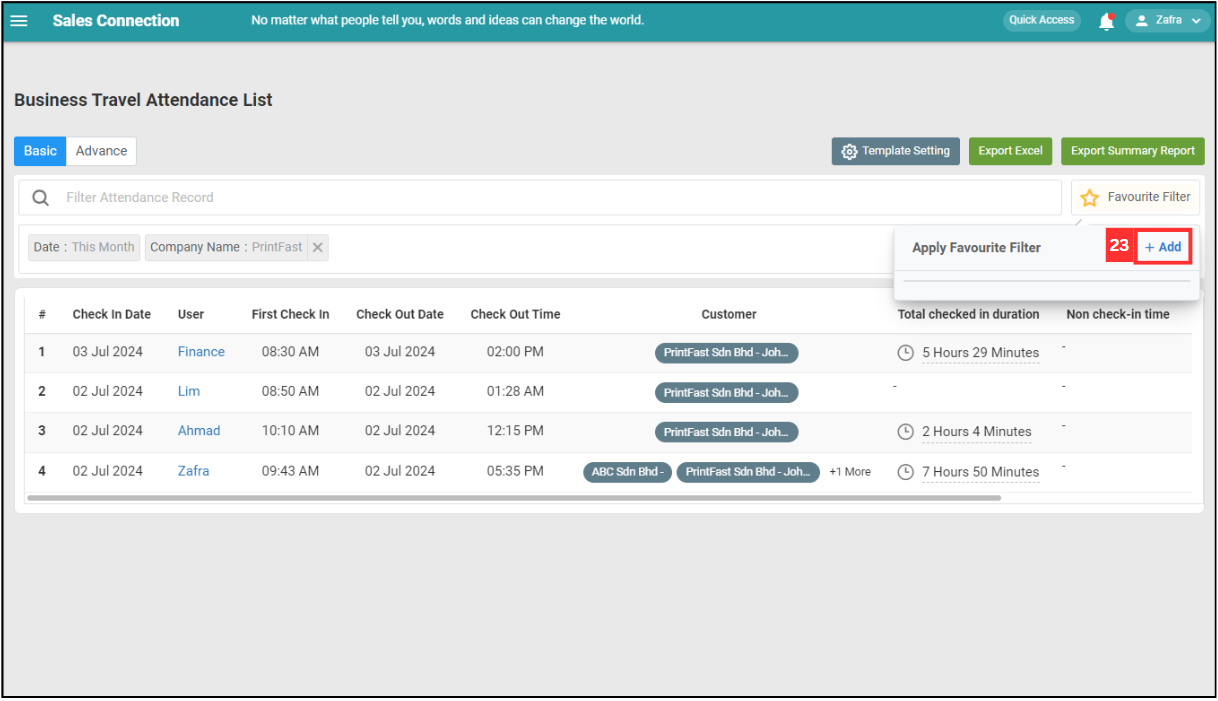
-
Enter the name of the favourite filter.
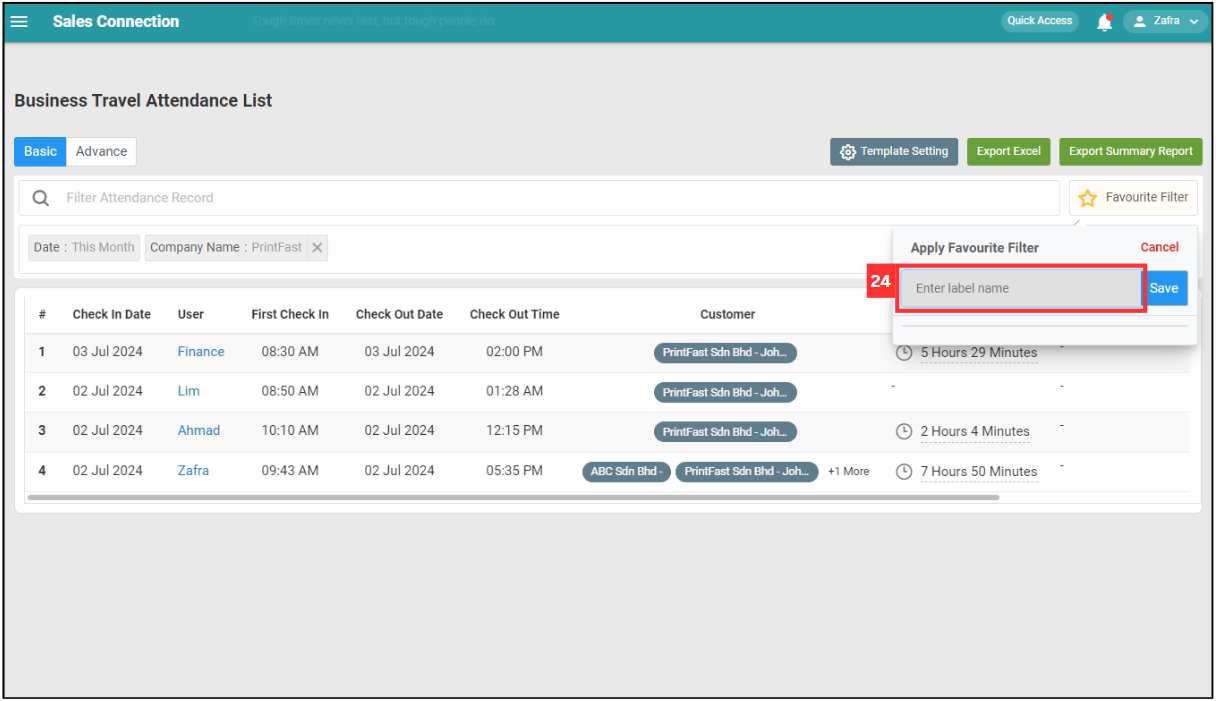
-
Click on the “Save” button.
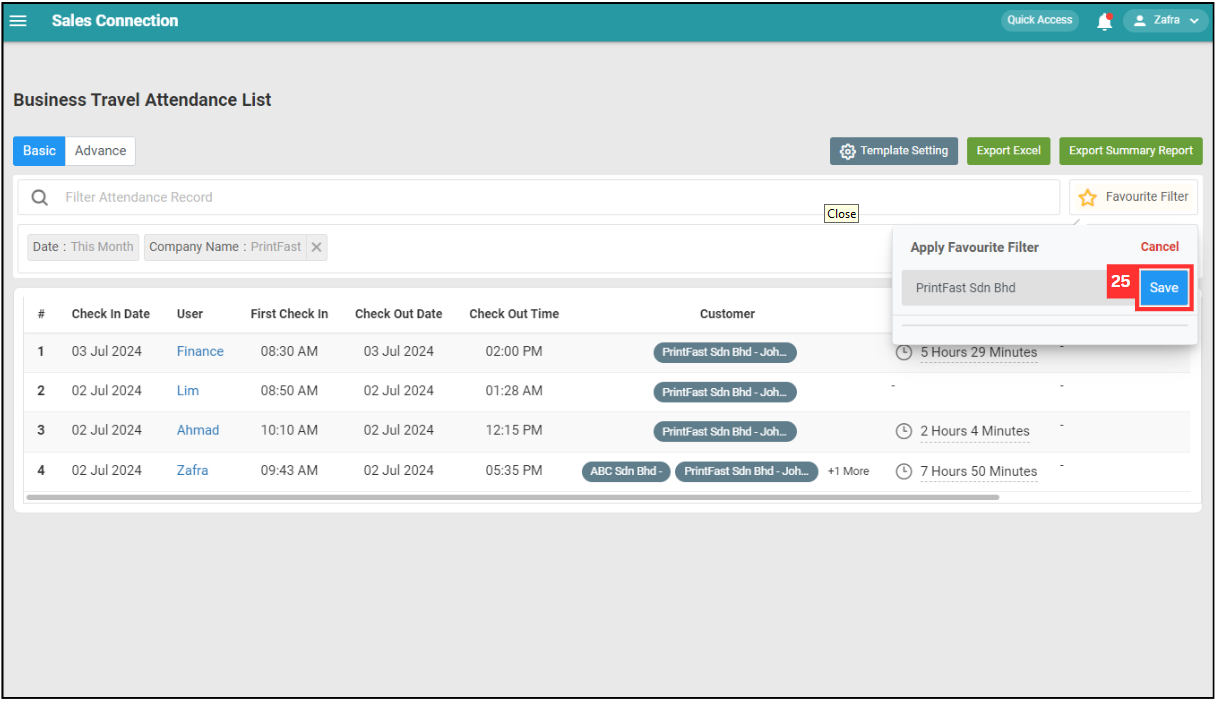
-
The favourite filter has been saved successfully and you can apply it whenever you want.
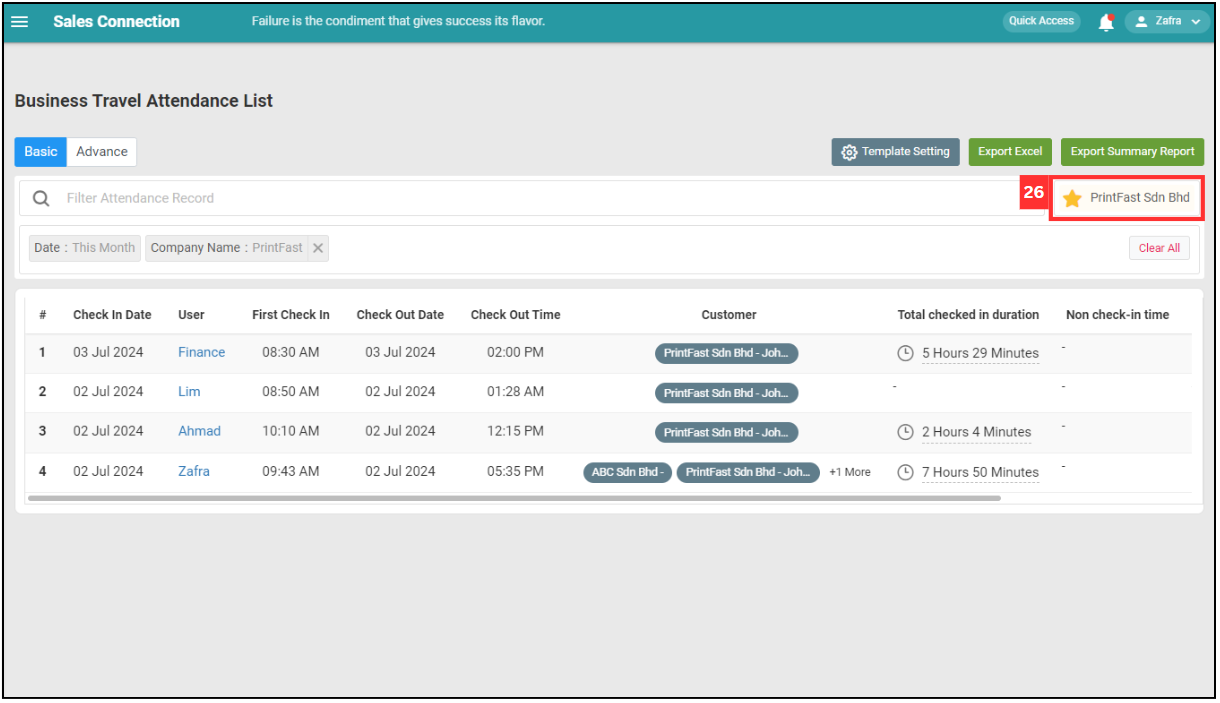
Returning to Default Filters
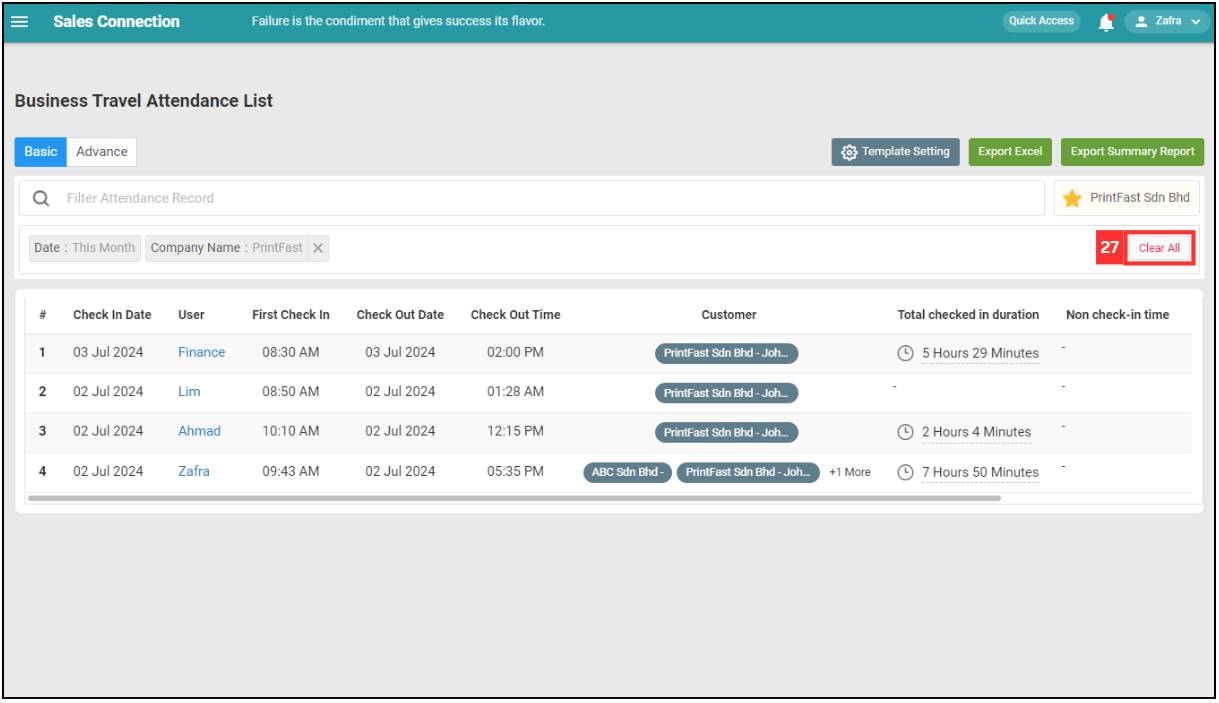
-
Click “Clear All” to remove all the filters applied.
Exporting Attendance List
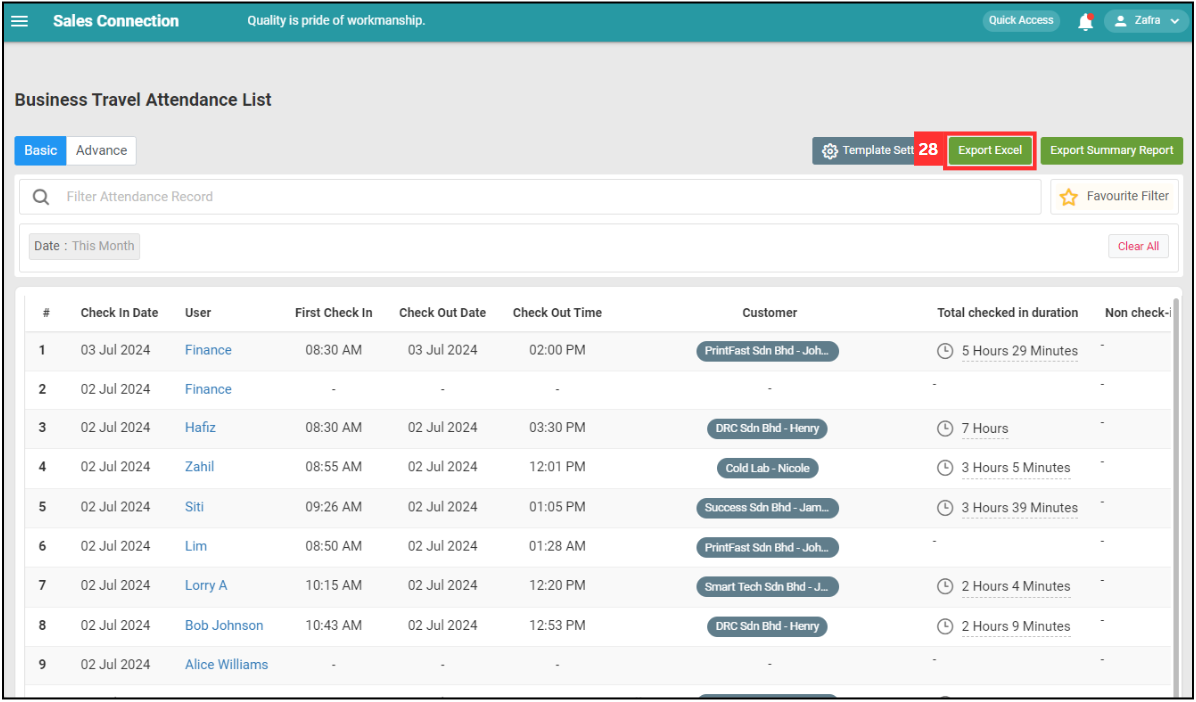
-
Click “Export Excel” to get the report of the attendance list in excel format.
-
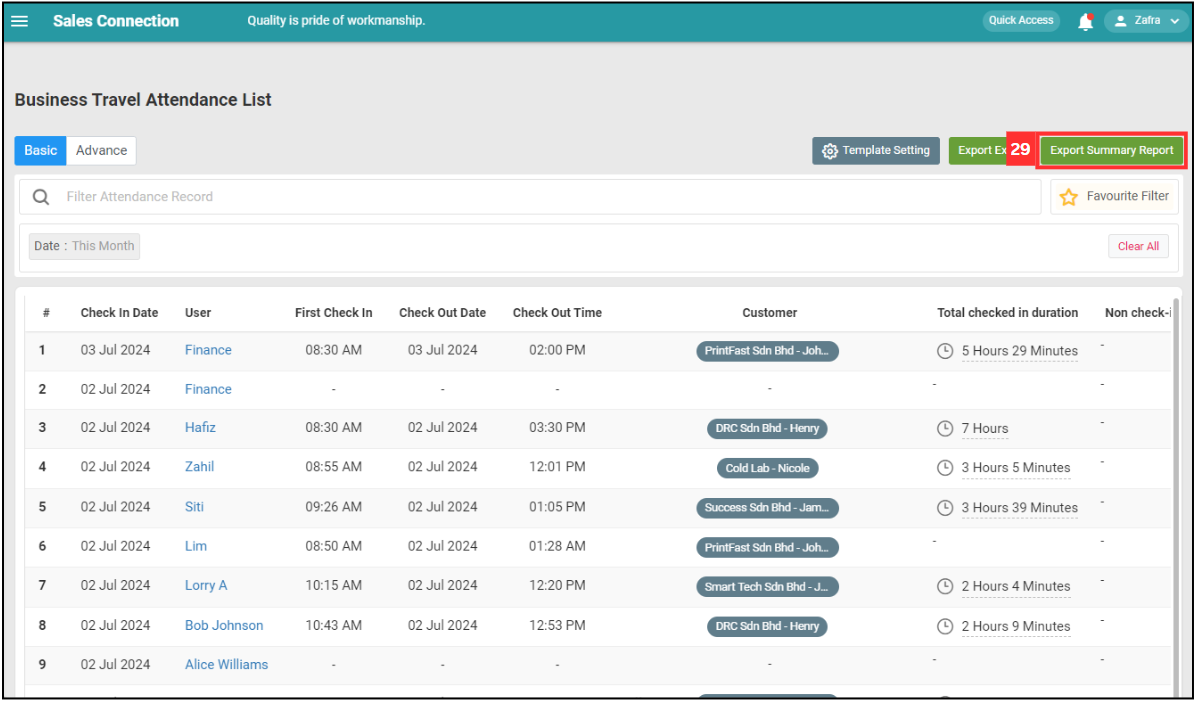
Click “Export Summary Report” to get the summary report of the attendance list.
Related Articles