Version 1.0
Created: 27 May 2024
Updated: 7 August 2024
How to Add a New Status for Customers, Projects, Jobs or Digital Forms?
Keep track of all your Job, Project, Customer, Asset, Digital Form(s), and other statuses with the right status set up.
Navigate to the section by clicking it.
-
In adding statuses for all the different data levels in your system, we will be utilising the Wizard page that has access to all status relevant pages. In this guide, we will focus on the Project status as an example. At the desktop main navigation bar, click on Wizard.
Open Wizard Page Here: https://system.caction.com/wizard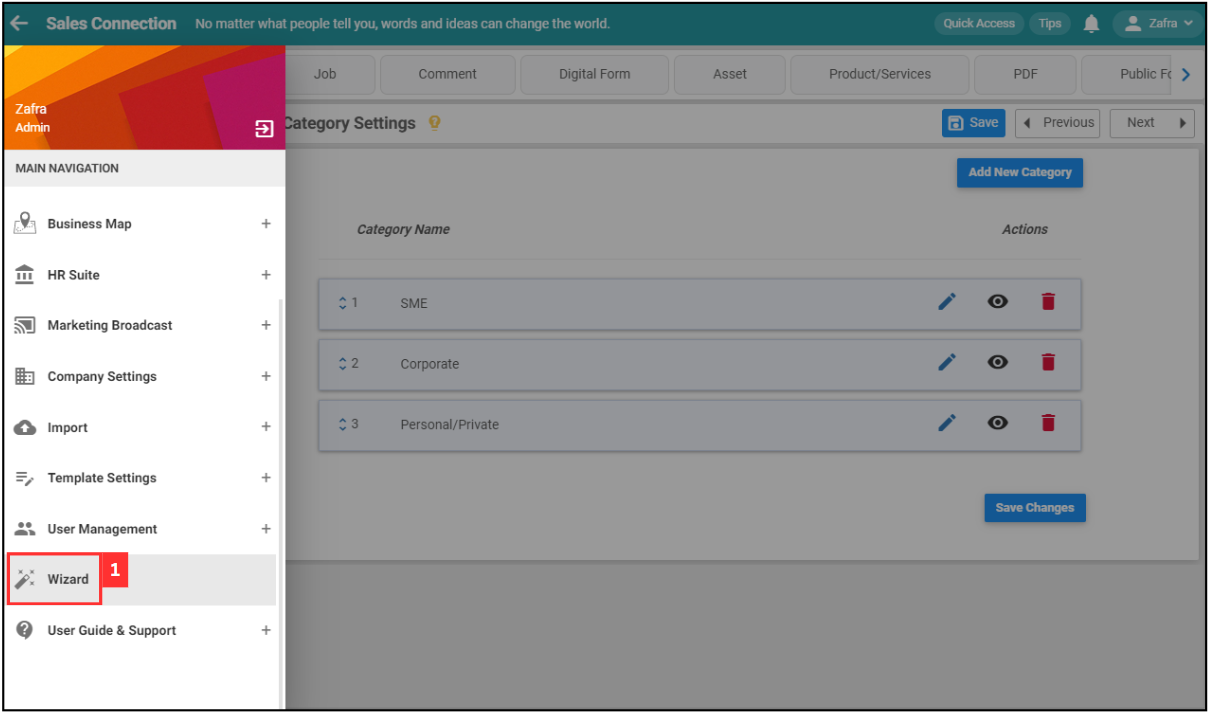
*Note: You must have access to Company Settings menu to perform this action. Please request permission or help from your admin if you do not have access to the menu.
Add New Status
-
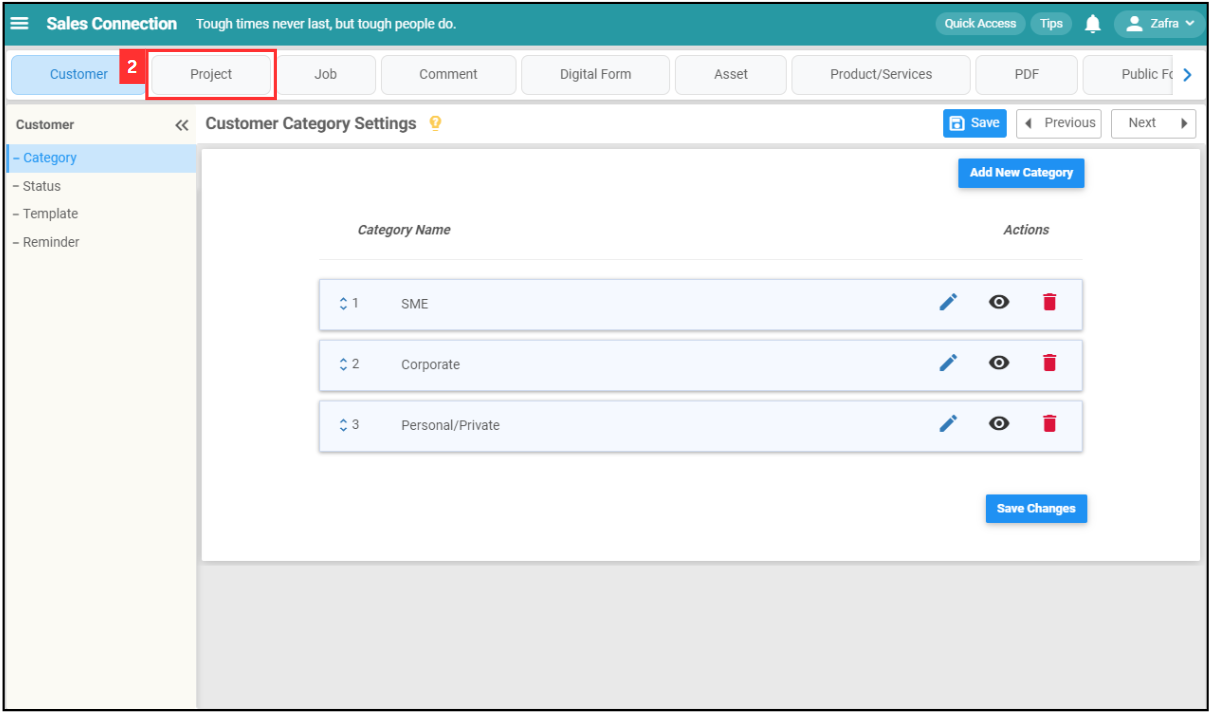
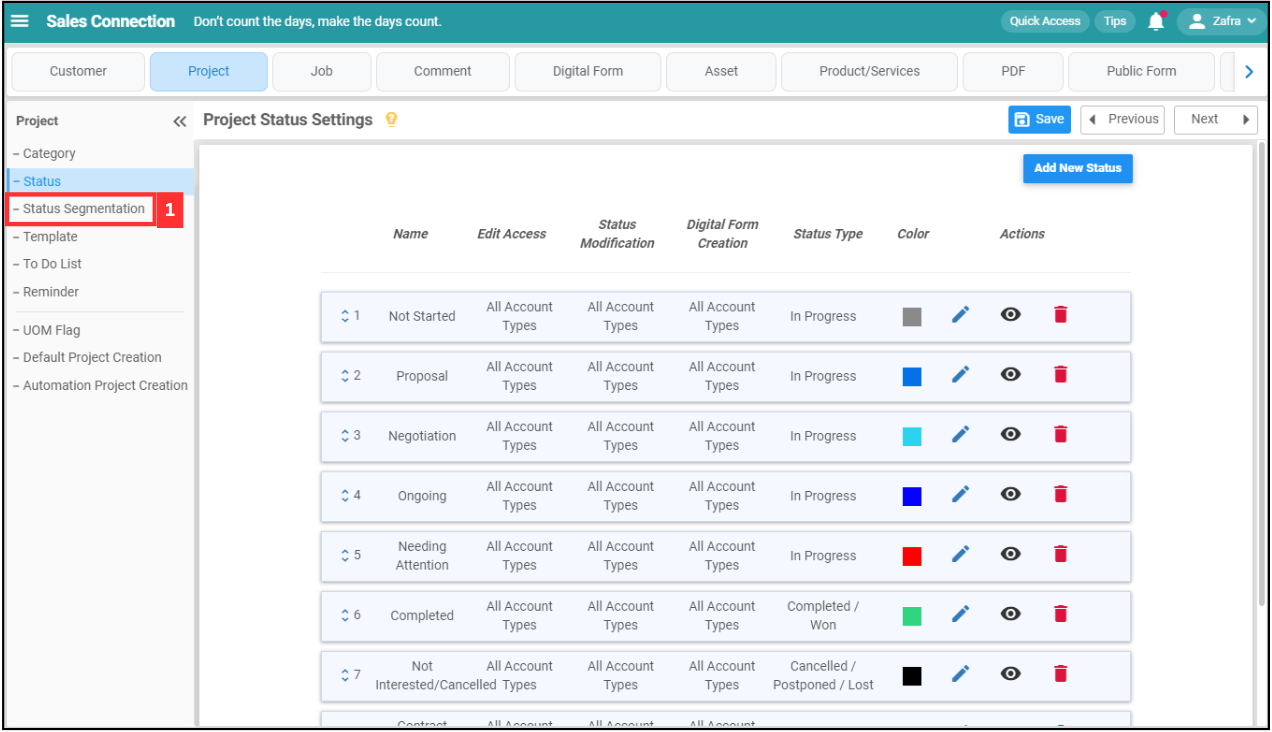
Click “Project”.
-
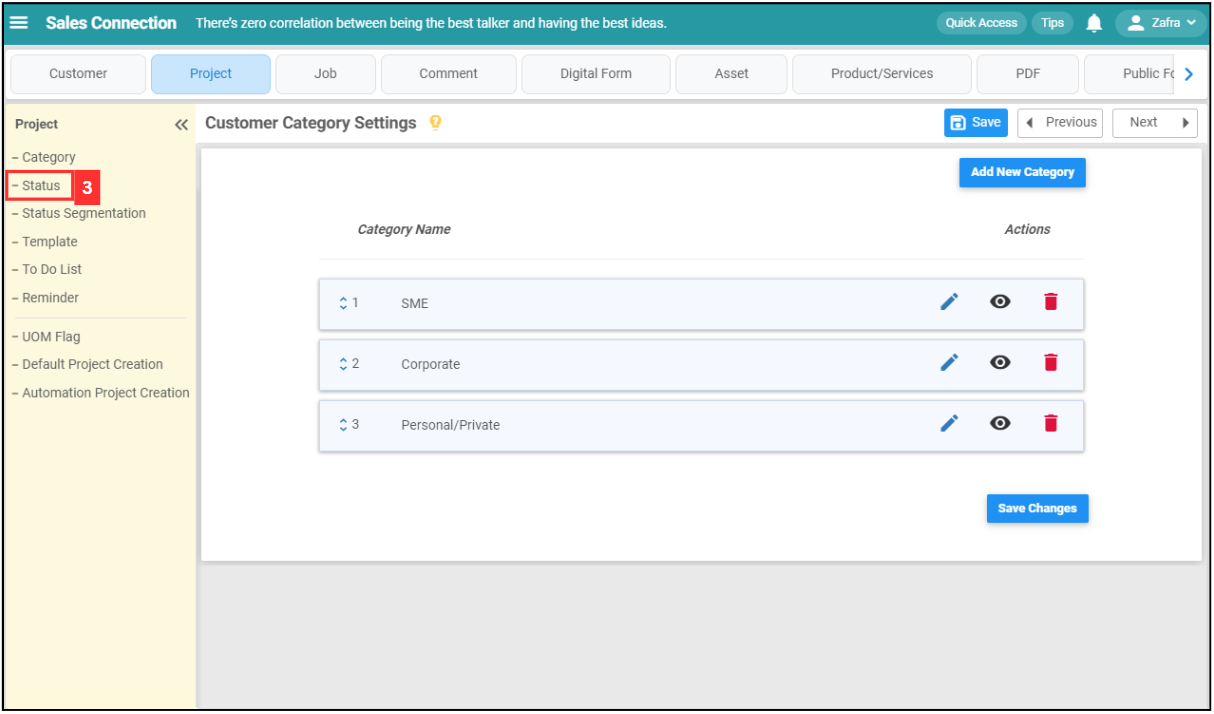
Click “Status”.
-
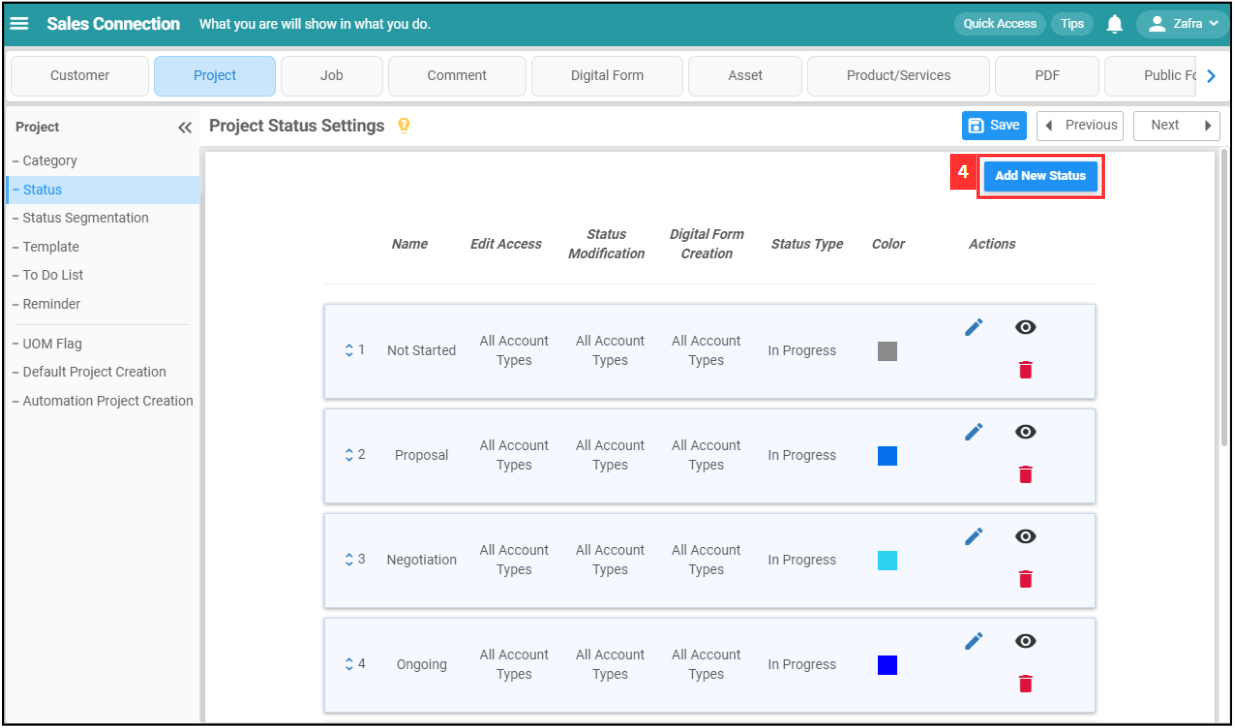
Click on the “Add New Status” button.
-
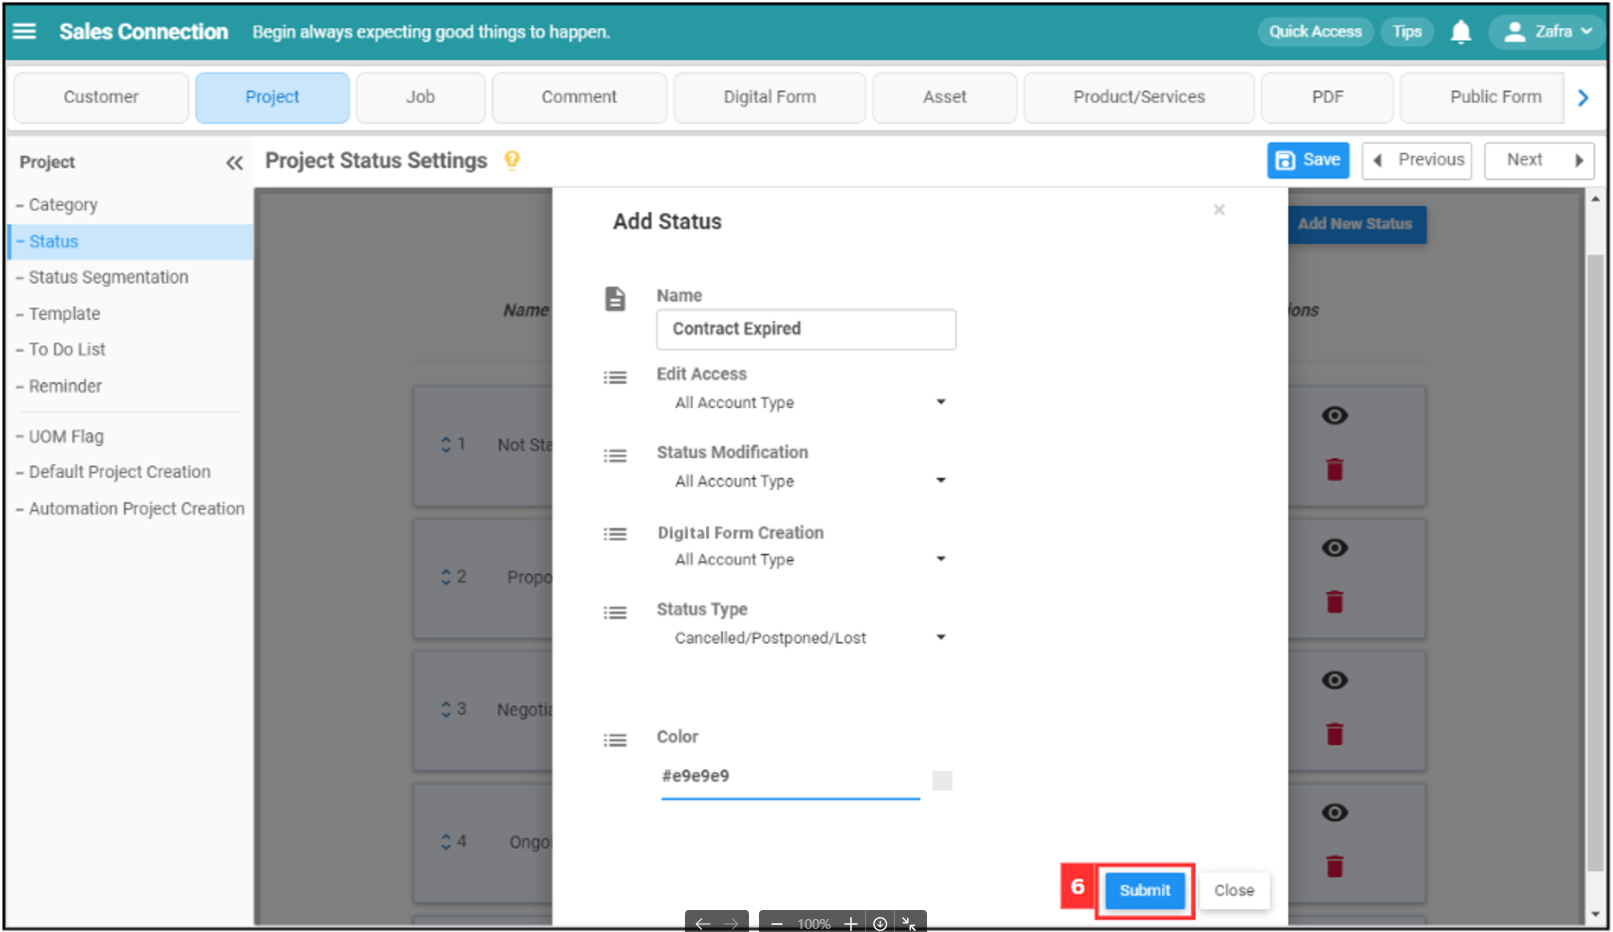
To add a new status for the Contract Expired Project, please follow these steps:
Terms Meaning Name Assign a name to the status (E.g. Contract Expired). Edit Access Define who can edit the Contract Expired Project when it’s in this status (E.g. If the status is “Contract Expired”, only specific users can make edits). Status Modification Specify who can change the project’s status (E.g. Only certain users can modify the project’s status when it’s “Contract Expired”). Digital Form Creation Specify who can create digital form for the project when it’s in this status (E.g. If the status is “Contract Expired”, only specific users can create digital form). Status Type Categorize the status for more manageable system administration, For this example, you can select “Cancelled”. Color Pick a color to represent the status in the system for easy reference. 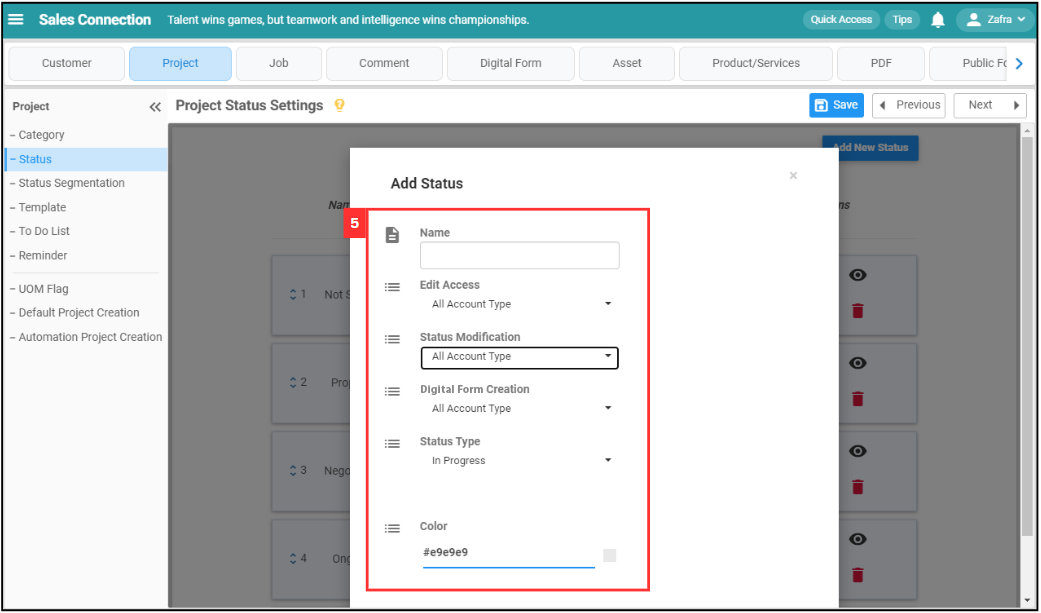
-
Click the “Submit” button.
-
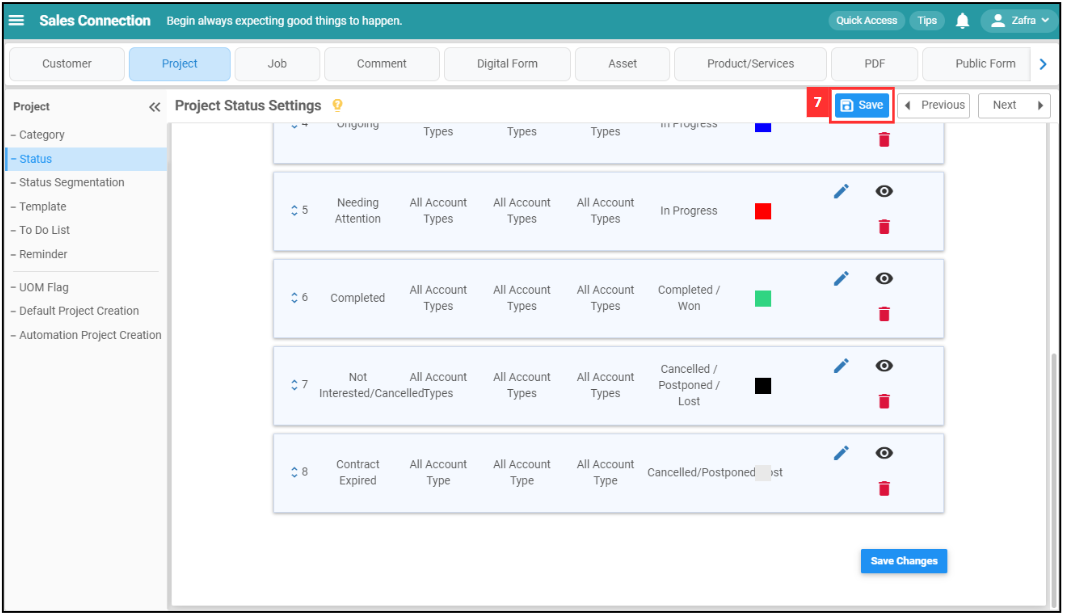
Remember to click the “Save” button to save the new status.
-
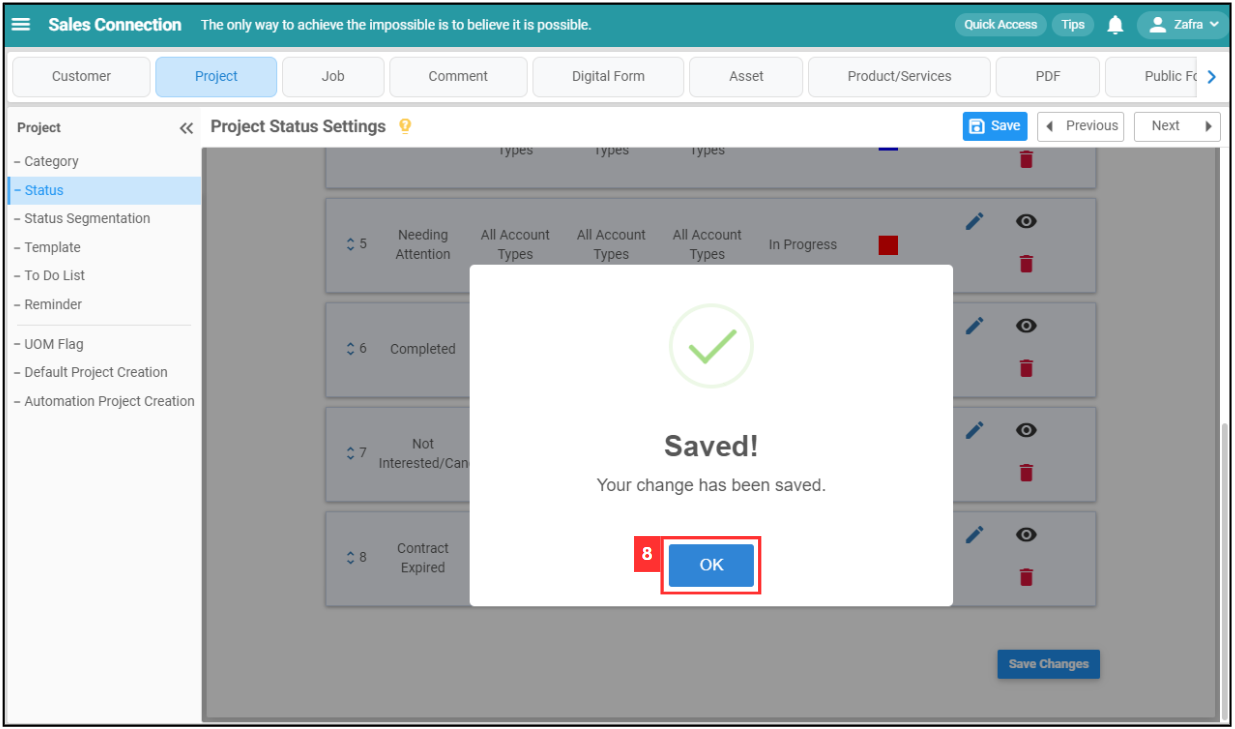
Click “OK” and the new project status has been saved successfully.
Status Segmentation
-
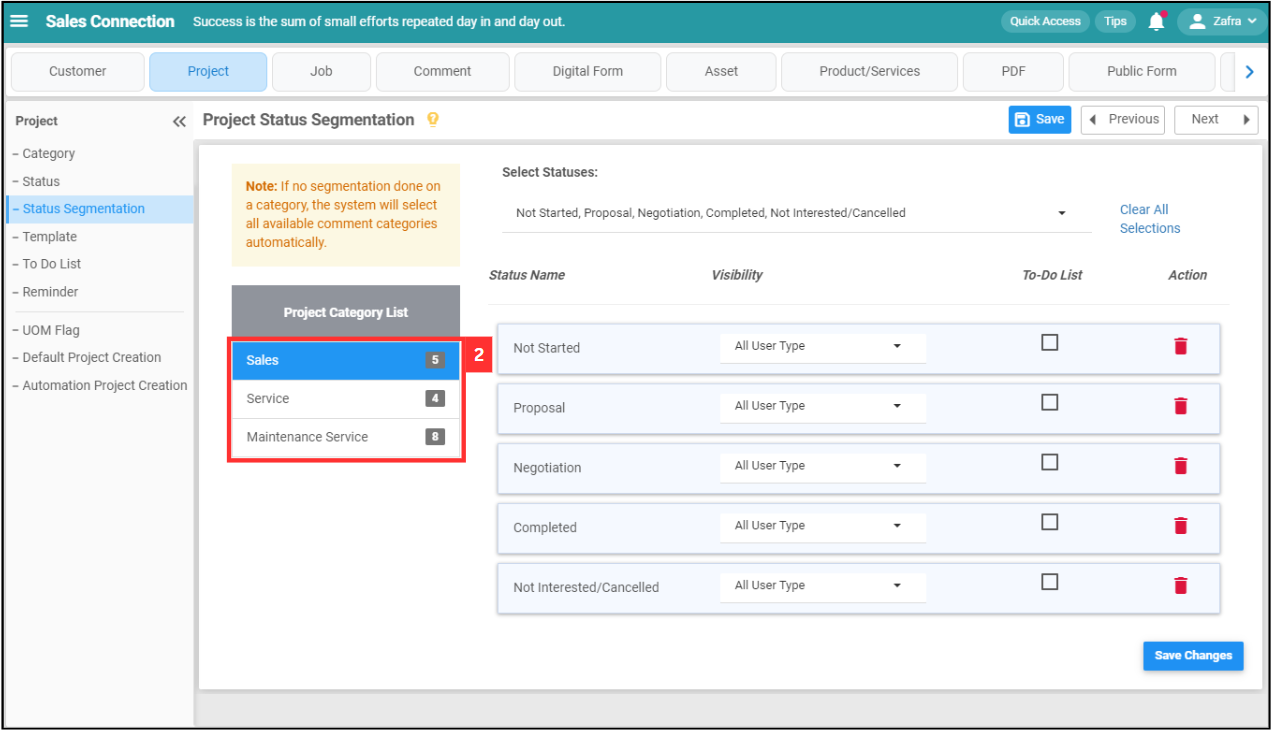
On the same page, click “Status Segmentation”.
-
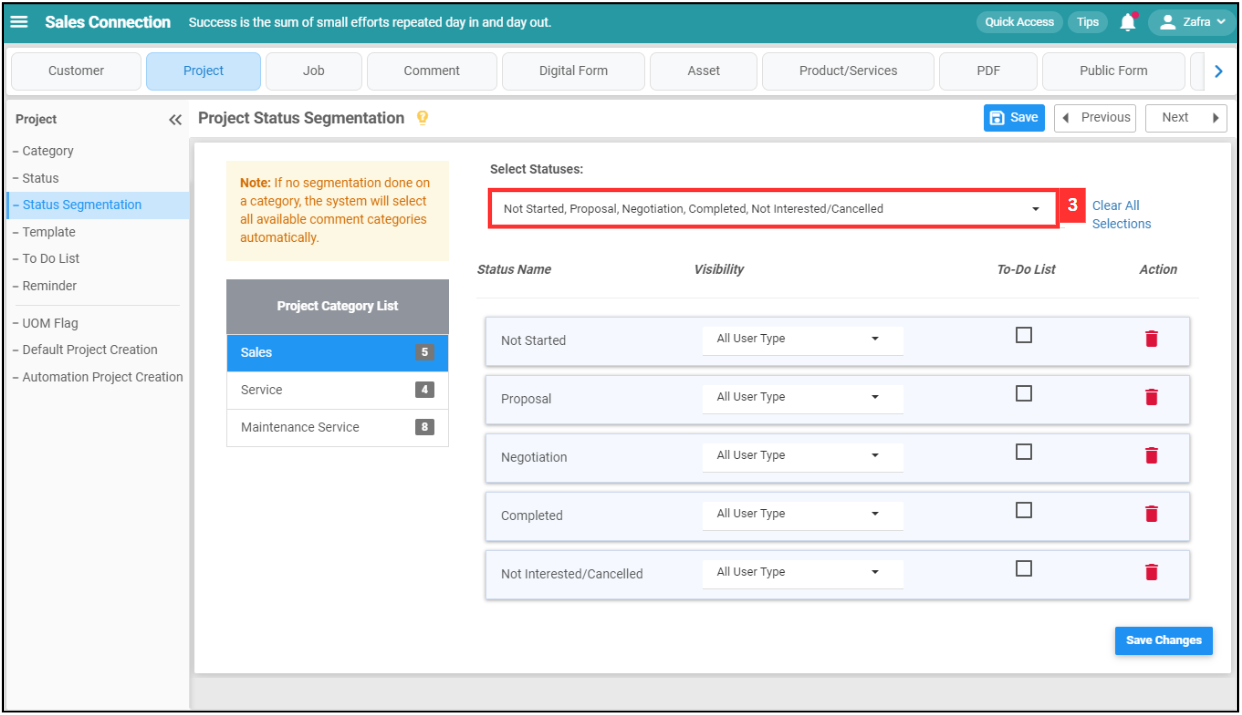
Select the project category you would like to add your new status to.
-
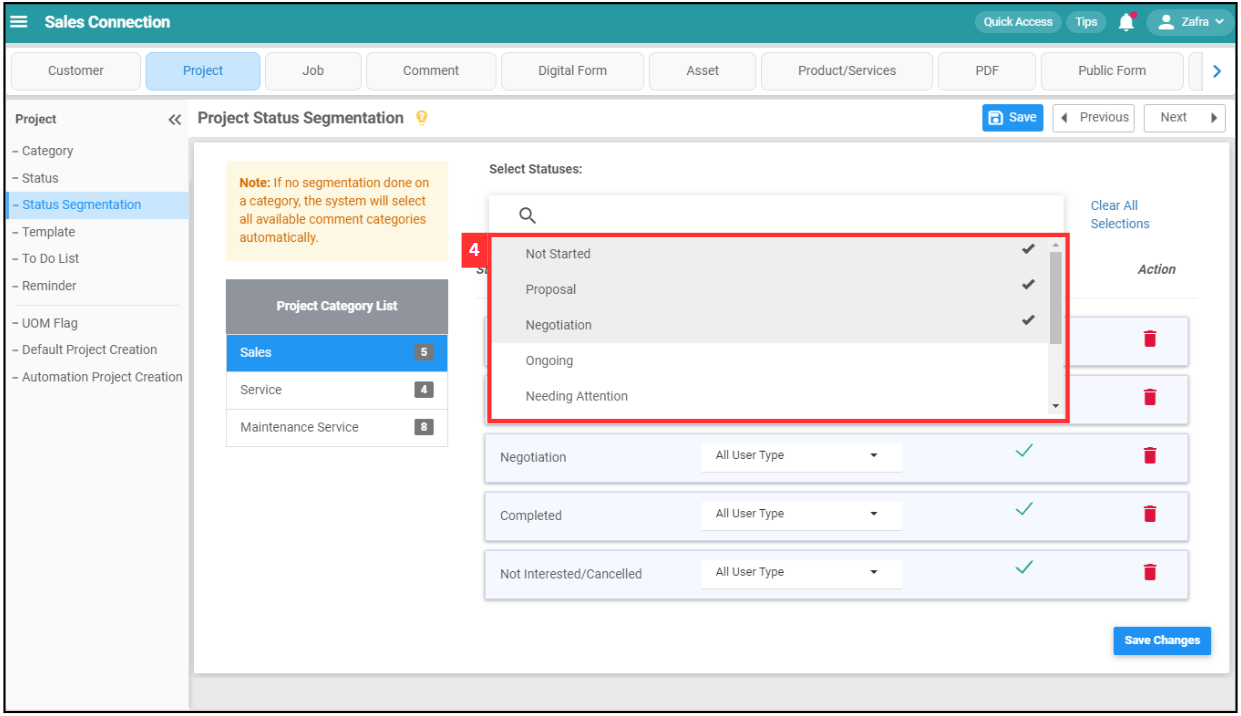
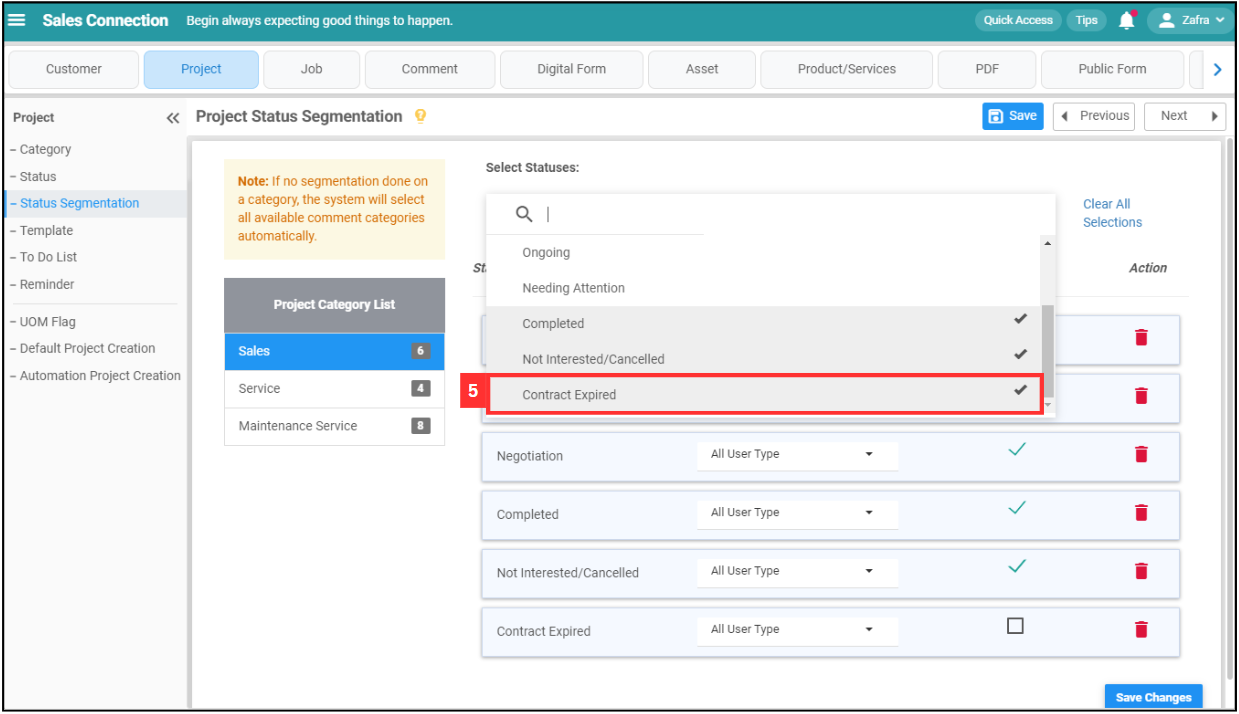
Click on the expand button to select status.
-
Scroll to find the status you want to add.
-
Click on the status you want to add.
-
Edit the field of the status you added.
Terms Description Visibility Determines which user type is able to see and select the status. To-do List Determine who can see the to-do list of the status. Delete Remove the status from the selected category. 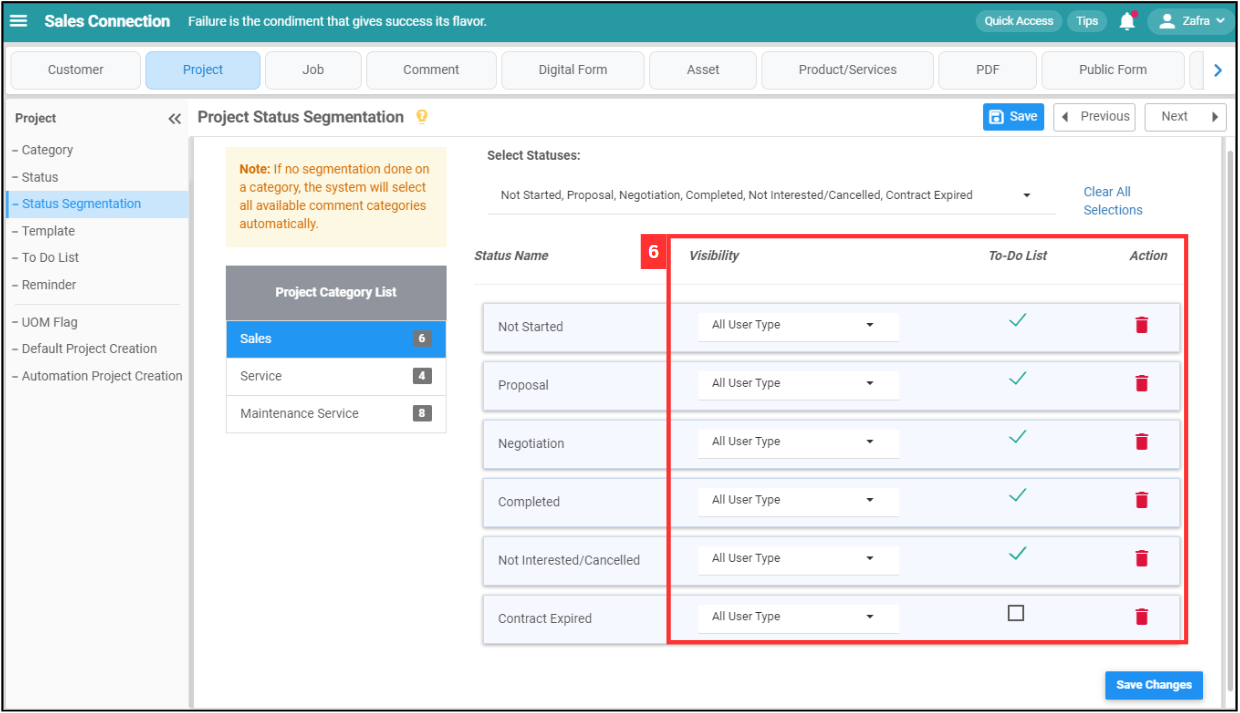
-
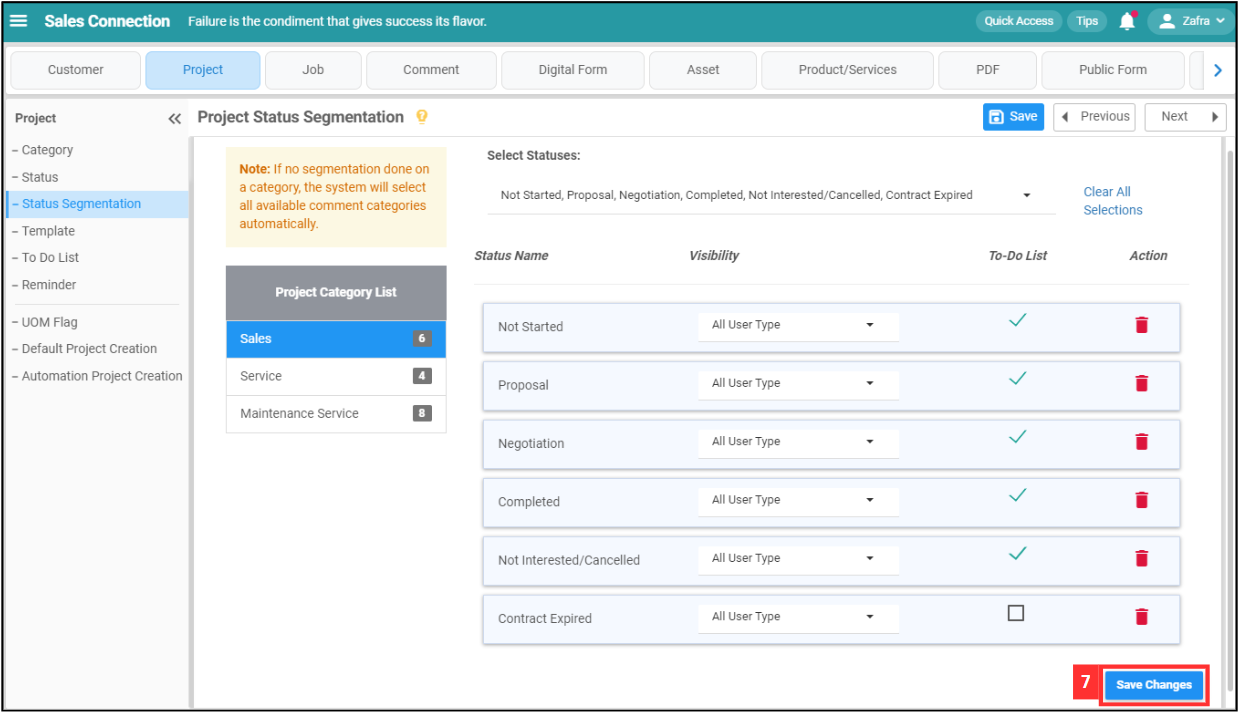
Click on the “Save Changes” button.
-
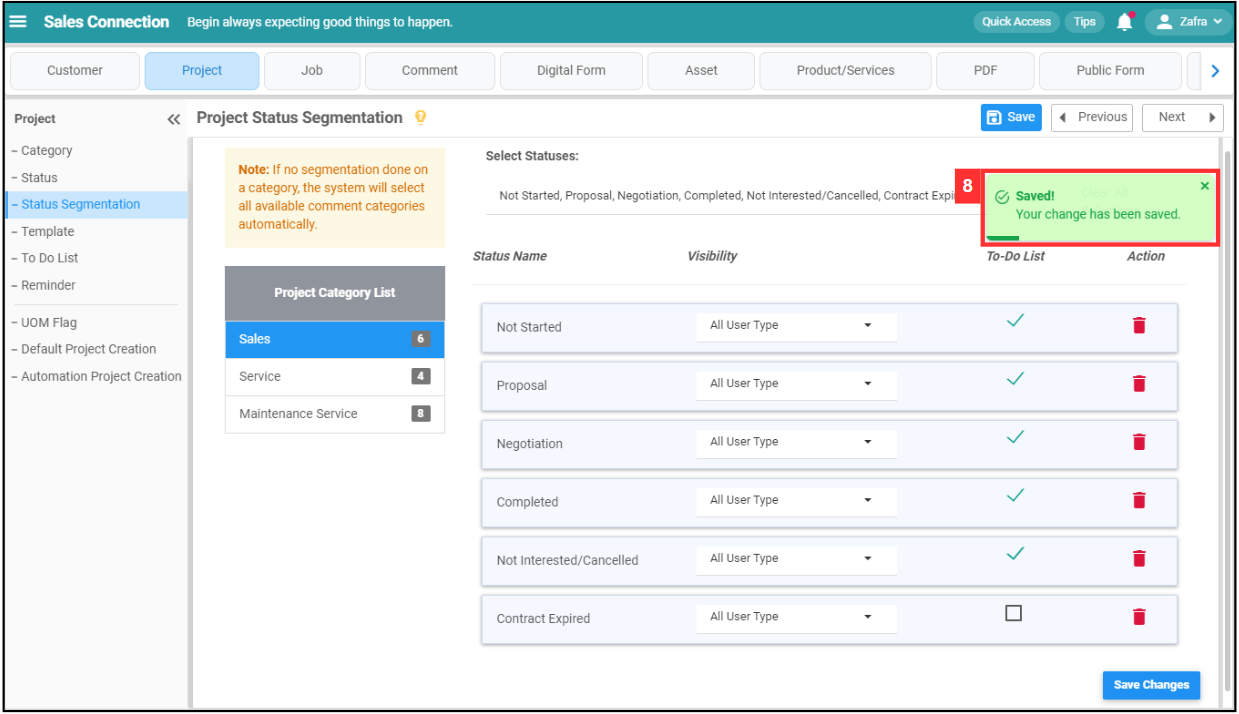
The status has been added to the category successfully when this prompt appears.
Example of Add New Status in Digital Form?
-
For example, if you wish to add new status in Delivery Order. At the desktop site’s navigation bar, go to Company Settings > Digital Form Settings > Digital Form Status.
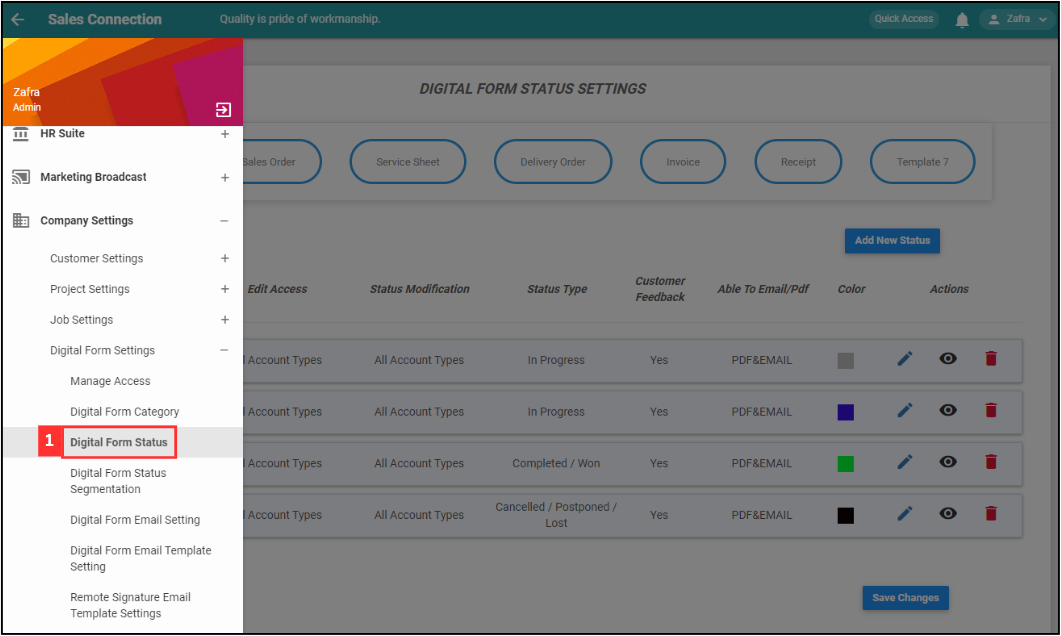
-
Click on “Delivery Order”.
Add New Digital Form Status Here: https://system.caction.com/ServiceReport/DigitalFormStatus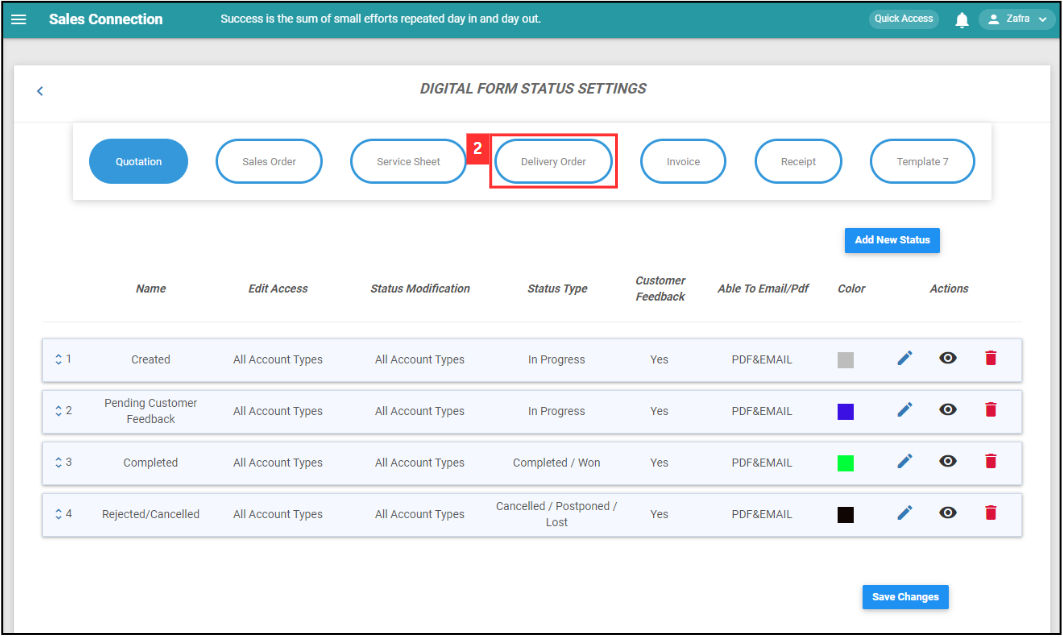
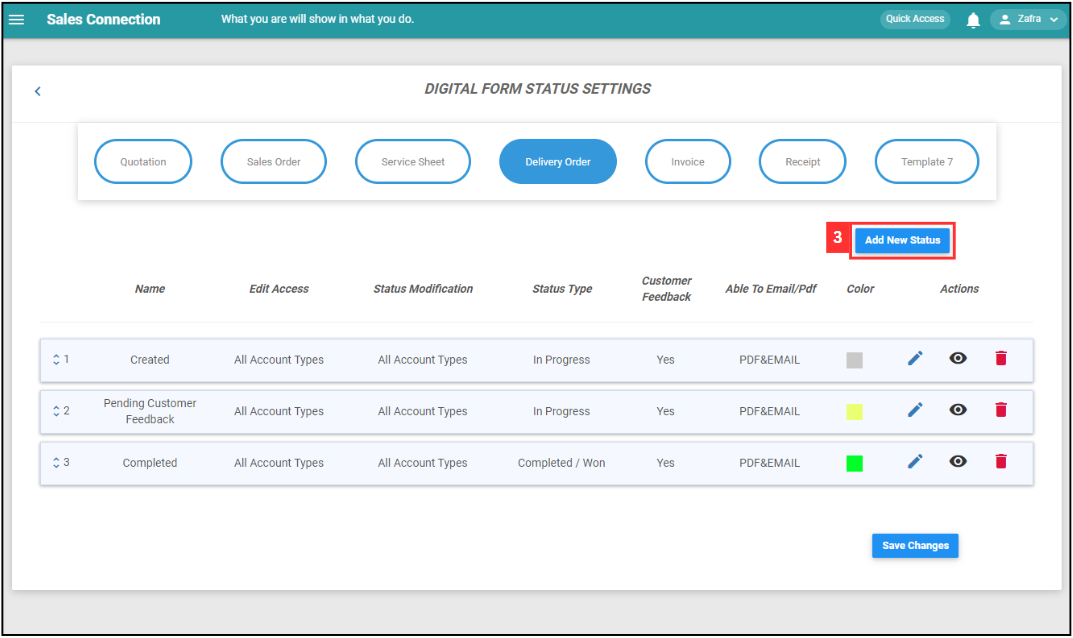
-
Click on the “Add New Status” button.
-
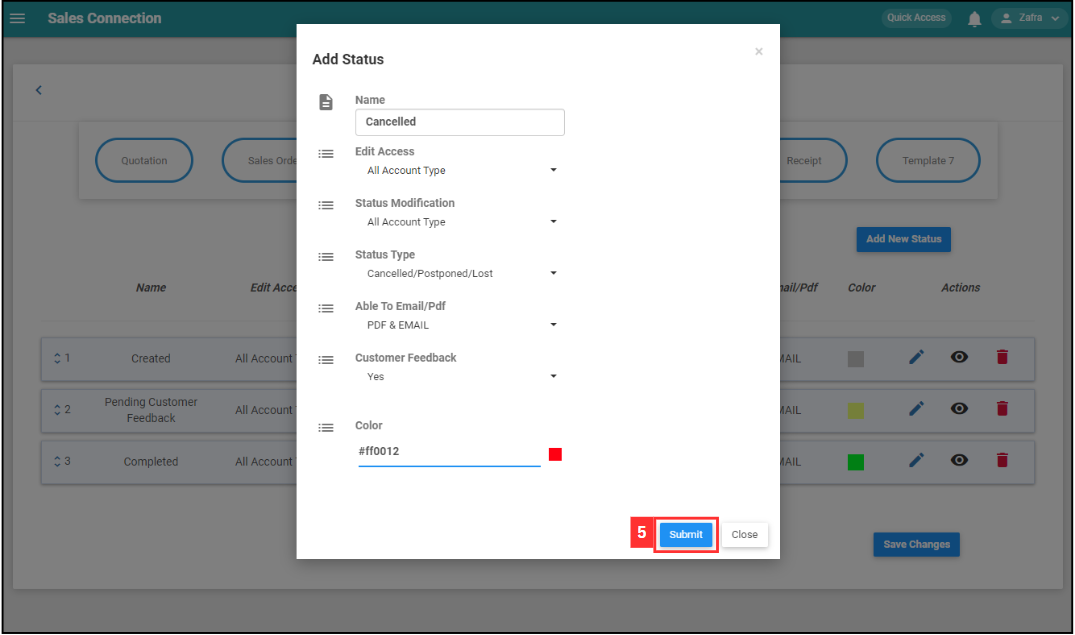
To add a new status for the Delivery Order Form, please follow these steps:
Terms Meaning Name Assign a name to the status (E.g. “Cancelled”). Edit Access Define who can edit the Delivery Order Form when it’s in this status (E.g. If the status is “Cancelled”, only specific users can make edits). Status Modification Specify who can change the form’s status (E.g. Only certain users can modify the form’s status when it’s “Cancelled”). Status Type Categorize the status for more manageable system administration. For this example, you can select “Cancelled”. Email/PDF Options Choose if the form can be emailed or converted to PDF (E.g. Select “PDF Only” if the form should only be sent as a PDF). Customer Feedback Choose if you want a section for customer comments in this status (E.g. Pick “No” if you don’t want a feedback section while in this status). Color Pick a color to represent the status in the system for easy reference. 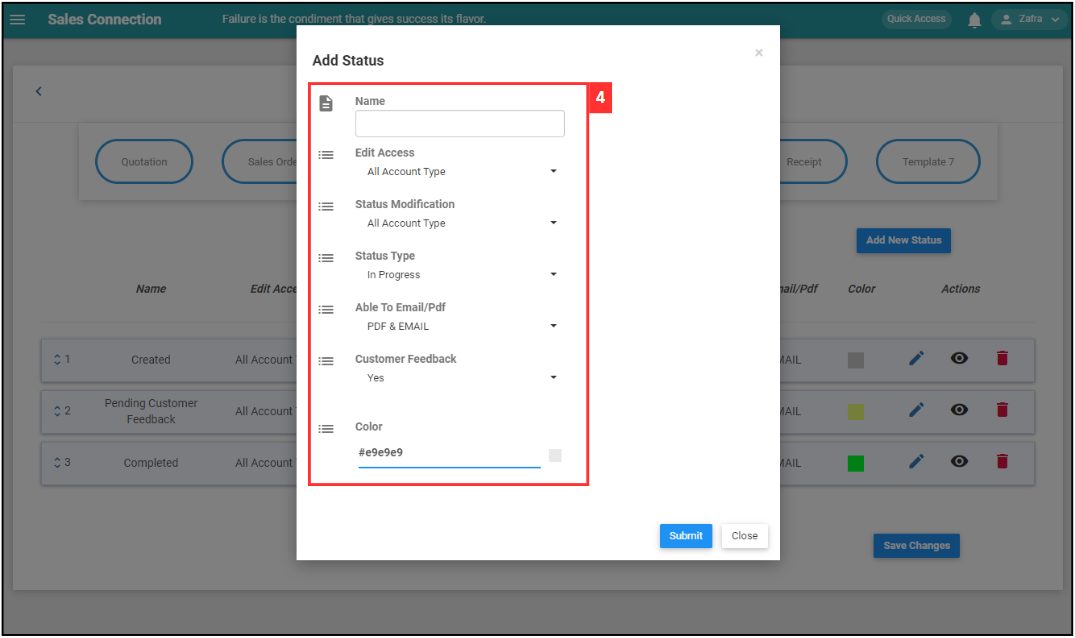
-
Click the “Submit” button.
-
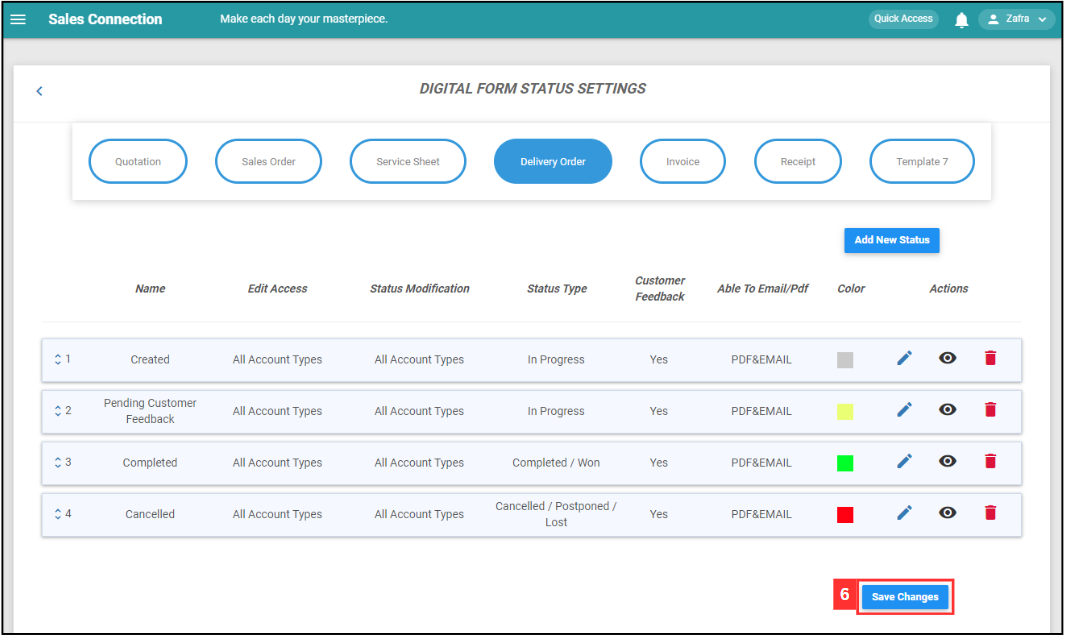
Remember to click the “Save Changes” button to save the new status.
-
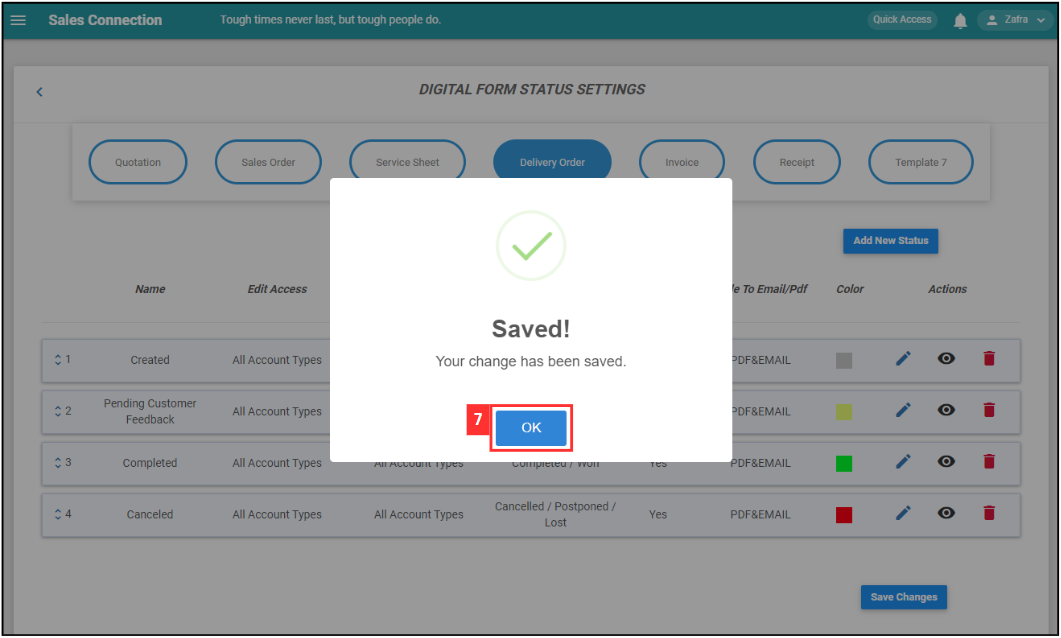
Click “OK” and the new “Delivery Order” status has been saved successfully.
Related Articles